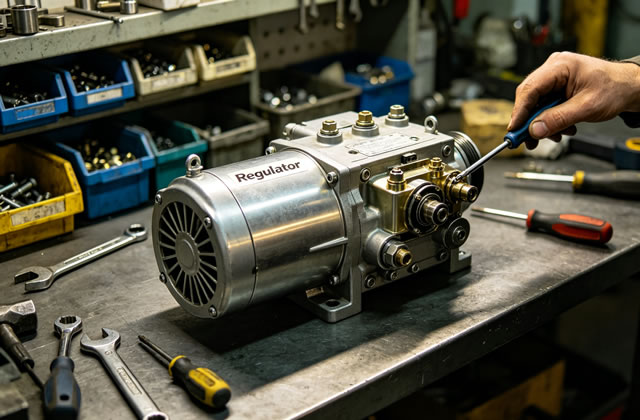
MWM regulators are widely used in gas engines, generator sets, industrial power systems, and high-pressure gas delivery applications. They are designed to ensure stable gas pressure, consistent flow, and reliable engine performance. To maintain long service life, minimize downtime, prevent gas leakage, and ensure operational safety, regular inspection, maintenance, cleaning, and overhaul are essential.
1. Importance of MWM Regulator Maintenance
Gas regulators are core components in MWM engine systems. Unstable pressure can lead to poor combustion, abnormal engine vibration, power loss, increased fuel consumption, and even safety risks such as gas leakage or equipment failure.
- Extend the service life of the regulator and related components
- Ensure accurate pressure control and stable gas supply
- Reduce fuel consumption and improve engine efficiency
- Prevent gas leakage, fire hazards, and workplace accidents
- Comply with industrial safety standards and maintenance regulations
- Minimize unplanned downtime and maintenance costs
2. Recommended Maintenance Schedule
Follow the factory-recommended service intervals based on operating hours and environmental conditions:
- Daily inspection: Visual check for leaks, abnormal noise, or pressure fluctuation
- Monthly maintenance: Clean filter housing, check pressure gauge readings
- Quarterly maintenance: Inspect diaphragm, seals, and valve seat
- Annual overhaul: Full disassembly, cleaning, replacement of wearing parts, calibration
Heavy-duty applications (continuous operation, dusty environments, corrosive gas) require more frequent maintenance.
3. Tools and Parts Required for Repair
Tools
- Standard wrench set and socket tools
- Torque wrench for precise assembly
- Clean compressed air source
- Non-abrasive cleaning brushes and cloths
- Pressure gauge and leak detector
- Calibration equipment for pressure adjustment
Replacement Parts (Common Wear Components)
- Diaphragm (high-quality rubber or fluorosilicone material)
- Valve seat and valve disc
- Spring set (main spring and adjusting spring)
- O-rings, gaskets, and sealing washers
- Filter element and filter screen
- Adjusting screw and locking nut
NOTE: Always use genuine MWM replacement parts to ensure performance and compatibility.
4. Step-by-Step Disassembly and Inspection Procedure
Step 1: System Preparation
Close the upstream and downstream gas valves. Bleed off all residual pressure from the regulator body. Confirm zero pressure before disassembly.
Step 2: Remove the Regulator from the Pipeline
Disconnect inlet and outlet pipes. Keep all components organized to avoid loss or misassembly.
Step 3: Disassemble the Upper and Lower Housings
Remove the top cover bolts carefully. Take out the diaphragm assembly, spring, and retainer. Inspect the diaphragm for cracks, swelling, hardening, or damage.
Step 4: Inspect the Valve Mechanism
Check the valve seat and valve disc for wear, dirt, carbon deposits, or scratches. A damaged seat will cause pressure drift and leakage.
Step 5: Clean Internal Components
Use approved cleaning solvent to remove oil, dirt, and carbon deposits. Do not use abrasive materials that may scratch sealing surfaces.
Step 6: Check the Filter Assembly
Remove the filter element. Clean or replace it if clogged. A blocked filter reduces gas flow and causes unstable pressure.
5. Reassembly and Calibration Process
Step 1: Install New Seals and Diaphragm
Replace all O-rings, gaskets, and diaphragm before reassembly. Apply a small amount of silicone lubricant to sealing parts for smooth installation.
Step 2: Reassemble the Regulator Body
Install the spring, diaphragm, and top cover. Tighten bolts evenly in a crisscross pattern to avoid distortion.
Step 3: Pressure Calibration
Connect the regulator to a test bench. Apply inlet pressure and adjust the set screw to reach the required outlet pressure. Lock the adjustment nut once calibrated.
Step 4: Leak Testing
Perform a bubble test or use an electronic gas leak detector to check all joints and seals. No leakage is allowed.
Step 5: Final Function Test
Verify stable outlet pressure under different flow conditions. Ensure no hunting, fluctuation, or abnormal noise.
6. Common Faults and Troubleshooting
- Low outlet pressure: Clogged filter, weak spring, damaged diaphragm, or leaking valve seat
- High outlet pressure: Valve jammed open, broken spring, or misadjusted setting
- Pressure hunting/fluctuation: Dirty valve seat, worn diaphragm, or unstable inlet pressure
- Gas leakage: Damaged seals, cracked housing, loose bolts, or torn diaphragm
- No gas flow: Fully clogged filter, closed valve, or frozen internal parts
7. Best Practices for Long-Term Reliability
- Always use clean, dry, and non-corrosive gas compatible with MWM regulators
- Install a pre-filter upstream to reduce contamination
- Store spare parts in a clean, dry, and dust-free environment
- Document all maintenance records, dates, and parts replaced
- Train maintenance personnel on proper handling and safety rules
- Do not modify regulator components without factory approval
8. Conclusion
MWM regulators are critical for safe and efficient gas engine operation. Proper and regular maintenance ensures stable performance, extends service life, and prevents unexpected failures. By following the procedures in this guide, technicians can perform safe, effective, and professional repair and overhaul services.
For complex issues or special models, always refer to the official MWM service manual or contact authorized technical support.