1. Introduction to MWM Solenoid Valves
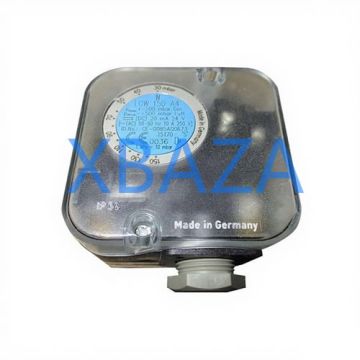
MWM solenoid valves are precision-engineered fluid control components widely used in industrial automation, gas engines, compressed air systems, hydraulic equipment, and process pipelines. They serve as critical electro-mechanical switches that control the flow of gas, liquid, or air by converting electrical energy into mechanical motion.
These valves are known for their high reliability, fast response time, long service life, and compatibility with harsh operating environments. Proper maintenance and timely repair are essential to ensure stable performance, prevent downtime, reduce energy consumption, and extend the operational lifespan of MWM solenoid valves.
Neglecting routine maintenance may lead to common failures such as leakage, failure to open/close, abnormal noise, insufficient flow, and coil burnout, which can disrupt entire industrial systems and cause significant economic losses.
2. Core Components of MWM Solenoid Valves
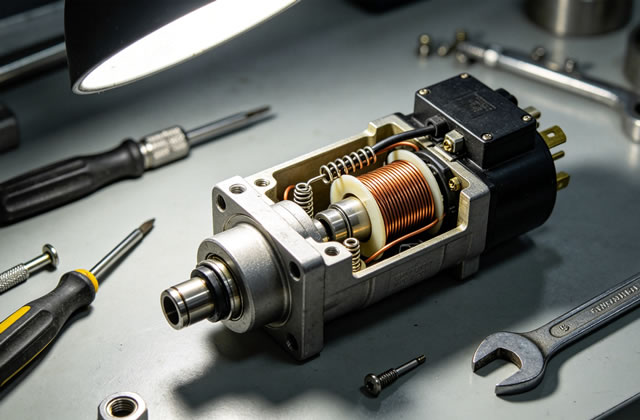
Understanding the key components is vital for effective maintenance and troubleshooting:
- Solenoid Coil: The electrical core that generates magnetic force when energized; the most common replacement part.
- Plunger/Armature: Moves under magnetic force to open or close the valve flow path.
- Sealing Elements (Gaskets, O-Rings, Diaphragms): Prevent internal and external leakage; wear parts requiring regular replacement.
- Valve Body: The main structure made of brass, stainless steel, or plastic, resistant to pressure and corrosion.
- Spring: Resets the plunger when the coil is de-energized.
- Connector & Wiring Terminal: Transmits power and control signals to the coil.
Always disconnect electrical power, relieve system pressure, and drain residual fluid/gas before disassembly, inspection, or repair. Failure to follow these steps may cause electric shock, fluid injection, or system damage.
3. Routine Preventive Maintenance (Recommended Schedule)
Preventive maintenance is the most effective way to avoid unexpected failures. Follow this schedule for optimal performance:
3.1 Weekly Inspection (5–10 Minutes per Valve)
- Check for external leakage at valve body, joints, and connectors.
- Listen for abnormal noise (buzzing, hissing) during operation.
- Verify valve response speed (instant opening/closing without delay).
- Confirm coil temperature is normal (not overheating or burning smell).
3.2 Monthly Maintenance (15–20 Minutes per Valve)
- Clean dust, oil, and dirt from the valve surface and coil housing.
- Check wiring connections for looseness, oxidation, or damage.
- Inspect mounting brackets and pipeline joints for stability.
- Test valve functionality under normal operating conditions.
3.3 Quarterly Maintenance (30–45 Minutes per Valve)
- Partial disassembly to inspect plunger movement and spring condition.
- Check sealing surfaces for scratches, wear, or deformation.
- Clean internal passages to remove debris, scale, or sediment.
- Test coil resistance with a multimeter to confirm electrical integrity.
3.4 Annual Overhaul (Full Service)
- Complete disassembly of all components.
- Replace all sealing parts (O-rings, gaskets, diaphragms) regardless of condition.
- Polish or replace worn plunger and valve seat.
- Calibrate valve performance and pressure resistance.
- Apply proper lubrication to moving components (use compatible lubricants only).
- Record maintenance data for lifecycle management.
4. Step-by-Step Repair Procedure for MWM Solenoid Valves
Follow these steps when repairing a faulty MWM solenoid valve:
- System Shutdown: Cut off power supply, close upstream and downstream valves, and release all residual pressure in the pipeline.
- Valve Removal: Loosen connection nuts and carefully remove the valve from the pipeline to avoid damage to threads.
- Component Disassembly: Separate the solenoid coil, valve body, plunger, spring, and seals; keep small parts organized to avoid loss.
- Thorough Cleaning: Use compressed air and compatible cleaning fluid to remove dirt, rust, and deposits from all parts.
- Damage Inspection: Check for cracked coils, broken springs, worn seals, scratched valve seats, and blocked flow paths.
- Part Replacement: Install new genuine MWM replacement parts for all damaged or worn components.
- Reassembly: Reassemble components in reverse order, ensuring proper alignment and no forced installation.
- Leakage Testing: Reconnect the valve, restore pressure, and test for internal/external leakage; confirm normal opening/closing.
- System Restoration: Restore power and return the valve to normal operation.
5. Common Faults, Causes & Troubleshooting Solutions
5.1 Valve Fails to Open
Possible Causes: No power supply, burned-out coil, broken spring, clogged passages, seized plunger.
Solutions: Check power input and wiring; replace faulty coil; install new spring; clean internal passages; lubricate or replace plunger.
5.2 Valve Fails to Close
Possible Causes: Foreign matter stuck in valve seat, damaged seal, weak spring, bent plunger.
Solutions: Clean valve seat and internal parts; replace sealing elements; replace damaged spring; replace deformed plunger.
5.3 External Leakage
Possible Causes: Loose connections, damaged gaskets, cracked valve body, worn O-rings.
Solutions: Tighten joints; replace seals/gaskets; replace cracked valve body; install new O-rings.
5.4 Internal Leakage
Possible Causes: Worn sealing surface, scratches on valve seat, incomplete closure.
Solutions: Replace seals; polish or replace valve seat; ensure proper plunger movement.
5.5 Coil Overheating / Burnout
Possible Causes: Voltage mismatch, continuous energization, coil short circuit, environmental overheating.
Solutions: Use correct voltage; avoid prolonged energization; replace shorted coil; improve ventilation or heat dissipation.
5.6 Abnormal Buzzing Noise
Possible Causes: Loose coil, low voltage, foreign matter in magnetic circuit, worn plunger.
Solutions: Secure coil mounting; stabilize voltage; clean magnetic components; replace worn plunger.
1. Always use genuine MWM spare parts to guarantee performance and compatibility.
2. Avoid using abrasive cleaners that may damage sealing materials.
3. Do not mix different lubricants; use only manufacturer-recommended lubrication.
4. Store disassembled parts in a clean, dry environment to avoid contamination.
6. Storage & Environmental Protection
For unused or temporarily removed MWM solenoid valves:
- Store in a dry, dust-free, and corrosion-free environment.
- Seal both ends of the valve to prevent internal contamination.
- Avoid direct sunlight and extreme temperature fluctuations.
- Apply anti-corrosion oil to metal components for long-term storage.
- Keep valves away from strong magnetic fields and chemical vapors.
7. Service Life & Replacement Standards
Under normal operating conditions and proper maintenance:
- Solenoid coil: 3–5 years
- Sealing elements: 1–2 years (preventive replacement recommended)
- Mechanical components (plunger, spring): 2–3 years
- Valve body: 5–8 years (no physical damage)
Replace the entire solenoid valve if the valve body is cracked, corroded beyond repair, or if frequent failures occur despite repeated repairs.
8. Conclusion
MWM solenoid valves are key components in industrial fluid control systems, and their stable operation directly affects system efficiency and safety. By implementing a strict routine maintenance plan, following standardized repair procedures, and troubleshooting faults in a timely manner, you can significantly reduce failure rates, extend service life, and lower operational costs.
Regular maintenance not only ensures reliable performance but also improves energy efficiency and reduces the risk of unexpected system downtime. Always adhere to the manufacturer’s instructions and safety standards during all maintenance and repair operations.