


1. Introduction to MWM Combustion Chamber Components
MWM (Motoren Werke Mannheim) combustion chamber parts are core components of MWM diesel and gas engines, widely used in power generation, marine, industrial, and heavy-duty applications. The combustion chamber is the heart of the engine, where fuel combustion, energy conversion, and power output occur. Its performance directly determines engine efficiency, power output, fuel consumption, and service life.
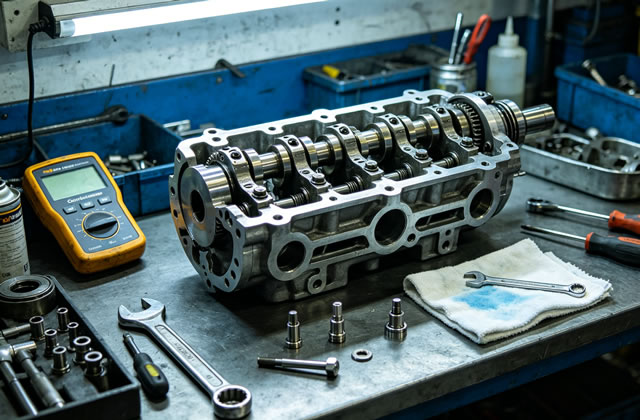
Key components of the MWM combustion chamber include: cylinder head, cylinder liner, piston, piston rings, piston pin, connecting rod, intake/exhaust valves, valve seats, valve guides, cylinder head gasket, and fuel injectors. Regular and professional maintenance of these parts is critical to ensuring stable engine operation, reducing failure rates, and extending overhaul intervals.
2. Routine Maintenance Schedule for MWM Combustion Chamber Parts
Adhering to a strict maintenance schedule is the foundation of reliable engine performance. Below is the standard maintenance cycle recommended by MWM for combustion chamber components:
| Maintenance Interval | Inspection & Service Items |
|---|---|
| Every 250 Operating Hours | Check valve clearance; inspect exhaust gas temperature; monitor fuel injection pressure; check for coolant/fuel leaks |
| Every 1000 Operating Hours | Visual inspection of piston crown deposits; check valve wear; inspect cylinder head gasket for leaks; clean injector nozzles |
| Every 4000-6000 Operating Hours | Comprehensive inspection of all combustion chamber parts; measure wear dimensions; replace worn piston rings/valves; torque cylinder head bolts |
| Major Overhaul (12000-20000 Hours) | Full disassembly; replace cylinder liners, pistons, valves, seats, guides, and gaskets; recondition connecting rods; precision machining of cylinder head |
3. Detailed Inspection Procedures for Core Components
3.1 Cylinder Head Inspection
The cylinder head houses valves, injectors, and cooling passages. Common issues include cracking, warpage, carbon deposits, and cooling channel blockages.
- Clean carbon deposits from the combustion chamber surface using non-abrasive tools
- Check for cracks using pressure testing or magnetic particle inspection
- Measure flatness with a straightedge and feeler gauge (maximum distortion: 0.05mm for MWM engines)
- Inspect cooling water passages for corrosion, scale buildup, and blockages
- Check injector seats for damage and proper sealing
3.2 Cylinder Liner Inspection
Cylinder liners provide a wear-resistant surface for piston movement. Wear or damage will cause oil consumption, power loss, and blow-by.
- Measure inner diameter at top, middle, and bottom positions using a bore gauge
- Check for scratches, scoring, cavitation, and ovality
- Inspect liner sealing rings for aging, hardening, or leakage
- Verify protrusion height from the cylinder block to ensure proper gasket compression
3.3 Piston & Piston Rings Inspection
Pistons withstand extreme heat and pressure; piston rings seal combustion pressure and control oil consumption.
- Remove carbon deposits from piston crown, ring grooves, and skirt
- Check for piston crown melting, cracking, or thermal fatigue
- Measure piston skirt diameter and ring groove wear
- Test piston ring tension and end gap in the cylinder liner
- Replace rings if end gap exceeds MWM factory limits
3.4 Intake & Exhaust Valves Inspection
Valves control air intake and exhaust gas discharge. Wear leads to poor sealing, power loss, and overheating.
- Check valve face and stem for wear, pitting, and burning
- Inspect valve seats for proper contact width and sealing
- Measure valve stem runout and guide clearance
- Perform valve lapping to restore sealing performance
- Replace valves and seats if sealing surface is damaged
4. Disassembly & Assembly Standards
Strict compliance with MWM factory torque specifications and assembly procedures is mandatory to prevent premature failure.
4.1 Disassembly Guidelines
- Record engine model, serial number, and operating hours before disassembly
- Mark all components to ensure correct reassembly in original positions
- Use specialized MWM service tools to avoid component damage
- Clean all parts immediately after disassembly and classify them by condition
- Inspect connecting rod bearings and crankshaft journals during disassembly
4.2 Assembly Torque Specifications (Key Fasteners)
| Component | Standard Torque (Nm) | Tightening Sequence |
|---|---|---|
| Cylinder Head Bolts | 280-320 Nm (follow 3-step torque method) | Middle to outer, cross pattern |
| Connecting Rod Bolts | 180-220 Nm + angle tightening | Alternate tightening |
| Valve Cover Bolts | 25-30 Nm | Cross sequence |
| Injector Clamp Bolts | 45-55 Nm | Even tightening |
4.3 Critical Assembly Notes
- Lubricate piston rings, cylinder liners, and valve stems with clean engine oil before assembly
- Install new cylinder head gaskets and seals for every overhaul
- Adjust valve clearance to MWM specifications after assembly
- Perform pressure testing on cooling and lubrication systems before startup
5. Troubleshooting Common Combustion Chamber Failures
Quick and accurate fault diagnosis reduces downtime and prevents secondary damage:
5.1 High Oil Consumption
Causes: Worn piston rings, damaged cylinder liners, worn valve guides/seals
Solutions: Replace piston rings; hone or replace cylinder liners; replace valve guides and seals
5.2 Poor Engine Power & Black Smoke
Causes: Incorrect valve clearance, worn injectors, piston ring breakage, valve burning
Solutions: Adjust valve clearance; overhaul/replace injectors; replace piston assemblies; resurface or replace valves
5.3 Coolant Leakage & Overheating
Causes: Damaged cylinder head gasket, cracked cylinder head/liner, faulty injector seals
Solutions: Replace gasket; repair or replace cracked components; replace injector seals
5.4 Abnormal Combustion Noise
Causes: Piston slap, loose valves, incorrect injection timing, bearing wear
Solutions: Replace worn pistons; adjust valves; reset injection timing; inspect bearings
6. Post-Maintenance Startup & Testing
After completing maintenance or overhaul, follow this startup procedure to verify performance:
- Check engine oil level, coolant level, and fuel system for leaks
- Prime the oil system to ensure proper lubrication before startup
- Start the engine and run at idle speed for 15-30 minutes
- Monitor oil pressure, coolant temperature, and exhaust gas temperature
- Check for unusual noise, vibration, smoke, or fluid leaks
- Adjust valve clearance and injection timing if necessary
- Perform load testing at 25%, 50%, 75%, and 100% load
- Record all operating parameters and compare with MWM factory standards
7. Long-Term Service Life Extension Recommendations
- Use high-quality fuel, lubricating oil, and coolant that meet MWM specifications
- Maintain proper engine operating temperature and avoid prolonged idling
- Regularly clean air filters, fuel filters, and oil filters to prevent contamination
- Implement real-time monitoring of exhaust temperature, vibration, and pressure
- Train operators and maintenance staff on proper engine operation and care
- Keep complete maintenance records for trend analysis and predictive maintenance
- Schedule annual professional inspections by MWM-certified technicians
8. Conclusion
The combustion chamber is the most critical assembly of MWM engines, and its maintenance quality directly affects the overall performance, reliability, and service life of the engine. By following MWM’s official maintenance standards, performing regular inspections, using genuine parts, and adhering to strict assembly procedures, you can minimize downtime, reduce operating costs, and maximize the efficiency and lifespan of your MWM engine.
For complex faults or major overhauls, always consult authorized MWM service centers and technical documentation to ensure professional and safe maintenance execution.

