


1. Overview of CAT Flame Detector
CAT Flame Detectors are critical safety devices designed to detect open flames, fire hazards, and combustible gas ignition in real time. They provide rapid signal transmission to fire suppression systems, emergency shutdown units, and control panels to prevent catastrophic equipment damage, production downtime, and personnel injuries.
These detectors utilize advanced ultraviolet (UV), infrared (IR), or multi-spectrum sensing technologies to ensure high sensitivity, low false alarm rates, and reliable performance in harsh operating environments.
2. Safety Precautions Before Maintenance
• Disconnect all power supplies to the detector and associated control systems before disassembly, cleaning, or repair.
• Isolate the detector from fire alarm and emergency shutdown circuits to avoid accidental system activation.
• Wear appropriate PPE (safety glasses, heat-resistant gloves, protective clothing) during all service operations.
• Do not perform maintenance in explosive, flammable, or high-risk environments without proper gas detection and ventilation.
• Follow all CAT equipment safety protocols and national fire safety standards.
- Verify the work area is safe, well-lit, and free of fire hazards
- Prepare professional tools: soft cloths, lint-free wipes, calibrated test flames, compressed air (dry, oil-free), and genuine CAT replacement parts
- Record current detector status, fault codes, and operating parameters before service
- Confirm lockout-tagout (LOTO) procedures are fully implemented
3. Routine Preventive Maintenance Schedule
Regular preventive maintenance is essential to maintain detection accuracy, extend service life, and ensure compliance with industrial safety standards. Follow the maintenance intervals below:
| Maintenance Frequency | Service Tasks |
|---|---|
| Weekly Inspection | Visual check of detector housing, lens, indicator lights, and mounting; verify no physical damage or obstruction |
| Monthly Inspection | Clean sensor lens/window; check cable connections; test LED status indicators; inspect for moisture ingress |
| Quarterly Service | Full functional test with calibrated flame source; check wiring integrity; verify signal output to control panel |
| Semi-Annual Service | Deep cleaning of internal components; seal inspection; calibration verification; fault log review |
| Annual Overhaul | Full calibration; replacement of worn seals/lenses; comprehensive performance test; documentation update |
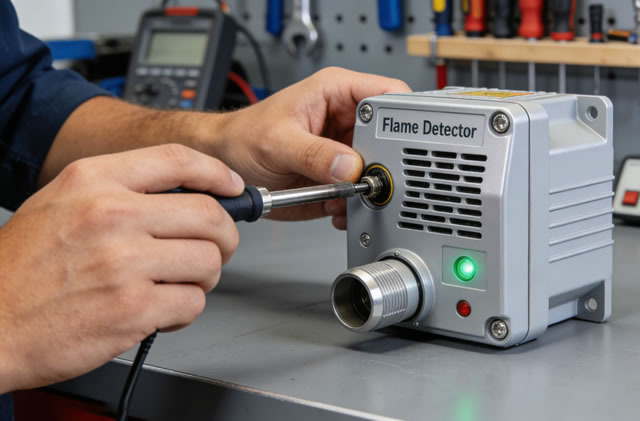
4. Detailed Maintenance Procedures
4.1 Visual & Physical Inspection
- Examine the detector exterior for cracks, corrosion, deformation, or loose mounting brackets
- Check the viewing window/lens for scratches, dust, oil, dirt, or condensation
- Inspect cable glands, wiring, and connectors for damage, looseness, or corrosion
- Verify the enclosure seal is intact to prevent water, dust, or gas ingress
- Confirm the detector is installed in the correct position with unobstructed detection coverage
4.2 Cleaning & Decontamination
Exterior Cleaning:
- Wipe the housing with a soft, dry cloth; use mild detergent for heavy contamination (avoid abrasive chemicals)
- Dry the surface completely to prevent moisture buildup
Lens/Sensor Cleaning (Critical Step):
- Use only lint-free, non-abrasive wipes and isopropyl alcohol (99% purity)
- Gently wipe the lens in a single direction; do not rub aggressively
- Remove all dust, grease, and residue to maintain detection sensitivity
- Blow dry with low-pressure, dry, oil-free compressed air
4.3 Electrical System Check
- Inspect all power and signal wires for fraying, cracking, or overheating
- Tighten terminal connections to manufacturer-specified torque
- Test input voltage to ensure it matches CAT detector specifications (12V/24V DC)
- Check for ground faults, short circuits, or electrical interference
- Verify communication with the fire control panel is stable
4.4 Functional & Performance Testing
After cleaning and inspection, perform a full functional test using a CAT-approved calibrated flame tester:
- Position the test flame at the manufacturer-recommended distance from the detector
- Activate the test flame and verify the detector triggers an alarm within the specified response time
- Confirm the alarm signal is transmitted to the control panel accurately
- Test fault conditions (lens blocked, power loss) to ensure fault alerts activate correctly
- Record test results, response time, and alarm status for documentation
4.5 Calibration Procedure
CAT Flame Detectors require professional calibration annually or after repair/replacement of core components:
- Use only CAT-certified calibration tools and software
- Reset the detector to factory default settings before calibration
- Follow on-screen prompts from the calibration interface
- Adjust sensitivity, threshold, and response time per CAT specifications
- Perform a post-calibration flame test to validate accuracy
- Print and save calibration reports for compliance records
5. Troubleshooting Common Faults
5.1 No Power / No Indicator Lights
- Cause: Loose power connection, blown fuse, faulty power supply
- Solution: Check wiring, replace fuse, test power input, repair power supply
5.2 False Alarms
- Cause: Dirty lens, electrical interference, strong sunlight/heat sources, incorrect sensitivity
- Solution: Clean lens, relocate detector, reduce sensitivity, check wiring shielding
5.3 No Flame Detection
- Cause: Damaged lens, faulty sensor, misalignment, calibration failure
- Solution: Replace lens, repair sensor, reposition detector, perform full calibration
5.4 Moisture / Condensation Inside Enclosure
- Cause: Damaged seal, loose cable gland, cracked housing
- Solution: Dry internal components, replace seal/gland, repair or replace detector housing
5.5 Communication Failure with Control Panel
- Cause: Broken signal wire, loose connector, protocol mismatch, panel fault
- Solution: Repair wiring, tighten connections, verify communication protocol, test control panel
6. Component Replacement Guidelines
- Always use genuine CAT OEM replacement parts (lenses, seals, sensors, cables)
- Disconnect power before replacing any component
- Align and secure components correctly to maintain waterproof/dustproof ratings
- Perform a full functional test and calibration after part replacement
- Discard damaged components per environmental regulations
7. Storage & Long-Term Preservation
- Store detectors in a dry, dust-free, temperature-controlled environment (10°C–30°C)
- Cover the lens with protective caps to avoid scratches
- Perform a full inspection and test before reinstalling stored units
- Do not store near corrosive chemicals, high heat, or direct sunlight
8. Documentation & Compliance
Complete and accurate maintenance records are mandatory for industrial safety compliance:
- Record all inspections, cleanings, tests, repairs, and calibrations
- Include dates, technician name, detector serial number, and service results
- Save calibration certificates, test reports, and part replacement records
- Maintain records for the lifetime of the detector per industry regulations
9. Conclusion
Proper, regular maintenance of CAT Flame Detectors is critical to ensure reliable fire detection, protect personnel and equipment, reduce downtime, and maintain regulatory compliance. By following this comprehensive guide, you can maximize the performance, accuracy, and service life of your CAT flame detection systems.
For complex faults, advanced repairs, or technical support, contact an authorized CAT service center or certified technical support team.

