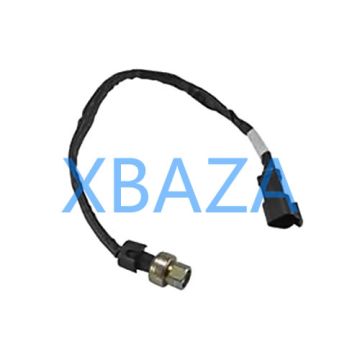
1. Overview of CAT Oil Pressure Sensor
The CAT oil pressure sensor (also known as an oil pressure sender/transducer) is a critical engine component that monitors real-time engine oil pressure and transmits data to the Engine Control Module (ECM) and dashboard gauge. It safeguards the engine by triggering warnings or shutdowns if oil pressure drops below safe operating levels.
Key functions include:
- Real-time oil pressure monitoring (0–100 PSI / 0–7 Bar typical range)
- Signal transmission to ECM and operator display
- Low oil pressure alarm and automatic engine protection
- Data logging for diagnostic and maintenance purposes

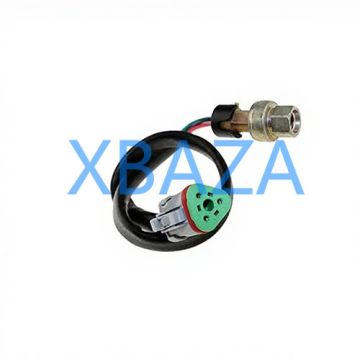
Typical CAT Engine Oil Pressure Sensor Installation Location
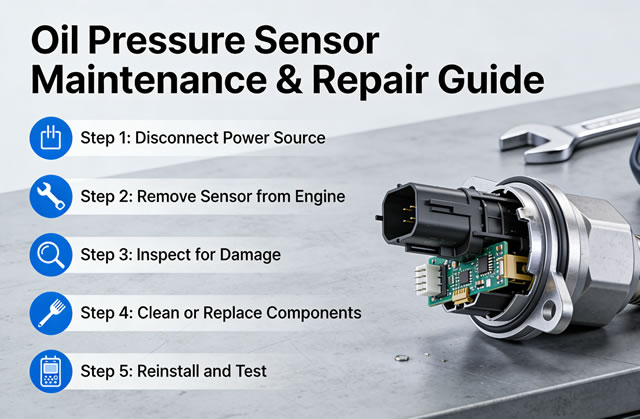
2. Routine Maintenance Procedures
Regular maintenance extends sensor lifespan, ensures accurate readings, and prevents unexpected downtime. Perform these tasks at every scheduled engine service.
2.1 Visual Inspection (Every Service Interval)
- Turn off the engine and allow it to cool completely (minimum 15 minutes).
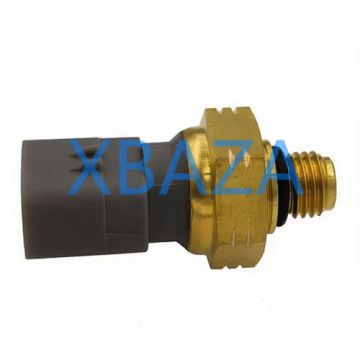
- Locate the oil pressure sensor (mounted on the engine block, oil filter housing, or oil gallery).
- Inspect the sensor body for cracks, corrosion, oil leaks, or physical damage.
- Check the electrical connector for oil contamination, bent pins, corrosion, or loose wiring.
- Verify the sensor mounting bolt/nut is tight and free of oil seepage.
2.2 Connector & Wiring Maintenance
- Clean the electrical connector with electrical contact cleaner to remove oil, dirt, and debris.
- Apply dielectric grease to the connector pins to prevent corrosion and moisture intrusion.
- Repair or replace frayed, cracked, or damaged wiring harnesses immediately.
- Ensure the connector locks into place securely (no slack or movement).
2.3 Oil & Filter Maintenance
Contaminated oil is the #1 cause of premature sensor failure. Follow these rules:
- Use only CAT-approved engine oil and genuine CAT oil filters.
- Replace oil and filters at the manufacturer-recommended interval (500/1000 hours).
- Check oil level daily to avoid low-pressure conditions that damage the sensor.
3. Common Fault Symptoms
Identify sensor issues early to prevent engine damage:
- Fault codes: ECM logs P0520, P0521, P0522, P0523 (CAT-specific diagnostic codes)
- Inaccurate dashboard gauge readings (zero pressure, fluctuating values, or constant high pressure)
- False low oil pressure alarms or unexpected engine shutdowns
- Oil leaks at the sensor base or electrical connector
- Corroded/wet electrical connector
4. Step-by-Step Sensor Testing
Test the sensor before replacement to confirm failure:
4.1 Electrical Testing (Using Multimeter)
- Disconnect the sensor electrical connector.
- Set multimeter to resistance (Ohms) mode.
- Measure resistance across the sensor pins:
- Good sensor: 80–300 Ohms (varies by CAT model)
- Failed sensor: 0 Ohms (short) or infinite Ohms (open circuit)
- Test voltage at the harness connector: 5V reference voltage from ECM (normal).
4.2 Pressure Testing (Using Manual Gauge)
- Remove the CAT oil pressure sensor.
- Install a manual oil pressure gauge in the port.
- Start the engine and compare manual pressure to ECM/dashboard readings.
- A discrepancy >10 PSI confirms sensor failure.
5. Sensor Removal & Installation
5.1 Removal
- Disconnect the battery negative cable to prevent electrical shorts.
- Clean the sensor area to remove dirt and oil.
- Disconnect the electrical connector.
- Use a proper socket/wrench to loosen and remove the sensor.
- Place a rag under the sensor to catch residual oil.
5.2 Installation (NEW Genuine CAT Sensor)
- Clean the sensor mounting threads and port surface.
- Apply a thin layer of CAT thread sealant (DO NOT overapply—blocks oil passages).
- Hand-tighten the sensor, then torque to OEM specifications (22–28 ft-lbs / 30–38 N·m).
- Reconnect the electrical connector and ensure it locks.
- Reconnect the battery, start the engine, and check for leaks.
- Clear fault codes from the ECM using CAT ET (Electronic Technician) software.
6. Troubleshooting Common Issues
| Issue | Cause | Solution |
|---|---|---|
| Low oil pressure alarm at idle | Sensor contamination, worn engine bearings | Clean/replace sensor; inspect engine bearings |
| Oil leak at sensor base | Loose mounting, failed O-ring, no sealant | Retorque; replace O-ring; apply OEM sealant |
| No pressure reading | Broken wiring, sensor failure, ECM fault | Repair wiring; replace sensor; test ECM |
| Corroded connector | Oil intrusion, moisture exposure | Clean connector; replace pigtail; apply dielectric grease |
7. Preventive Maintenance Schedule
- Daily: Check dashboard oil pressure readings for abnormalities
- 250 Hours: Visual inspection of sensor, connector, and wiring
- 500 Hours: Clean connector, apply dielectric grease, torque check
- 1000 Hours: Full electrical testing; replace if performance degrades
- 2000 Hours: Recommended OEM replacement (preventive)
8. Final Safety & Best Practices
- Always follow CAT engine service manual specifications for your specific model
- Relieve oil pressure before sensor removal to prevent spills and injury
- Do not use Teflon tape on sensor threads (can clog oil passages)
- Document all maintenance and replacements for warranty and fleet tracking
- Calibrate the sensor after installation using CAT ET diagnostic tool