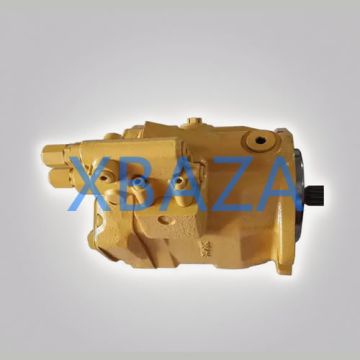
The Caterpillar (CAT) oil pump is the heart of the engine lubrication system, responsible for delivering pressurized oil to critical engine components—including bearings, pistons, camshafts, and valve trains. Proper maintenance and timely repair of CAT oil pumps ensure maximum engine performance, prevent catastrophic failure, extend service life, and reduce operational downtime. This manual covers routine maintenance, inspection, troubleshooting, disassembly, repair, reassembly, and post-installation testing for all CAT industrial, marine, construction, and heavy-duty engine oil pumps.
1. Core Functions of CAT Oil Pumps
- Deliver continuous, pressurized lubrication to reduce friction and wear
- Cool internal engine components by transferring heat away
- Remove contaminants, metal shavings, and debris from lubrication paths
- Maintain consistent oil pressure across all operating conditions
- Prevent dry starts and premature component failure
2. Pre-Maintenance Safety Precautions
- Allow the engine to cool completely to prevent burns from hot oil or components
- Disconnect the battery negative terminal to avoid accidental engine startup
- Relieve all oil pressure before disconnecting oil lines or pump components
- Wear protective gloves, safety glasses, and non-slip footwear
- Use only genuine CAT replacement parts and approved lubricants
- Place a drain pan under the pump to collect spilled oil
- Follow all CAT engine-specific safety guidelines in the official service manual
3. Routine Preventive Maintenance Schedule
Preventive maintenance is the most effective way to avoid unexpected oil pump failure. Follow this schedule for all CAT oil pump models:
| Maintenance Interval | Service Task |
|---|---|
| Every 250 Operating Hours | Check oil pressure gauge readings; inspect for oil leaks at pump housing and seals |
| Every 500 Operating Hours | Replace engine oil and oil filter; inspect oil pickup tube and screen for clogging |
| Every 1000 Operating Hours | Clean oil pump pickup screen; check mounting bolts for torque and tightness |
| Every 2000 Operating Hours | Perform full visual inspection; check relief valve operation and spring tension |
| Every 4000 Operating Hours | Complete oil pump overhaul; replace bearings, seals, gaskets, and worn components |
4. Visual & Functional Inspection Procedures
4.1 External Inspection
- Check for oil leaks around the pump housing, cover plate, and drive gear
- Inspect mounting bolts for corrosion, stretching, or looseness
- Examine oil lines and fittings for cracks, damage, or blockages
- Verify the oil pressure sending unit is functioning correctly
4.2 Internal Inspection (After Partial Disassembly)
- Remove the pump cover and inspect rotor/gear surfaces for scoring, pitting, or wear
- Check the oil pickup screen for dirt, sludge, metal particles, or blockages
- Measure axial and radial clearances to ensure compliance with CAT factory specifications
- Inspect the pressure relief valve for sticking, corrosion, or spring fatigue
- Check drive gears and shafts for wear, bending, or misalignment
5. Common CAT Oil Pump Failures & Troubleshooting
5.1 Low Oil Pressure
Possible Causes: Worn pump gears/rotors, clogged pickup screen, faulty relief valve, low oil level, worn engine bearings, damaged oil seals
Solutions: Clean pickup tube, replace relief valve spring, overhaul pump, refill oil to correct level
5.2 Oil Pump Noise (Whining / Knocking)
Possible Causes: Insufficient lubrication, worn bearings, damaged gears, loose mounting, air entering the oil system
Solutions: Tighten mounting bolts, replace worn bearings/gears, repair leaks to eliminate air intake
5.3 Oil Leaks
Possible Causes: Damaged gaskets, worn seals, cracked pump housing, loose fasteners
Solutions: Replace gaskets and oil seals, torque bolts to CAT specifications, replace damaged housing
5.4 Sticking Pressure Relief Valve
Possible Causes: Sludge buildup, corrosion, damaged spring, misaligned valve
Solutions: Clean valve components, replace spring and valve assembly
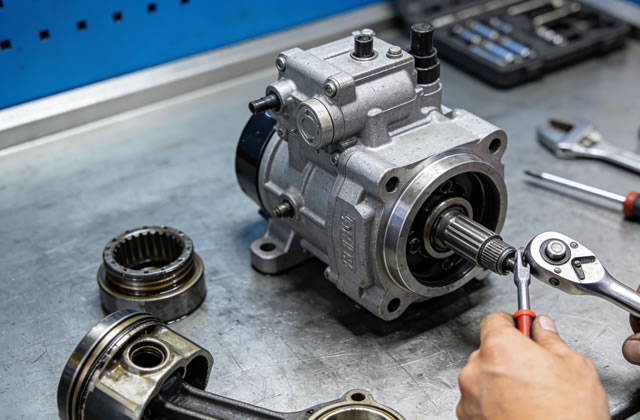
6. Step-by-Step Oil Pump Disassembly
- Drain engine oil completely and remove the oil filter
- Disconnect the oil pickup tube and oil pressure sensor
- Loosen and remove pump mounting bolts in a crisscross pattern
- Separate the pump from the engine block and remove the gasket
- Remove the pump cover screws and separate the cover from the housing
- Take out the inner/outer rotors or gear set and drive shaft
- Remove the pressure relief valve plug, spring, and valve piston
- Clean all components with approved solvent and inspect for wear
7. Repair & Component Replacement Guidelines
- Worn Gears/Rotors: Replace complete gear/rotor set if clearance exceeds CAT limits
- Damaged Drive Shaft: Replace shaft if bent, worn, or damaged; verify shaft end play
- Faulty Relief Valve: Replace spring, valve piston, and plug assembly
- Worn Bearings/Bushings: Install new CAT-spec bearings to restore correct clearances
- Leaking Seals/Gaskets: Replace all lip seals, O-rings, and gaskets with genuine CAT parts
- Cracked Housing: Replace the entire pump housing if cracked or warped
8. Reassembly & Torque Specifications
- Lubricate all new components with clean engine oil before assembly
- Install the drive shaft, gears/rotors, and bushings into the pump housing
- Insert the relief valve, spring, and plug; torque to factory specs
- Install a new gasket and attach the pump cover; torque cover bolts evenly
- Mount the pump to the engine block with a new gasket; torque mounting bolts
- Reconnect the oil pickup tube, oil lines, and pressure sensor
- Refill engine with recommended CAT oil and install a new oil filter
9. Post-Installation Testing & Verification
- Start the engine and run at idle speed; check for oil leaks immediately
- Monitor oil pressure gauge—pressure must meet CAT engine specifications
- Listen for unusual noise from the pump area; no whining or grinding is acceptable
- Run engine for 15–20 minutes and recheck for leaks and pressure stability
- Perform a full operational test under light load to confirm performance
- Record maintenance details for future service tracking
10. Long-Term Storage & Preservation
- Clean and coat all pump components with corrosion inhibitor before storage
- Seal all openings to prevent dust, moisture, or debris entry
- Store in a dry, temperature-controlled environment
- Inspect stored pumps every 6 months for corrosion or damage
- Re-lubricate components before returning to service
11. Conclusion
Proper maintenance and repair of CAT oil pumps are essential for reliable engine operation, maximum service life, and minimal downtime. By following the procedures in this manual—including routine inspection, preventive maintenance, correct disassembly/assembly, and genuine part replacement—you can ensure your CAT oil pump performs at factory standards for years.
Always refer to your specific CAT engine model’s official service manual for model-specific clearances, torque values, and special instructions. For complex repairs or uncertainty, contact an authorized CAT service technician for professional support.