


1. Introduction to Jenbacher Ignition Plugs
Jenbacher ignition plugs are critical components in Jenbacher gas engines, responsible for initiating the combustion process by generating a high-voltage spark. These plugs are engineered to withstand extreme operating conditions—including high temperatures, pressure fluctuations, and exposure to corrosive gases—making proper maintenance essential to ensure engine efficiency, reduce downtime, and extend the overall service life of the engine.
Neglecting ignition plug maintenance can lead to issues such as misfiring, reduced power output, increased fuel consumption, and even severe engine damage. This guide outlines best practices for inspecting, cleaning, replacing, and storing Jenbacher ignition plugs to maintain optimal engine performance.
2. Pre-Maintenance Preparation
Before performing any maintenance on Jenbacher ignition plugs, ensure you follow these safety and preparation steps to avoid injury or equipment damage:
- Gather the required tools and materials:
- Torque wrench (calibrated to Jenbacher specifications)
- Spark plug socket (correct size for Jenbacher models)
- Compressed air (low pressure, to clean debris)
- Brass wire brush (non-abrasive)
- Ignition plug gap gauge (feeler gauge)
- Anti-seize compound (high-temperature, nickel-based)
- Clean lint-free cloths
- Replacement plugs (genuine Jenbacher OEM parts recommended)
- Inspect the work area: Ensure the engine compartment is clean and free of oil, grease, or loose debris to prevent contamination of the plug cavity during removal.
- Review the engine manual: Refer to the specific Jenbacher engine model manual (e.g., J312, J420, J620) for model-specific torque values, gap specifications, and maintenance intervals.
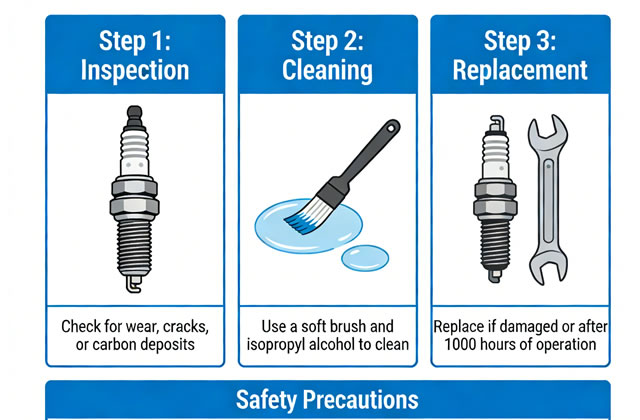
3. Step-by-Step Inspection Process
Regular inspection is the first step in ignition plug maintenance. Inspect plugs at the intervals recommended by Jenbacher (typically every 2,000 to 5,000 operating hours, or as per your engine’s service schedule):
3.1 Removal of Ignition Plugs
- Use compressed air to blow away any dirt, dust, or debris from the plug housing to prevent contamination from falling into the combustion chamber.
- Disconnect the ignition coil or high-voltage cable from the plug, taking care not to damage the cable connector.
- Insert the spark plug socket onto the ignition plug and turn counterclockwise to loosen and remove the plug. Avoid using excessive force to prevent stripping the threads.
3.2 Visual Inspection Criteria
Examine the removed plug for the following conditions and take corrective action:
| Condition | Signs to Look For | Recommended Action |
|---|---|---|
| Normal Wear | Light tan/gray electrode, minimal erosion, no deposits | Clean and recheck gap; reinstall if within specs |
| Carbon Deposits | Black, sooty coating on electrodes | Clean with brass brush; investigate cause (e.g., rich fuel mixture, incomplete combustion) |
| Oil Fouling | Oily coating on electrodes | Replace plug; check for oil leakage into combustion chamber (e.g., worn valve seals, piston rings) |
| Electrode Erosion | Worn, rounded electrodes, cracked insulator | Replace plug immediately; check for excessive voltage or engine timing issues |
| Overheating | White, blistered insulator, melted electrodes | Replace plug; investigate overheating causes (e.g., lean fuel mixture, insufficient cooling) |
3.3 Gap Measurement and Adjustment
Jenbacher ignition plugs require precise gap settings to ensure proper spark generation. Follow these steps:
- Refer to the engine manual for the correct gap specification (typically 0.6–1.0 mm for Jenbacher models).
- Insert the feeler gauge into the gap between the center and ground electrode. The gauge should fit with slight resistance.
- If the gap is too narrow, gently bend the ground electrode outward using the gauge. If too wide, bend the electrode inward (avoid excessive force to prevent cracking the insulator).
- Recheck the gap after adjustment to confirm it meets specifications.
4. Cleaning and Reinstallation
4.1 Cleaning Process
For plugs in good condition (no excessive wear or damage):
- Use a brass wire brush to remove light deposits from electrodes and the plug body (avoid steel brushes, which can scratch the insulator).
- Blow out any remaining debris with low-pressure compressed air (max 30 psi) to prevent particles from entering the engine during reinstallation.
- Wipe the plug body with a lint-free cloth dampened with isopropyl alcohol to remove oil or grease.
4.2 Reinstallation Guidelines
- Apply a thin, even layer of high-temperature anti-seize compound to the plug’s threads (do NOT apply compound to the electrode or insulator tip).
- Hand-thread the plug into the cylinder head to avoid cross-threading. Tighten until finger-tight.
- Use a torque wrench to tighten the plug to Jenbacher’s specified torque (typically 20–30 Nm for most Jenbacher models; confirm with the engine manual).
- Reconnect the ignition coil/high-voltage cable firmly to the plug top—ensure a secure fit to prevent voltage leakage.
5. Replacement Criteria and Best Practices
Replace Jenbacher ignition plugs if any of the following apply:
- Electrode erosion exceeds 0.5 mm (per Jenbacher specs).
- Insulator is cracked, chipped, or damaged.
- Plug has oil/carbon deposits that cannot be fully cleaned.
- Plug has reached the end of its service life (typically 10,000–15,000 operating hours for Jenbacher OEM plugs).
6. Storage and Handling of Replacement Plugs
To maintain the integrity of new Jenbacher ignition plugs:
- Store plugs in their original packaging in a cool, dry place (temperature range: 0°C to 40°C, humidity < 70%).
- Avoid dropping or impacting plugs—this can damage the internal insulator or electrode alignment.
- Do not remove the protective caps from new plugs until immediately before installation to prevent contamination.
7. Post-Maintenance Verification
After completing maintenance or replacement:
- Start the engine and run it at idle for 5–10 minutes to check for misfires, unusual noises, or warning lights.
- Monitor engine parameters (e.g., exhaust temperature, power output, fuel consumption) for the first 24 hours of operation to confirm optimal performance.
- Document all maintenance activities (date, plug condition, torque values, replacement parts) in the engine service log for future reference.
8. Conclusion
Proper maintenance of Jenbacher ignition plugs is a fundamental aspect of Jenbacher gas engine care. By following the inspection, cleaning, adjustment, and replacement guidelines outlined in this document, you can maximize engine reliability, minimize unplanned downtime, and ensure compliance with Jenbacher’s warranty requirements. Always use genuine Jenbacher OEM parts and adhere to the manufacturer’s service intervals to achieve the best results.
For complex issues (e.g., repeated plug failure, abnormal wear patterns), contact an authorized Jenbacher service technician to diagnose and resolve underlying engine problems.

