Jenbacher gas engines are renowned for their reliability and efficiency in power generation applications, and the valve guide is a critical component that directly impacts engine performance, longevity, and operational safety. Proper maintenance and care of Jenbacher valve guides not only prevent unplanned downtime but also optimize engine efficiency and reduce long-term operational costs. This document provides a detailed, step-by-step guide to the maintenance, inspection, and care of Jenbacher valve guides for operators, maintenance technicians, and engineering teams.
1. Understanding the Role of Jenbacher Valve Guides
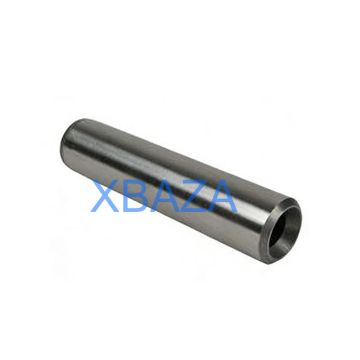
Valve guides in Jenbacher engines serve as precision sleeves that guide the intake and exhaust valves during their reciprocating motion. They ensure proper alignment of the valves with the valve seats, maintain optimal clearances, and dissipate heat from the valve stems to the cylinder head. Jenbacher valve guides are typically manufactured from high-strength cast iron or bronze alloys to withstand high temperatures (up to 800°C in exhaust side), mechanical wear, and chemical corrosion from combustion byproducts.
Failure to maintain valve guides can lead to issues such as excessive valve stem wear, valve sticking, loss of compression, increased oil consumption, and even catastrophic engine damage if a valve seizes or breaks.
2. Pre-Maintenance Preparation
2.1 Required Tools and Materials
- Torque wrench (calibrated to Jenbacher specifications)
- Valve guide clearance gauge set (metric, 0.01mm precision)
- Cleaning solvents (non-corrosive, OEM-recommended)
- Brass/bristle brushes (non-scratching)
- Valve guide reamer (for reconditioning)
- Replacement valve guides (genuine Jenbacher parts only)
- High-temperature lubricant (OEM-approved)
- Feeler gauges, dial indicators, and inspection mirror
- Protective equipment (gloves, safety glasses, face mask)
2.2 Safety Checks
- Verify fuel supply is closed and pressure relieved
- Confirm cooling system is drained (if cylinder head removal is required)
- Check that electrical systems are disconnected and tagged
- Ensure work area is clean, well-ventilated, and free of flammable materials
3. Routine Inspection Procedures
Routine inspection of valve guides should be performed at intervals specified in the Jenbacher Operation and Maintenance Manual (typically every 8,000 to 12,000 operating hours, or during scheduled overhauls). The key inspection items include:
| Inspection Item | Acceptance Criteria (Jenbacher OEM Spec) | Action if Out of Spec |
|---|---|---|
| Valve stem-to-guide clearance | Intake: 0.05-0.10mm; Exhaust: 0.08-0.15mm | Recondition or replace guide |
| Guide inner surface condition | Smooth, no scoring, pitting or corrosion | Replace guide if damage is present |
| Guide bore roundness/straightness | ≤0.02mm deviation from nominal | Ream or replace guide |
| Guide protrusion (cylinder head surface) | Within ±0.5mm of OEM specification | Adjust or replace guide |
3.1 Step-by-Step Inspection Process
- Remove valve covers, valve springs, retainers, and valves from the cylinder head
- Clean the valve guide bore thoroughly with solvent and brush to remove carbon deposits and oil residue
- Measure stem-to-guide clearance using a feeler gauge or dial indicator (insert gauge at top, middle, and bottom of the guide to check for taper)
- Inspect the guide bore for wear, scratches, or corrosion using an inspection mirror and light
- Check guide alignment by inserting a new valve stem and verifying it moves smoothly without binding
- Document all measurements and compare to Jenbacher OEM specifications
4. Maintenance and Repair Procedures
4.1 Reconditioning of Serviceable Valve Guides
If the valve guide wear is within reconditioning limits (clearance up to 1.5x the maximum spec), reaming the guide bore to the next oversize and installing oversize valve stems is a cost-effective alternative to replacement:
- Secure the cylinder head in a fixture to prevent movement during reaming
- Select the correct oversize reamer (Jenbacher offers 0.25mm, 0.50mm oversize options)
- Ream the guide bore slowly and evenly, using cutting fluid to prevent overheating
- Clean the reamed bore and verify dimensions with a gauge
- Apply high-temperature lubricant to the new oversize valve stem and insert into the guide to confirm smooth operation
4.2 Valve Guide Replacement
Replacement is required if guides are excessively worn, cracked, or corroded. Follow these steps for proper replacement:
- Use a hydraulic press or dedicated valve guide removal tool to extract the old guide (avoid hammering to prevent cylinder head damage)
- Clean the guide bore in the cylinder head and inspect for damage to the seating surface
- Chill the new Jenbacher OEM valve guide (using dry ice) to reduce its size for easy installation (interference fit: 0.015-0.030mm)
- Press the new guide into the bore using a pilot tool to ensure proper alignment
- Trim the guide to the correct protrusion length as per OEM specs
- Ream the inner bore to the correct size for the valve stem
5. Post-Maintenance Care and Verification
5.1 Assembly and Lubrication
- Apply a thin layer of OEM-approved high-temperature lubricant to the valve stem before installation
- Reinstall valves, springs, and retainers to Jenbacher torque specifications
- Ensure valve timing is rechecked and adjusted if necessary
5.2 Post-Maintenance Testing
- Perform a compression test on each cylinder to verify proper sealing
- Start the engine and run it at idle for 15-20 minutes, monitoring for abnormal noise or oil consumption
- Check exhaust gas temperatures to ensure even distribution across cylinders
- Conduct a leak-down test if compression is below OEM standards
- Document all test results and maintenance activities in the engine log
6. Preventive Maintenance Best Practices
- Use Genuine Parts: Only install Jenbacher OEM valve guides and valve stems to ensure compatibility and performance
- Fuel Quality Control: Poor fuel quality increases carbon buildup and corrosion – use filtered, clean gas as per Jenbacher specs
- Regular Oil Changes: Clean engine oil reduces valve stem wear – follow OEM oil change intervals (typically 250-500 hours)
- Monitor Operating Conditions: Avoid prolonged operation at high load/temperature, which accelerates guide wear
- Training: Ensure maintenance technicians are trained on Jenbacher-specific procedures and use calibrated tools
- Documentation: Maintain a detailed log of all valve guide inspections, maintenance, and replacements for trend analysis
7. Troubleshooting Common Valve Guide Issues
| Symptom | Root Cause | Corrective Action |
|---|---|---|
| Excessive oil consumption | Worn intake valve guides (oil drawn into combustion chamber) | Recondition/replace guides; check valve stem seals |
| Valve sticking | Carbon buildup, insufficient clearance, or guide distortion | Clean guides, check clearances, replace if distorted |
| Uneven cylinder compression | Guide misalignment or uneven wear | Realign/replace guides; recheck valve timing |
| Metallic noise from cylinder head | Excessive guide clearance or loose guide fit | Replace guides; ensure proper interference fit |
8. Conclusion
Proactive maintenance and care of Jenbacher valve guides are essential to maximizing engine uptime, performance, and lifespan. By adhering to OEM inspection intervals, using genuine parts, and following the procedures outlined in this document, operators can minimize the risk of valve guide failure and ensure their Jenbacher engines operate at peak efficiency. Regular training of maintenance staff and thorough documentation of all maintenance activities further support long-term reliability and compliance with operational standards.
For additional guidance, always refer to the latest version of the Jenbacher Engine Operation and Maintenance Manual or contact authorized Jenbacher service personnel.