


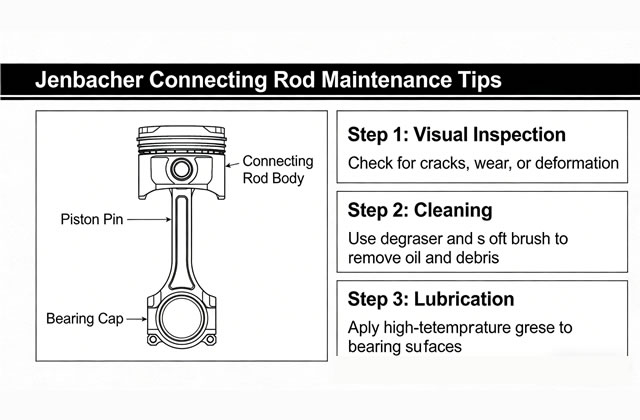
Jenbacher connecting rods are critical heavy-duty components that bridge the piston and crankshaft in high-power gas engines, transmitting combustion forces to drive mechanical output. As part of the engine’s moving assembly, they operate under extreme stress—including high tensile loads, thermal expansion, and rotational friction—making their maintenance essential to engine reliability, performance, and safety. Neglecting connecting rod maintenance can lead to premature wear, fatigue cracks, or even catastrophic failure, resulting in costly engine breakdowns, extended downtime, and potential damage to adjacent components (e.g., crankshafts, cylinder walls). Below is a detailed, long-form maintenance guide tailored to Jenbacher connecting rods, covering inspection, care, replacement, and best practices to maximize their service life.
1. Core Understanding of Jenbacher Connecting Rods
Before diving into maintenance, it is critical to recognize the design and functional demands of Jenbacher connecting rods—most are forged steel or high-strength alloy steel components, precision-machined to meet strict tolerances for Jenbacher gas engine models (e.g., Jenbacher JMS, JMC, and JGS series). Key features include:
- Precision-machined big-end and small-end bores to accommodate crankshaft bearings and piston pins;
- Friction-reducing surface finishes (e.g., induction-hardened rod journals) to withstand continuous wear;
- Lightweight yet durable construction to balance strength and rotational efficiency;
- Interference-fit rod bolts (or torque-to-yield bolts) that secure the rod to the crankshaft, requiring strict torque compliance during installation.
These design elements mean connecting rods are not “one-size-fits-all” components—using non-OEM or untested replacement rods can lead to misalignment, fatigue, or failure. Maintenance must prioritize preserving their original precision and structural integrity.
2. Pre-Inspection Preparation: Safety & Tooling
Inspecting or maintaining connecting rods requires careful preparation to avoid accidents or accidental damage. Safety is non-negotiable, as connecting rod work involves removing high-pressure engine components and handling heavy, precision parts.
2.1 Safety Precautions
- Engine Shutdown & Cool-Down: Always shut down the engine and allow it to cool completely (minimum 3–4 hours) before starting work. High temperatures can cause metal components to expand, making disassembly difficult and posing burn risks.
- Disconnect All Power & Fluids: Disconnect the engine’s ignition power, fuel supply, and cooling system lines to prevent leaks or accidental startup. Drain engine oil and coolant into sealed containers to avoid contamination.
- Secure the Engine: Mount the engine on a sturdy workbench or engine stand, and use locking clamps to prevent shifting during disassembly/reassembly.
- Wear Protective Gear: Use nitrile gloves (to avoid hand oil contamination), safety glasses (to protect from debris), and anti-fatigue mats (for prolonged standing work). Never work alone in confined spaces—have a colleague on hand for heavy component handling.
2.2 Essential Tools for Maintenance
- Precision torque wrench (calibrated to Jenbacher factory specs, minimum 1/2” drive for heavy-duty bolts);
- Dial indicator or bore gauge (to measure rod bore wear and alignment);
- Plastic feeler gauges (non-abrasive, to avoid scratching rod surfaces);
- Soft-bristle brushes and compressed air (60–80 PSI, oil-free);
- Solvent-based cleaner (degreaser formulated for metal parts, compatible with alloy steel);
- Anti-seize lubricant (Jenbacher-specified, for rod bolts and bearing surfaces);
- Soft cloths (lint-free, to wipe debris without leaving residue);
- Engine stand and lifting equipment (for handling heavy connecting rod assemblies).
3. Routine Inspection: Detecting Wear & Damage Early
Connecting rod issues rarely develop overnight—they progress through subtle signs that can be caught during regular engine checks. A comprehensive pre-use and periodic inspection (every 500 operating hours, or during routine overhauls) is critical to identifying problems before they escalate.
3.1 Visual Inspection (Before Disassembly)
Start with a visual check of the engine bay to spot obvious signs of connecting rod distress:
- Unusual Noises: A loud “knocking” or “tapping” sound that increases with engine speed (especially under load) indicates potential connecting rod wear or bearing failure—this is a critical warning; do not operate the engine further.
- Oil Leaks: Oil seepage around the big-end bearing caps (visible on the crankcase) may signal worn bearings or loose rod bolts.
- Engine Performance Issues: Reduced power output, rough idling, or misfiring can be traced to connecting rod misalignment or fatigue, which disrupts piston stroke consistency.
- Exhaust Smoke: Excessive black smoke may indicate incomplete combustion caused by connecting rod-related piston misalignment, leading to unburned fuel.
3.2 Disassembly Inspection (Detailed)
When disassembling the engine (e.g., for a 2,000-hour overhaul), inspect each connecting rod individually for hidden damage. Focus on these key areas:
3.2.1 Big-End Bore (Crankshaft Side)
- Wear Assessment: Use a bore gauge to measure the inside diameter of the big-end bore. Compare readings to Jenbacher’s factory tolerance limits (typically 0.02–0.05 mm maximum wear). If wear exceeds the limit, the rod must be replaced—reboring is not recommended for high-stress Jenbacher rods, as it compromises structural integrity.
- Bore Distortion: Check for ovality or taper in the bore (variation in diameter across different angles). A distortion of more than 0.01 mm indicates misalignment or fatigue, which can cause bearing failure.
- Surface Damage: Look for scoring, galling, or pitting on the bore surface. These defects arise from inadequate lubrication or foreign particle contamination, and they accelerate wear over time.
3.2.2 Small-End Bore (Piston Pin Side)
- Pin Fit Check: Insert a new Jenbacher piston pin into the small-end bore—there should be a smooth, interference fit (per factory specs). Excessive play (more than 0.03 mm) indicates wear, which can lead to piston slap and rod bending.
- Bushing Condition: If the rod has a replaceable small-end bushing, check for cracks, wear, or separation from the rod body. Replace the bushing if damaged, and ensure it is pressed to the correct depth per Jenbacher’s guidelines.
3.2.3 Rod Bolt & Fasteners
- Torque Retention Check: Use a torque wrench to test the existing rod bolts. If the bolt fails to hold torque (i.e., it loosens easily) or shows signs of stretching (e.g., elongation of the bolt shank), replace the bolts immediately. Jenbacher specifies torque-to-yield (TTY) bolts for most models—these are one-time use and cannot be reused after installation.
- Bolt Thread Condition: Inspect the threads for damage, corrosion, or debris. Damaged threads can lead to improper torque, resulting in loose bolts or bolt failure. Clean threads with a thread chaser if needed, but replace bolts if threads are stripped or corroded.
3.2.4 Rod Body & Surface Condition
- Fatigue Cracks: Use a magnetic particle inspection (MPI) kit to detect micro-cracks on the rod body, especially at the stress points (e.g., between the big-end and small-end bores, or at the bolt bosses). Cracks may also be visible under a magnifying lamp—any crack, no matter how small, means the rod must be discarded.
- Bending/Misalignment: Place the rod on a flat, precision surface and check for warping using a straightedge. A bent rod will cause uneven piston loading, leading to cylinder wall wear and reduced engine efficiency. Minor bending (less than 0.01 mm) may be corrected via straightening (by a certified Jenbacher service center), but severe bending requires replacement.
- Corrosion & Debris: Wipe the rod body with a lint-free cloth to remove oil and debris. Check for rust, corrosion, or carbon buildup—corrosion weakens the rod’s structural integrity, while carbon can trap moisture and accelerate wear.
3.3 Lubrication System Check
Connecting rod failure is often linked to poor lubrication. Inspect the engine’s lubrication system to ensure proper oil flow to the rod bearings:
- Oil Pressure Test: Run a diagnostic oil pressure test (per Jenbacher’s manual) to confirm oil pressure meets factory specs. Low oil pressure can lead to inadequate lubrication of the connecting rod bearings.
- Oil Filter & Passages: Clean or replace the oil filter, and flush oil passages to remove debris that could block oil flow to the connecting rods.
- Oil Quality: Analyze the used engine oil for metal particles (via an oil analysis kit)—high levels of iron or steel indicate connecting rod wear.
4. Proper Handling & Storage: Preserving Precision
Connecting rods are precision components, and improper handling or storage can cause irreversible damage—even before installation. Follow these protocols to protect them during maintenance, storage, and transport.
4.1 Handling Best Practices
- Avoid Impact: Never drop, bang, or drop the connecting rod against hard surfaces. Even a small impact can cause micro-cracks or surface damage.
- Use Soft Surfaces: Place rods on foam padding, wooden blocks, or rubber mats when working on them—avoid direct contact with metal workbenches to prevent scratching.
- Minimize Contamination: Keep rods away from dust, sand, or metal shavings. Always wear gloves to avoid leaving oil residue (which can attract debris) or skin oils (which accelerate corrosion).
- Label Individual Rods: If removing multiple connecting rods, label each rod with its original cylinder number (e.g., “Cylinder 1”) and store it in a dedicated container. This prevents mixing of rods from different cylinders, which can cause misalignment and uneven wear.
4.2 Storage Guidelines
- Clean & Prep First: Thoroughly clean the connecting rod, dry it completely, and apply a thin layer of Jenbacher-specified anti-corrosion oil to all metal surfaces. This prevents rust and corrosion during long-term storage.
- Sealed Storage Containers: Store rods in airtight, moisture-proof containers (e.g., plastic bins with silica gel packets) to protect against humidity. For long-term storage (more than 6 months), wrap the rod in a vapor-corrosion-inhibiting (VCI) bag for extra protection.
- Avoid Overlapping: Do not stack connecting rods on top of each other—use individual dividers or foam inserts to prevent contact and friction.
- Storage Environment: Keep containers in a cool, dry place (temperature 10–25°C, humidity below 60%) away from direct sunlight, corrosive chemicals, and extreme temperature changes.
- Regular Inspection: For stored rods, inspect them every 6 months for signs of corrosion or damage. Reapply anti-corrosion oil if needed, and replace VCI bags once they expire.
5. Reassembly & Torque Protocols: Critical for Longevity
Incorrect reassembly is a leading cause of premature connecting rod failure—even a small torque deviation or misalignment can lead to catastrophic damage. Follow Jenbacher’s factory guidelines strictly during reassembly.
5.1 Pre-Reassembly Preparation
- Clean All Components: Thoroughly clean the connecting rod, rod bolts, crankshaft journals, and piston pins. Ensure no debris, oil residue, or anti-seize lubricant remains in excess (follow Jenbacher’s specs for lubricant application).
- Check Bearing Clearance: Install new Jenbacher big-end bearings (always replace bearings during reassembly—never reuse worn ones) and check the bearing clearance using Plastigage (per factory specs). Clearance that is too tight will cause overheating and wear, while clearance that is too loose will lead to oil pressure loss and rod damage.
- Lubricate Critical Surfaces: Apply a thin, uniform layer of Jenbacher-specified anti-seize lubricant to the rod bolt threads and under the bolt heads. Do not over-lubricate, as excess lubricant can squeeze out during torque application, leading to bolt slippage.
5.2 Torque Procedure (Non-Negotiable)
Jenbacher connecting rod bolts require a two-step torque process to ensure proper clamping force. Always refer to the engine’s technical manual for the exact torque values (varies by Jenbacher model). The general procedure is:
- Pre-Torque: Tighten the rod bolts to a preliminary torque (typically 30–40% of the final torque) using a torque wrench. This ensures the rod and bearings are properly seated against the crankshaft journal.
- Final Torque: Tighten the bolts to the full factory-specified torque (e.g., 80–120 Nm for certain Jenbacher models) in a crisscross pattern (alternating between the two bolts) to ensure even clamping force.
- Angle Torque (For TTY Bolts): For torque-to-yield bolts, after reaching the final torque, rotate the bolt an additional specified angle (e.g., 45–90 degrees) to achieve the required stretch. Use a degree wheel attached to the torque wrench for precision.
- Verify Torque: After final torque, recheck the torque of each bolt—if any bolt has loosened, repeat the torque procedure (do not over-tighten to compensate).
5.3 Post-Reassembly Checks
- Manual Crankshaft Rotation: Rotate the crankshaft by hand (using a crankshaft turning tool) to ensure the connecting rods and pistons move smoothly without resistance. Stiffness or grinding indicates misalignment, incorrect bearing clearance, or over-torqued bolts.
- Oil Priming: Prime the engine’s lubrication system with fresh oil to ensure oil flows to the connecting rod bearings before startup. This prevents dry-start wear, which is a major cause of rod bearing failure.
- Initial Startup Check: Start the engine and monitor it for the first 10 minutes—listen for unusual noises, check oil pressure, and inspect for leaks. If any issues arise, shut down the engine immediately and inspect the connecting rod assembly.
6. Replacement Criteria: When to Replace a Connecting Rod
Connecting rods are designed for long service life, but they are not indestructible. Replace a connecting rod immediately if any of the following conditions are met—delaying replacement will lead to further engine damage and higher costs:
| Condition | Replacement Rationale |
|---|---|
| Fatigue cracks (visible or detected via MPI) on the rod body, bolt bosses, or stress points | Cracks propagate under load, leading to rod failure and engine seizure. |
| Bore wear/exceedance of factory tolerance limits (big-end or small-end) | Worn bores cause bearing failure, piston slap, and misalignment. |
| Severe bending or warping (more than 0.01 mm deviation) | Bent rods cause uneven piston loading, cylinder wall wear, and reduced power. |
| Damaged rod bolts (stretched, stripped threads, or torque retention failure) | Loose or failed bolts lead to rod separation and catastrophic engine damage. |
| Corrosion that compromises the rod’s structural integrity (e.g., deep pitting, rust on stress surfaces) | Corrosion weakens the rod, making it prone to fatigue under load. |
| Galling or scoring on the bore surfaces that cannot be repaired | These defects accelerate wear and lead to bearing failure. |
| Non-OEM rods that have not been tested/approved for Jenbacher engines | Non-certified rods do not meet the high-stress demands of Jenbacher gas engines. |
Note: Never attempt to repair a connecting rod with cracks, severe bending, or worn bores—repairs (e.g., welding, reboring) compromise the rod’s structural integrity and are not covered by Jenbacher warranties.
7. Long-Term Maintenance Best Practices
To maximize the service life of Jenbacher connecting rods and avoid premature failure, integrate these practices into your regular engine maintenance routine:
- Stick to Service Intervals: Follow Jenbacher’s recommended service schedule for oil changes, oil filter replacements, and engine overhauls—regular maintenance prevents debris buildup and lubrication issues.
- Use High-Quality Lubricants: Only use Jenbacher-specified engine oil and anti-seize lubricants—substandard lubricants fail to protect against high stress and friction.
- Monitor Operating Conditions: Avoid overloading the engine (e.g., excessive RPM, heavy loads beyond factory specs) and ensure proper cooling—overheating and overloading accelerate connecting rod wear.
- Train Maintenance Personnel: Ensure your team is certified in Jenbacher engine maintenance, with specific training on connecting rod inspection, torque, and handling.
- Keep Detailed Records: Maintain a log of connecting rod inspections, replacements, torque values, and engine operating hours—this helps track wear patterns and predict future maintenance needs.
- Source OEM Parts: Always use Jenbacher original equipment connecting rods, bolts, and bearings—counterfeit or untested parts do not meet the engine’s precision requirements.
8. Final Summary
Jenbacher connecting rods are the backbone of your gas engine’s mechanical performance, operating under some of the highest stresses in the engine. Their maintenance is not a “one-time” task but a continuous commitment to precision, safety, and care. By following the comprehensive guidelines outlined above—from routine inspection and proper handling to strict torque compliance and timely replacement—you can extend the service life of your connecting rods, prevent catastrophic failure, and ensure your Jenbacher engine runs reliably, efficiently, and safely for years to come.
Whether you are performing a 500-hour check or a full engine overhaul, prioritizing connecting rod maintenance will protect your investment, minimize downtime, and keep your cross-border engine parts business running smoothly. Always refer to Jenbacher’s official technical manuals for model-specific specs, and consult certified Jenbacher service centers for complex maintenance or repairs.

