Best Practices for Ensuring Reliability and Longevity of Jenbacher Engine Speed Sensors
1. Introduction to Jenbacher Speed Sensors
Jenbacher speed sensors are critical components in Jenbacher gas engines, responsible for measuring crankshaft or camshaft rotational speed and position. These sensors provide real-time data to the engine control unit (ECU), enabling precise fuel injection timing, ignition control, and overspeed protection. Common types of Jenbacher speed sensors include inductive (magnetic) sensors, Hall-effect sensors, and optical sensors, each designed to operate in the harsh environmental conditions of Jenbacher engines (high temperature, vibration, and exposure to oil/gas).
Failure of a speed sensor can lead to engine misfires, reduced performance, unexpected shutdowns, or even severe engine damage. Regular maintenance and prompt repair are essential to avoid costly downtime and ensure optimal engine operation.
2. Preventive Maintenance Schedule
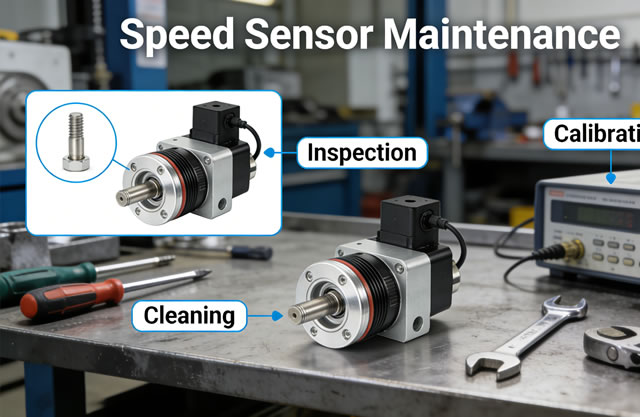
Preventive maintenance is the most effective way to extend the lifespan of Jenbacher speed sensors. Below is a recommended maintenance schedule based on engine operating hours and industry best practices:
| Maintenance Task | Frequency | Details |
|---|---|---|
| Visual Inspection | Every 500 operating hours / Monthly | Check for physical damage, loose connections, oil leaks, and corrosion on sensor housing and wiring |
| Cleaning | Every 1000 operating hours / Quarterly | Remove dirt, oil, and carbon deposits from sensor tip and mounting surface using non-abrasive cleaner |
| Wiring & Connector Check | Every 2000 operating hours / Semi-annually | Inspect wiring for fraying, insulation damage; test connector pins for tightness and corrosion |
| Calibration & Testing | Every 5000 operating hours / Annually | Verify sensor output accuracy with multimeter/oscilloscope; recalibrate if necessary |
| Replacement | Every 10,000-15,000 operating hours / Every 3-5 years | Proactive replacement even if no faults detected (prevents unexpected failure) |
3. Common Faults & Troubleshooting
3.1 Symptoms of a Faulty Speed Sensor
- Engine warning light (Malfunction Indicator Lamp) activation
- Erratic engine speed readings on the control panel
- Engine hesitation, misfiring, or reduced power output
- Overspeed protection system false triggers or failure to trigger
- Engine failure to start or sudden shutdown during operation
3.2 Step-by-Step Troubleshooting Process
- Check Diagnostic Codes: Connect to the Jenbacher ECU (using Jenbacher Service Tool or compatible scanner) to retrieve fault codes related to speed sensor circuits (e.g., P0335 for crankshaft position sensor circuit malfunction).
- Visual Inspection: Examine the sensor for physical damage (cracks, dents), oil contamination, or loose mounting bolts. Check wiring harness for cuts, fraying, or corrosion at connectors.
- Check Sensor Gap: Verify the air gap between the sensor tip and the target wheel (tooth wheel) matches Jenbacher OEM specifications (typically 0.5-1.5 mm). Incorrect gap causes weak signal output.
- Electrical Testing:
- For inductive sensors: Use a multimeter to measure resistance (typically 800-1500 ohms). Abnormal resistance indicates a faulty sensor coil.
- For Hall-effect sensors: Check supply voltage (5V or 12V) at the connector; measure output signal with an oscilloscope while cranking the engine (should show square wave pattern).
- Check Wiring & Ground: Test continuity of wiring between sensor and ECU; ensure ground connections are clean and tight (poor ground causes signal interference).
- Replace and Verify: If all tests confirm a faulty sensor, replace with a genuine Jenbacher OEM sensor (aftermarket sensors may not meet precision requirements) and recheck operation.
4. Repair & Replacement Procedures
4.1 Tools Required
- Socket wrench set (including torque wrench)
- Multimeter and/or oscilloscope
- Non-abrasive cleaning solvent (Jenbacher-approved)
- Sensor gap gauge (feeler gauge)
- Electrical contact cleaner
- Genuine Jenbacher replacement sensor (matching part number)
- Locktight (medium strength, if specified by OEM)
4.2 Replacement Steps
- Ensure the engine is fully shut down, cooled, and disconnected from power sources (battery, fuel supply).
- Locate the speed sensor (typically mounted on the engine block near the crankshaft/camshaft pulley).
- Disconnect the electrical connector from the sensor (press the release tab and pull gently to avoid damaging pins).
- Remove the mounting bolt(s) securing the sensor to the engine block using a socket wrench. Note the sensor orientation for reinstallation.
- Carefully remove the sensor from the mounting hole (avoid forcing it – use gentle twisting if stuck to prevent damage to the sensor tip or mounting surface).
- Clean the mounting hole and surface with approved solvent to remove oil, dirt, or debris.
- Install the new sensor: align it with the mounting hole, insert gently, and hand-tighten the mounting bolt(s) initially.
- Adjust the sensor gap to OEM specifications using a feeler gauge (refer to Jenbacher engine manual for exact values).
- Torque the mounting bolt(s) to the specified torque (typically 10-15 Nm) using a torque wrench – over-tightening damages the sensor housing.
- Reconnect the electrical connector (ensure it clicks into place to confirm secure connection).
- Clean any excess solvent or debris from the engine bay.
- Reconnect power sources, start the engine, and verify no fault codes are present; check speed readings on the control panel for accuracy.
5. Post-Repair Verification & Maintenance Tips
5.1 Post-Repair Checks
- Run the engine at idle and load conditions for 30-60 minutes to monitor sensor performance.
- Recheck fault codes and speed sensor data via the ECU to confirm stable signal output.
- Inspect for oil leaks around the sensor mounting area (leaks contaminate the sensor tip and cause premature failure).
5.2 Long-Term Maintenance Tips
- Always use genuine Jenbacher OEM parts – aftermarket sensors lack the precision and durability for Jenbacher engine conditions.
- Keep the engine bay clean to reduce debris buildup on sensors and wiring.
- Address oil leaks promptly (oil contamination is the leading cause of speed sensor failure).
- Store spare sensors in a dry, temperature-controlled environment (avoid moisture and extreme temperatures).
- Document all maintenance/repair activities (date, hours, tasks performed) for compliance and future reference.