Caterpillar (CAT) alternators are core components of heavy-duty machinery, generator sets, construction equipment, marine vessels, and industrial power systems. Designed for extreme operating conditions—including high temperatures, dust, vibration, and heavy loads—CAT alternators deliver reliable electrical power for engine starting, auxiliary systems, and onboard electronics. However, consistent performance and long service life depend on regular maintenance and timely professional repairs. This complete guide covers daily inspections, routine maintenance, troubleshooting, repair procedures, and long-term care for all CAT alternator models.
1. Importance of CAT Alternator Maintenance
A well-maintained CAT alternator prevents unexpected downtime, reduces repair costs, extends equipment lifespan, and ensures safe operation. Neglected alternators lead to critical failures such as battery drain, electrical system malfunctions, engine shutdowns, and costly component damage. For commercial and industrial operations, proactive maintenance directly improves productivity, safety, and return on investment.
- Maximizes alternator service life (up to 10+ years with proper care)
- Prevents sudden breakdowns in remote or harsh working environments
- Maintains stable voltage output for sensitive electronic systems
- Reduces fuel consumption and engine stress
- Complies with CAT factory warranty requirements
2. Pre-Maintenance Safety Protocols
- Turn off the engine and allow all components to cool completely (minimum 30 minutes)
- Disconnect the battery negative (-) cable first, then the positive (+) cable to avoid short circuits
- Lock out and tag out (LOTO) power sources to prevent accidental engine startup
- Wear personal protective equipment (PPE): safety glasses, insulated gloves, non-slip footwear
- Keep flammable materials away from the work area
- Use insulated tools for all electrical connections
3. Routine Maintenance Schedule for CAT Alternators
CAT recommends a structured maintenance schedule based on operating hours and environmental conditions. Adjust intervals for dusty, high-humidity, or extreme-temperature environments.
3.1 Daily/Pre-Operation Inspection (5–10 Minutes)
- Visual check for physical damage, cracks, oil leaks, or loose mounting bolts
- Inspect drive belt tension and wear (no cracks, glazing, or slack)
- Check wiring harnesses for fraying, corrosion, or loose connections
- Verify battery terminals are clean, tight, and free of corrosion
- Listen for unusual noises (grinding, squealing, rattling) during operation
- Confirm charge indicator lights function properly
3.2 250-Hour / 3-Month Maintenance
- Clean alternator exterior with compressed air (low pressure) and soft cloth
- Tighten all mounting bolts, electrical terminals, and ground connections
- Inspect and adjust drive belt tension per CAT specifications
- Check voltage output with a multimeter (13.5–14.5V for 12V systems)
- Clean battery terminals and apply anti-corrosion grease
3.3 1000-Hour / 1-Year Maintenance
- Full disassembly inspection: rotor, stator, bearings, rectifier, and voltage regulator
- Clean internal components with approved electrical contact cleaner
- Test insulation resistance with a megohmmeter
- Lubricate bearings with CAT-approved high-temperature grease
- Replace worn drive belt and tensioner (if applicable)
- Check and re-torque all electrical connections to factory specs
3.4 4000-Hour / 4-Year Major Service
- Complete alternator overhaul by a CAT-certified technician
- Replace bearings, seals, brushes, and worn electrical components
- Resurface or replace slip rings as needed
- Full electrical performance testing
- Replacement of all gaskets and weather seals
4. Detailed Maintenance Procedures
4.1 Cleaning the CAT Alternator
Dust, dirt, oil, and debris cause overheating and premature failure. Clean the alternator regularly:
- Use dry, low-pressure compressed air (max 30 PSI) to remove loose dirt
- Wipe the exterior with a lint-free cloth dampened with mild detergent
- Use electrical contact cleaner for slip rings, brushes, and connectors
- Avoid high-pressure water or steam cleaning—damage internal windings
4.2 Drive Belt Inspection & Adjustment
The drive belt transfers power from the engine to the alternator. A faulty belt causes charging issues:
- Replace belts with cracks, fraying, glazing, or oil contamination
- Adjust tension so belt deflects 1/2–3/4 inch under moderate pressure
- Use only genuine CAT replacement belts for optimal performance
4.3 Bearing Lubrication & Replacement
Front and rear bearings support the rotor shaft. Worn bearings create noise and vibration:
- Lubricate annually with high-temperature, heavy-duty grease
- Replace bearings immediately if grinding, squealing, or roughness occurs
- Use CAT genuine bearings for perfect fit and durability
4.4 Electrical System Testing
Regular voltage and current testing ensures proper charging performance:
- Open-circuit voltage: 12.6V+ (battery fully charged)
- Operating voltage: 13.5–14.5V (12V system) / 27–29V (24V system)
- Test voltage regulator and rectifier for stable output
- Check for parasitic battery drain when equipment is off
5. Common CAT Alternator Faults & Troubleshooting
Early detection of issues reduces repair costs and prevents total failure. Below are the most common problems and solutions:
5.1 Battery Not Charging
Causes: Broken drive belt, faulty voltage regulator, worn brushes, blown fuse, damaged stator/rotor windings, loose wiring
Solutions: Replace belt, test regulator, replace brushes, repair wiring, overhaul alternator
5.2 Overcharging (High Voltage)
Causes: Defective voltage regulator, poor ground connection, shorted rotor windings
Solutions: Replace regulator, clean ground terminals, repair rotor
5.3 Unusual Noises (Grinding/Squealing/Rattling)
Causes: Worn bearings, loose mounting, misaligned pulley, damaged rotor
Solutions: Replace bearings, tighten mounts, align pulley, service rotor
5.4 Overheating
Causes: Dirty internal components, blocked vents, overloading, bad bearings
Solutions: Clean alternator, clear vents, reduce load, replace bearings
5.5 Intermittent Charging
Causes: Loose connections, corroded terminals, worn brushes, faulty wiring
Solutions: Tighten connections, clean terminals, replace brushes, repair harness
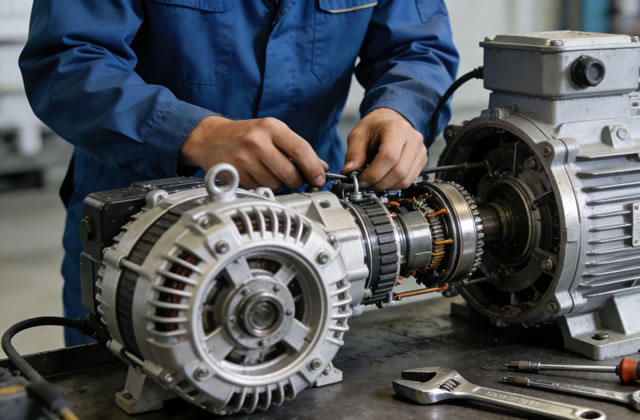
6. Professional CAT Alternator Repair Procedures
Major repairs require certified technicians and genuine CAT parts. Do not attempt complex repairs without proper training.
6.1 Alternator Disassembly
- Disconnect all power sources and remove the alternator from equipment
- Mark and document all wiring connections for reassembly
- Remove drive pulley, end frames, and through bolts
- Separate rotor, stator, voltage regulator, and rectifier
6.2 Component Inspection & Testing
- Rotor: Test for continuity and insulation resistance; replace if shorted
- Stator: Check for burned windings or damage; repair or replace
- Slip Rings: Clean or resurface; replace if worn excessively
- Brushes: Replace if length is below factory minimum
- Voltage Regulator & Rectifier: Test with diagnostic tools; replace if faulty
6.3 Reassembly & Installation
- Use new gaskets, seals, and bearings during reassembly
- Lubricate all moving parts with CAT-approved lubricants
- Torque all bolts to CAT factory specifications
- Reconnect wiring exactly as marked during disassembly
- Mount the alternator securely and adjust belt tension
6.4 Post-Repair Testing
- Run full charging system test under load
- Verify stable voltage output
- Check for leaks, noise, or overheating
- Confirm all warning lights function correctly
7. Long-Term Care & Storage Recommendations
For equipment stored for long periods, protect the CAT alternator from corrosion and damage:
- Clean and dry the alternator completely before storage
- Disconnect the battery and store it in a cool, dry area
- Cover the alternator with a waterproof, dust-proof protective cover
- Rotate the engine monthly to maintain bearing lubrication
- Inspect and test the alternator before returning equipment to service
8. Why Use Genuine CAT Parts & Certified Service
- Genuine CAT parts are engineered for exact fit and performance
- Certified technicians follow factory service standards
- Maintains equipment warranty validity
- Ensures reliability in extreme operating conditions
- Reduces repeat failures and long-term costs
Conclusion
CAT alternators are built for durability, but their performance and lifespan depend entirely on consistent, professional maintenance. By following the inspection schedules, safety protocols, and repair guidelines in this guide, you can ensure your CAT alternator operates reliably for years, minimize downtime, and protect your valuable equipment investment. Always consult your CAT equipment service manual for model-specific specifications, and contact an authorized CAT dealer for complex repairs and overhauls.
Proactive maintenance today prevents costly failures tomorrow—this is the foundation of maximum equipment uptime and operational efficiency.