


This document is a comprehensive maintenance and repair guide for CAT Diodes (Caterpillar Diodes), designed for technicians, maintenance personnel, and equipment operators. It includes detailed information on diode structure, working principles, routine maintenance, fault diagnosis, repair procedures, and safety precautions.
1. Introduction to CAT Diodes
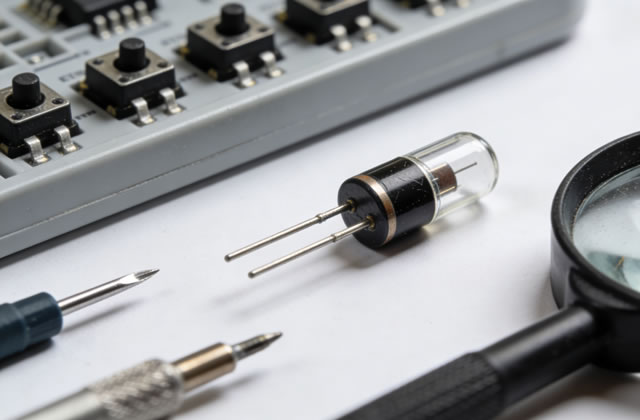
CAT Diodes are essential semiconductor components widely used in Caterpillar equipment, including construction machinery, power generation units, heavy-duty trucks, and industrial engines. As a unidirectional current conductor, the diode plays a critical role in rectification, voltage clamping, surge protection, and current regulation in the equipment’s electrical system. Caterpillar diodes are engineered to withstand harsh operating environments—high temperature, vibration, humidity, and electrical stress—ensuring reliable performance in extreme conditions.
Key features of CAT Diodes:
- High temperature resistance (operating range: -40°C to 150°C, depending on the model)
- High current carrying capacity (up to 100A or more for industrial-grade models)
- Excellent surge protection to prevent damage from voltage spikes
- Robust construction with corrosion-resistant housing for outdoor and harsh industrial use
- Perfect compatibility with Caterpillar original electrical systems, ensuring seamless integration
2. Routine Maintenance of CAT Diodes
Routine maintenance is crucial to extend the service life of CAT Diodes and prevent unexpected failures. The following maintenance tasks should be performed regularly, depending on the equipment’s operating conditions (recommended interval: monthly for heavy-duty use, quarterly for standard use).
2.1 Visual Inspection
Perform a thorough visual check of the diode and its surrounding components to identify obvious signs of damage or wear. Use the following checklist:
- Check the diode housing for cracks, deformation, or discoloration (discoloration often indicates overheating).
- Inspect the terminal connections (leads or mounting bolts) for looseness, corrosion, or oxidation. Corroded terminals can cause poor contact and increased resistance, leading to overheating.
- Examine the wiring connected to the diode for fraying, insulation damage, or short circuits.
- Check for any signs of leakage (electrolyte or oil, if applicable) around the diode, which may indicate internal damage.
2.2 Cleaning
Keep the diode and its connections clean to prevent dust, dirt, and debris from affecting performance. Follow these steps:
- Turn off the equipment and disconnect the power supply (battery, generator, or main power) to ensure safety.
- Use a dry, lint-free cloth to wipe the diode housing and terminals, removing surface dust and dirt.
- For corroded terminals, use a wire brush or sandpaper to gently remove oxidation, then clean with a cotton swab dipped in isopropyl alcohol. Avoid using harsh chemicals that may damage the diode’s insulation.
- After cleaning, ensure the terminals are dry before reconnecting the power supply.
2.3 Connection Check
Loose connections are a common cause of diode failure. Verify that all terminal bolts, nuts, or connectors are tightened to the manufacturer’s recommended torque (refer to Caterpillar equipment manuals for specific values). Check for any signs of arcing (burn marks around connections), which indicates poor contact and requires immediate attention.
2.4 Temperature Monitoring
CAT Diodes generate heat during operation, but excessive temperature can shorten their service life. Use an infrared thermometer to measure the diode’s surface temperature during normal operation. The temperature should not exceed the maximum operating temperature specified in the diode’s datasheet (typically 150°C). If the temperature is too high, check for:
- Overloaded electrical circuits
- Poor heat dissipation (clogged heat sinks, insufficient airflow)
- Short circuits in the diode or surrounding components
3. Fault Diagnosis of CAT Diodes
When equipment malfunctions, the CAT Diode may be a potential cause. Common symptoms of a faulty diode include: no power output, intermittent electrical issues, overheating, voltage spikes, or damage to other electrical components. Use the following methods to diagnose diode faults.
3.1 Tools Required for Diagnosis
- Digital multimeter (DMM) with diode test function
- Infrared thermometer
- Wire brush and cleaning supplies
- Caterpillar equipment service manual (for model-specific specifications)
3.2 Diode Test with Multimeter
The most common method to test a CAT Diode is using a digital multimeter’s diode test mode. Follow these steps:
- Disconnect the diode from the electrical circuit (remove wires or mounting bolts) to avoid interference from other components.
- Set the multimeter to the diode test mode (usually indicated by a diode symbol: ⚡).
- Connect the multimeter’s positive probe (red) to the diode’s anode (positive terminal) and the negative probe (black) to the cathode (negative terminal). This is the forward bias direction.
- A healthy diode will display a voltage drop between 0.5V and 0.7V (for silicon diodes, which are commonly used in CAT equipment). This indicates that the diode is conducting current in the forward direction.
- Reverse the probes (positive to cathode, negative to anode). A healthy diode will display “OL” (overload) or a very high resistance, indicating that it does not conduct current in the reverse direction.
- Interpretation of test results:
- No voltage drop in forward bias: Diode is open (failed open circuit).
- Low resistance in reverse bias: Diode is shorted (failed short circuit).
- Voltage drop outside the 0.5-0.7V range: Diode is degraded and should be replaced.
3.3 Other Diagnostic Checks
If the multimeter test is inconclusive, perform the following checks:
- Check the diode’s heat sink (if equipped) for clogging or damage. A faulty heat sink can cause overheating and diode failure.
- Test the surrounding components (capacitors, resistors, fuses) for faults, as they can affect the diode’s performance.
- Use an oscilloscope to measure the diode’s voltage and current waveform, which can identify intermittent faults or voltage spikes.
4. Repair and Replacement of CAT Diodes
If a CAT Diode is diagnosed as faulty, it should be repaired (if possible) or replaced immediately to prevent further damage to the equipment’s electrical system. Follow these steps for safe and effective repair/replacement.
4.1 Safety Precautions
Before starting any repair work, adhere to these safety guidelines:
- Disconnect all power sources (battery, generator, main power) and wait for the equipment to discharge (allow 5-10 minutes for capacitors to discharge).
- Wear personal protective equipment (PPE): insulated gloves, safety glasses, and anti-static wristband (to prevent electrostatic discharge damage to the diode).
- Use only CAT original or OEM replacement diodes. Generic diodes may not meet Caterpillar’s specifications and can cause equipment failure.
- Work in a clean, dry environment to avoid dust or moisture entering the electrical system.
4.2 Replacement Procedure
- Locate the faulty diode using the equipment’s service manual. Note the diode’s orientation (anode and cathode) to ensure correct installation.
- Disconnect the wires or terminals connected to the diode. Use a wrench or screwdriver to remove mounting bolts (if applicable). Label the wires to avoid incorrect reconnection.
- Remove the faulty diode from its mounting position. If the diode is soldered to a circuit board, use a soldering iron to desolder it (ensure the soldering iron is set to the correct temperature to avoid damaging the board).
- Clean the mounting area and terminals with a wire brush and isopropyl alcohol to remove corrosion or debris.
- Install the new CAT original/OEM diode, ensuring the correct orientation (anode to positive, cathode to negative). If soldering, solder the diode to the circuit board using a small amount of solder (avoid excessive solder, which can cause short circuits).
- Reconnect the wires or terminals to the diode, ensuring they are tight and secure. Torque the mounting bolts to the manufacturer’s recommended value.
- Double-check the installation: verify the diode’s orientation, connections, and mounting to ensure no errors.
4.3 Post-Replacement Testing
After replacing the diode, perform the following tests to ensure proper operation:
- Reconnect the power supply and turn on the equipment.
- Use a multimeter to test the diode’s forward and reverse bias (as described in Section 3.2) to confirm it is working correctly.
- Monitor the diode’s temperature during operation using an infrared thermometer. Ensure the temperature is within the specified range.
- Test the equipment’s electrical system to ensure all functions are working properly (e.g., power output, voltage regulation, surge protection).
4.4 Repair of Minor Damage
In some cases, minor damage to the diode (e.g., corroded terminals, loose connections) can be repaired without replacing the entire diode. For example:
- Corroded terminals: Clean the terminals with a wire brush and isopropyl alcohol, then apply a thin layer of anti-corrosion grease to prevent future oxidation.
- Loose connections: Tighten the terminals or replace the connectors if they are damaged.
Note: If the diode’s housing is cracked, or it fails the multimeter test, replacement is the only safe option.
5. Storage and Handling of CAT Diodes
Proper storage and handling of CAT Diodes are essential to prevent damage before installation. Follow these guidelines:
- Store diodes in a dry, cool environment (temperature: 0°C to 30°C, humidity: less than 60%). Avoid direct sunlight and high temperatures.
- Keep diodes in their original packaging until ready for use. This protects them from electrostatic discharge (ESD) and physical damage.
- Handle diodes with clean, dry hands or use anti-static gloves. ESD can damage the diode’s internal components, even if no visible damage is present.
- Do not drop or impact diodes, as this can cause internal cracks or damage to the semiconductor junction.
- Check the diode’s expiration date (if applicable) before installation. Expired diodes may have degraded performance.
6. Common Troubleshooting Tips
Here are some common issues related to CAT Diodes and their solutions:
| Symptom | Possible Cause | Solution |
|---|---|---|
| Diode overheats during operation | Poor heat dissipation, overloaded circuit, short circuit | Clean heat sink, check circuit load, test for short circuit and replace diode if necessary |
| No current flow through the diode | Open circuit in diode, loose connections, incorrect orientation | Test diode with multimeter, tighten connections, check orientation and reinstall |
| Reverse current flow | Shorted diode, incorrect installation | Replace the diode, ensure correct orientation during installation |
| Intermittent electrical issues | Loose connections, degraded diode, voltage spikes | Tighten connections, test diode, install surge protector if needed |
7. Conclusion
CAT Diodes are critical components in Caterpillar equipment’s electrical system, and proper maintenance and repair are essential to ensure equipment reliability and longevity. By following the guidelines in this guide—routine maintenance, accurate fault diagnosis, safe repair/replacement, and proper storage—you can minimize downtime, reduce repair costs, and extend the service life of your CAT Diodes and equipment. Always refer to the Caterpillar equipment service manual for model-specific specifications and procedures, and use only original/OEM replacement parts to guarantee compatibility and performance.

