Caterpillar (CAT) gasket kits are critical components in maintaining the integrity of heavy-duty engines, hydraulic systems, and industrial machinery. Designed to create airtight and watertight seals between mating surfaces, these gasket kits prevent fluid leaks, pressure loss, and contamination that can lead to costly downtime and equipment failure. This guide outlines the key steps, best practices, and safety protocols for inspecting, replacing, and maintaining CAT gasket kits to ensure optimal equipment performance and longevity.
1. Understanding CAT Gasket Kit Components
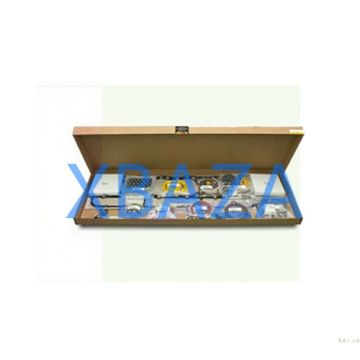
CAT gasket kits are engineered to meet the rigorous demands of Caterpillar machinery, including excavators, bulldozers, generators, and diesel engines. A typical kit includes:
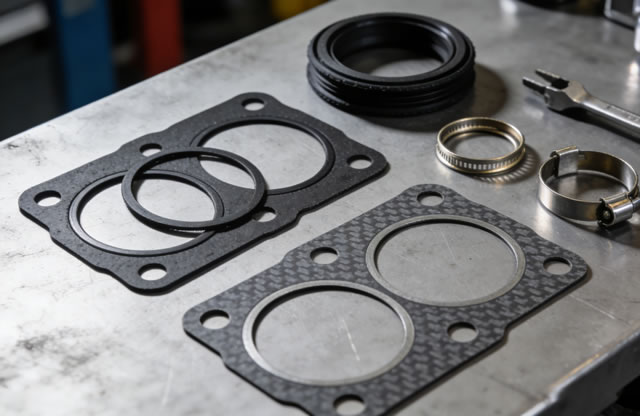
- Head gaskets: Seal the engine cylinder head to the block, preventing coolant and oil cross-contamination
- Valve cover gaskets: Prevent oil leaks from the valve cover assembly
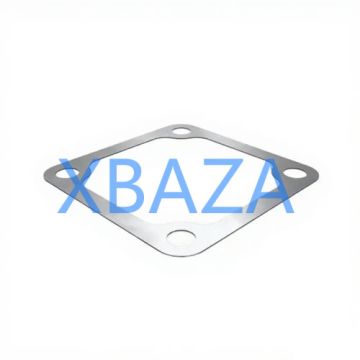
- Intake/exhaust manifold gaskets: Maintain air/fuel seal in the manifold system
- Oil pan gaskets: Seal the oil pan to the engine block, preventing oil leakage
- Water pump gaskets: Ensure proper coolant circulation without leaks
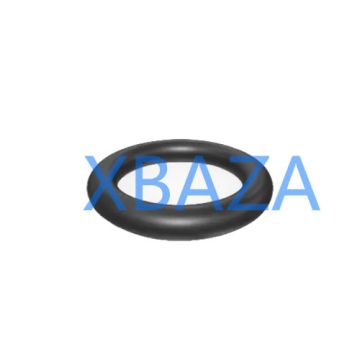
- O-rings and seals: Supplementary sealing components for hoses, fittings, and small connections
- Gasket sealant (where applicable): High-temperature, chemical-resistant sealant for enhanced adhesion
All components in a genuine CAT gasket kit are manufactured to strict OEM specifications, ensuring compatibility and performance with Caterpillar equipment. Using non-genuine gaskets can compromise seal integrity and void equipment warranties.
2. Pre-Repair Preparation and Safety
Before starting gasket replacement, gather the necessary tools and materials:
- Genuine CAT gasket kit (matching your equipment model/serial number)
- Torque wrench (calibrated to CAT specifications)
- Gasket scraper (plastic or wooden to avoid surface damage)
- Brake cleaner or CAT-approved solvent
- Lint-free cloths and shop towels
- Surface preparation tools (sandpaper, wire brush for minor surface imperfections)
- CAT-recommended sealant (if required for your specific application)
- Torque specifications manual for your equipment model
3. Step-by-Step Gasket Replacement Process
3.1 Inspection and Removal of Old Gaskets
- Document the assembly: Take photos or notes of the original gasket placement to ensure correct reinstallation
- Remove the component (e.g., valve cover, cylinder head) using proper socket sets and wrenches
- Carefully scrape away all remnants of the old gasket using a plastic scraper – avoid metal scrapers that can scratch mating surfaces
- Clean the mating surfaces thoroughly with CAT-approved solvent to remove oil, grease, or sealant residue
- Inspect mating surfaces for warping, cracks, or damage – even minor imperfections can cause leaks
- Repair or replace damaged surfaces (e.g., resurface cylinder heads) before installing new gaskets
3.2 Installation of New CAT Gasket Kit
- Verify gasket compatibility: Cross-check the kit part number with your equipment’s service manual
- Apply sealant only where specified: Over-application can cause sealant to enter oil/coolant passages
- Position the gasket correctly: Align bolt holes and alignment pins to avoid misplacement
- Reinstall the component and hand-tighten bolts/nuts in a crisscross pattern
- Torque bolts to CAT OEM specifications: Use a calibrated torque wrench and follow the recommended torque sequence (typically from center to outer bolts)
- Allow sealant (if used) to cure for the recommended time before starting the equipment
4. Post-Installation Testing and Verification
After installing the new CAT gasket kit, perform these critical checks to confirm proper sealing:
- Start the engine/machinery and run it at idle for 10-15 minutes to reach operating temperature
- Inspect all gasketed joints for leaks (oil, coolant, fuel, or air)
- Check fluid levels (oil, coolant) and top up as needed
- Monitor pressure gauges (if applicable) to ensure no pressure loss in hydraulic/pneumatic systems
- Perform a compression test on engine gaskets to verify cylinder pressure integrity
- Re-torque bolts after the first heat cycle (per CAT recommendations) to account for thermal expansion
5. Preventive Maintenance for CAT Gasket Kits
Proactive maintenance reduces the risk of gasket failure and extends equipment life. Follow these guidelines:
| Maintenance Task | Frequency | Key Notes |
|---|---|---|
| Visual gasket inspection | Every 250 operating hours / Monthly | Check for cracks, swelling, or fluid seepage |
| Fluid analysis | Every 500 operating hours / Quarterly | Detect coolant in oil (head gasket failure) or oil in coolant |
| Gasket replacement (scheduled) | Per equipment service manual (typically 2,000-5,000 hours) | Replace before failure to avoid unplanned downtime |
| Mating surface cleaning | During every gasket replacement | Ensure no debris or residue compromises seal |
6. Common Issues and Troubleshooting
Even with proper installation, gasket issues may arise. Here are common problems and solutions:
- Leaking gaskets: Caused by improper torque, contaminated mating surfaces, or incorrect gasket alignment. Re-torque to specs or reinstall with clean surfaces.
- Gasket blowout: Usually due to excessive pressure (e.g., engine overheating) or low-quality gaskets. Replace with genuine CAT kit and address root cause (e.g., cooling system repair).
- Sealant buildup: Over-application can block oil/coolant passages. Use sealant only as directed and clean excess before assembly.
- Warped mating surfaces: Resurface or replace components to ensure flat contact with gaskets.
7. Benefits of Using Genuine CAT Gasket Kits
Investing in genuine CAT gasket kits offers significant advantages over aftermarket alternatives:
- Engineered to CAT’s strict quality standards for maximum durability
- Precision-fit design ensures compatibility with CAT machinery
- Resistance to high temperatures, pressure, and chemical degradation
- Backed by Caterpillar’s warranty and technical support
- Reduced risk of premature failure and unplanned downtime
Conclusion
Proper maintenance and installation of CAT gasket kits are essential for preserving the performance and reliability of Caterpillar equipment. By following the best practices outlined in this guide – using genuine CAT parts, preparing surfaces correctly, torquing to specifications, and conducting regular inspections – you can minimize leaks, extend equipment life, and reduce overall maintenance costs. Always refer to your equipment’s service manual or consult a certified CAT technician for model-specific guidance.