


1. Introduction to CAT Solenoid Valves
Caterpillar (CAT) solenoid valves are critical precision components installed in CAT heavy machinery, including excavators, loaders, bulldozers, generators, and hydraulic systems. They act as electro-mechanical control switches that regulate the flow of hydraulic fluid, compressed air, fuel, or coolant by converting electrical energy into linear mechanical motion.
These valves are engineered for extreme working conditions—high pressure, heavy vibration, dust, moisture, and temperature fluctuations. Proper maintenance and timely repair are essential to ensure equipment reliability, prevent downtime, reduce operational costs, and extend the service life of both the solenoid valve and the entire CAT machine.
Common CAT solenoid valve applications: Hydraulic control systems, engine fuel systems, transmission control, brake systems, emission control, and auxiliary equipment operation.
- Turn off the machine engine and disconnect the battery/power supply to avoid electric shock or accidental valve activation.
- Relieve all system pressure (hydraulic, air, fuel) before disassembling the valve.
- Wear protective gear: gloves, goggles, and non-slip footwear.
- Work in a clean, well-ventilated area to prevent dust contamination.
- Use genuine CAT replacement parts for all repairs to ensure performance and compatibility.
2. Routine Preventive Maintenance (Recommended Schedule)
Preventive maintenance is the most effective way to avoid sudden solenoid valve failures. Follow this schedule based on CAT equipment operating conditions:
2.1 Daily Visual Inspection (5–10 Minutes)
- Check for external oil/fuel/air leaks around the valve body, fittings, and seals.
- Inspect electrical connectors for corrosion, loose wires, water damage, or burnt pins.
- Verify mounting bolts are tight and free of rust or damage.
- Listen for abnormal noises (buzzing, clicking, humming) during valve operation.
2.2 Weekly Maintenance (30 Minutes)
- Clean the valve exterior with a dry cloth to remove dust, mud, grease, and debris.
- Check cable insulation for cracks, wear, or damage; repair or replace damaged wiring immediately.
- Test valve response time to ensure quick, smooth operation without delay.
2.3 Monthly/250 Operating Hours Maintenance
- Disconnect electrical connectors and clean contacts with electrical contact cleaner.
- Inspect O-rings, gaskets, and seals for hardening, cracking, or swelling; replace worn seals.
- Lubricate moving components (plunger, spool) with CAT-approved lubricant if required.
- Test voltage and current supply to ensure they match the valve’s rated specifications.
2.4 Annual/2000 Operating Hours Overhaul
- Full disassembly and thorough cleaning of all internal components.
- Replacement of all wearable parts: seals, O-rings, springs, plungers, and bushings.
- Calibration of valve pressure and flow settings per CAT factory specifications.
- Performance testing to confirm normal operation before reinstallation.
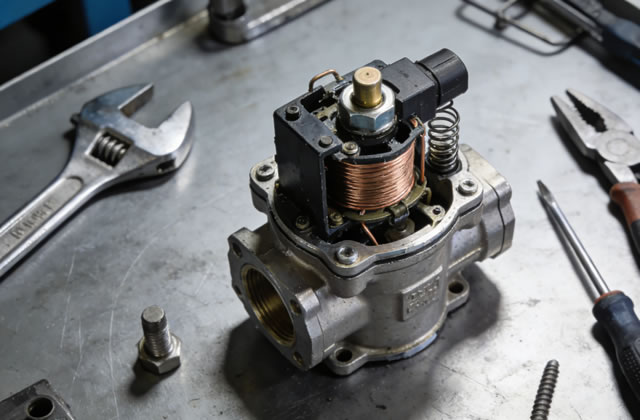
3. Step-by-Step CAT Solenoid Valve Disassembly & Cleaning
Contamination (dust, metal shavings, sludge) is the #1 cause of CAT solenoid valve failure. Regular internal cleaning restores optimal performance:
- Prepare Tools: Wrenches, screwdrivers, clean rags, lint-free cloths, CAT-approved cleaning solvent, compressed air (low pressure), and replacement seals.
- Mark Components: Label wires, connectors, and small parts to ensure correct reassembly.
- Disconnect Power & Pressure: Confirm zero electrical power and zero system pressure before disassembly.
- Remove the Valve: Loosen mounting bolts and carefully detach the valve from the machine.
- Disassemble the Valve: Separate the solenoid coil, valve body, plunger, spool, springs, and seals. Do not use excessive force to avoid damage.
- Clean Internal Parts: Soak plunger, spool, and valve body in cleaning solvent for 10–15 minutes. Remove dirt, sludge, and debris with a soft brush. Wipe dry with a lint-free cloth.
- Dry Components: Use low-pressure compressed air to blow out passages and ensure no moisture remains.
- Inspect Parts: Check for scratches, burrs, corrosion, or wear on the plunger, spool, and valve bore.
- Reassemble: Install new seals/O-rings, lubricate moving parts, and reassemble in reverse order of disassembly.
- Reinstall & Test: Mount the valve back to the machine, reconnect power and pressure, then test for leaks and proper operation.
4. Common Failures & Professional Repair Solutions
4.1 Solenoid Valve Fails to Open/Close
Possible Causes: No power supply, burnt coil, seized plunger, blocked fluid passages, damaged spring.
Repair Steps: Check voltage input → Test coil continuity (replace if faulty) → Clean seized plunger → Clear blocked passages → Replace broken springs.
4.2 Leakage (External or Internal)
Possible Causes: Worn/damaged seals, loose fittings, cracked valve body, improper installation.
Repair Steps: Replace all O-rings/gaskets → Tighten fittings to CAT torque specs → Replace cracked valve body → Reinstall correctly.
4.3 Abnormal Noise (Buzzing/Clicking/Humming)
Possible Causes: Low voltage, dirty plunger, loose components, damaged coil.
Repair Steps: Stabilize power supply → Clean plunger → Tighten mounting bolts → Replace faulty coil.
4.4 Slow or Unstable Operation
Possible Causes: Contaminated fluid, worn spool, insufficient pressure, clogged filters.
Repair Steps: Replace hydraulic/fuel fluid → Clean or replace spool → Check system pressure → Replace clogged filters.
4.5 Solenoid Coil Burnout
Possible Causes: Overvoltage, moisture ingress, continuous energization, short circuit.
Repair Steps: Replace coil with genuine CAT part → Seal connectors against moisture → Install protective relays → Fix wiring short circuits.
5. Solenoid Coil Testing & Replacement
The solenoid coil is the electrical core of the valve—test it regularly for functionality:
5.1 Coil Testing Steps
- Use a multimeter to measure coil resistance. Compare with CAT’s rated resistance value.
- Infinite resistance = open circuit (coil faulty).
- Zero resistance = short circuit (coil faulty).
- Test voltage supply to ensure it matches coil rating (12V, 24V, etc.).
5.2 Coil Replacement Guide
- Disconnect power and remove electrical connectors.
- Unscrew the old coil from the valve body.
- Install the new genuine CAT coil, ensuring proper alignment.
- Reconnect wiring and secure connectors.
- Test the coil for proper operation before full assembly.
6. Reassembly, Installation & Performance Testing
6.1 Reassembly Rules
- Use only new, genuine CAT seals and gaskets.
- Lubricate O-rings and plungers with compatible fluid before assembly.
- Follow the exact reverse order of disassembly.
- Tighten bolts to CAT’s specified torque (do not over-tighten).
6.2 Installation & Testing
- Mount the valve securely and reconnect all hoses/wiring.
- Restore system pressure and check for leaks.
- Reconnect power and activate the valve multiple times.
- Verify smooth opening/closing, no leaks, no abnormal noise, and correct flow control.
- Record maintenance details for future service tracking.
7. Storage & Long-Term Preservation
For unused or spare CAT solenoid valves:
- Clean and dry the valve completely before storage.
- Wrap in anti-rust paper and store in a dry, dust-free, cool environment.
- Avoid direct sunlight, high humidity, and heavy vibration.
- Lubricate internal components every 6 months during long-term storage.
- Inspect before reuse to ensure no corrosion or damage.
8. Conclusion & Best Practices
CAT solenoid valves are vital to the performance and safety of heavy machinery. Adhering to a strict maintenance schedule, performing timely repairs, and using genuine CAT parts will maximize valve lifespan, minimize equipment downtime, and reduce total operating costs.
Core Best Practices:
- Always prioritize safety: disconnect power and relieve pressure before service.
- Cleanliness is critical—prevent dust and contamination at all stages.
- Replace wearable parts regularly instead of waiting for failure.
- Use only genuine CAT components for repairs and replacements.
- Document all maintenance and repair activities for traceability.
By following this comprehensive guide, you can maintain CAT solenoid valves at peak performance and ensure the reliable operation of your Caterpillar equipment for years to come.


