Published: March 2026 | Applicable to Jenbacher J3, J4, J6 Series Gas Engines
1. Introduction to Jenbacher Valve Seats
Jenbacher gas engines are renowned for their high efficiency and reliability in power generation applications, and the valve seat is a critical component within the engine's combustion chamber. The valve seat forms a tight seal with the intake/exhaust valve, ensuring optimal compression ratio, preventing gas leakage, and maintaining the engine's thermal efficiency. Over time, due to high temperatures, mechanical wear, and chemical corrosion from fuel gases, valve seats can degrade, leading to reduced engine performance, increased fuel consumption, and even catastrophic engine failure if not properly maintained.
This guide outlines the essential maintenance procedures, inspection criteria, and best practices for Jenbacher valve seats to ensure long-term engine reliability and performance.
2. Pre-Maintenance Preparation
2.1 Safety Precautions
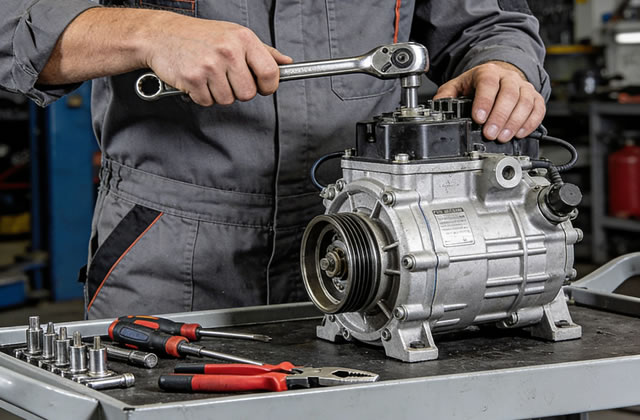
2.2 Required Tools and Materials
- Torque wrench (calibrated to Jenbacher specifications)
- Valve seat inspection gauge set (including bore gauges, depth gauges, and surface roughness testers)
- Valve seat cutter and reamer kit (Jenbacher OEM recommended)
- High-temperature lubricant (Jenbacher part no. 987654)
- Non-abrasive cleaning solvent (degreaser for carbon deposits)
- Magnetic particle inspection (MPI) kit (for crack detection)
- Replacement valve seats (genuine Jenbacher OEM parts only)
- Torch or heat gun (for press-fit seat installation/removal)
- Feeler gauges (for measuring seat-to-valve clearance)
3. Routine Inspection Procedures
Routine inspection of valve seats should be performed during scheduled engine overhauls (typically every 8,000 to 12,000 operating hours for Jenbacher engines) or if the engine exhibits symptoms such as rough idling, reduced power output, or increased exhaust emissions.
3.1 Visual Inspection
- Remove the valve cover, intake/exhaust manifolds, and valves to access the valve seat.
- Clean the valve seat thoroughly with degreaser and a soft-bristle brush to remove carbon deposits, oil residue, and debris.
- Check for visible damage: cracks, pitting, scoring, uneven wear, or deformation of the seat surface. Pay special attention to the sealing face (the contact area with the valve).
- Inspect the seat for signs of corrosion, especially if the engine operates on biogas, landfill gas, or other corrosive fuel gases.
3.2 Dimensional Inspection
| Inspection Parameter | Acceptable Tolerance (Jenbacher Spec) | Action if Out of Tolerance |
|---|---|---|
| Seat bore diameter | ±0.02 mm from OEM specification | Re-machine or replace seat |
| Seat surface roughness (Ra) | ≤ 1.6 μm | Re-face the seat surface |
| Seat-to-valve contact width | 2.5 – 3.5 mm (varies by engine model) | Re-cut the seat angle to adjust contact width |
| Seat runout (concentricity) | ≤ 0.015 mm | Replace valve seat |
3.3 Non-Destructive Testing (NDT)
For critical applications or high-hour engines, perform MPI (Magnetic Particle Inspection) to detect micro-cracks in the valve seat that are not visible to the naked eye. Cracks in the valve seat can propagate under thermal stress, leading to seat detachment or fracture. Any valve seat with detectable cracks must be replaced immediately.
4. Maintenance and Repair Procedures
4.1 Cleaning and De-Carbonization
Carbon buildup on the valve seat is a common issue, caused by incomplete combustion of fuel gases. To clean the seat:
- Use a non-abrasive solvent (avoid harsh chemicals that damage the seat's surface coating) to soak the seat for 15–20 minutes.
- Use a soft brass brush to gently remove carbon deposits—never use steel wool or abrasive pads, as they can scratch the sealing surface.
- Rinse the seat with clean solvent and dry with compressed air (ensure air pressure is ≤ 5 bar to avoid damaging the seat).
4.2 Valve Seat Re-Facing (Machining)
- Mount the valve seat cutter on a precision guide to ensure concentricity with the seat bore.
- Cut the seat surface in small increments (0.05 mm per pass) to avoid overheating and material deformation.
- After cutting, measure the contact width and surface roughness to confirm compliance with Jenbacher specifications.
- Deburr the seat edges with a fine file to remove any sharp points that could cause valve damage.
4.3 Valve Seat Replacement
Replace the valve seat if it exhibits any of the following: visible cracks, excessive wear (bore diameter out of tolerance), pitting deeper than 0.2 mm, or deformation of the sealing face.
- Heat the cylinder head to 100–120°C (use a controlled heat gun) to expand the material and ease removal of the press-fit seat—never use brute force, as it can damage the cylinder head.
- Remove the old seat using a puller tool designed for Jenbacher valve seats.
- Clean the seat bore in the cylinder head with a honing tool to remove any corrosion or debris, and verify the bore diameter matches OEM specifications.
- Chill the new valve seat to -20°C (using dry ice) for 30 minutes to shrink it, then press it into the bore using a hydraulic press (apply 5–8 tons of force, aligned concentrically).
- After installation, re-check the seat runout and surface finish, and re-face if necessary to ensure proper valve contact.
5. Post-Maintenance Verification
After completing valve seat maintenance or replacement, perform the following checks to confirm proper installation and functionality:
- Assemble the valves and valve springs, and use a leak-down tester to check for gas leakage—leakage rate should be ≤ 2% of the test pressure (3 bar) per Jenbacher standards.
- Torque the valve retainers to the OEM specification (varies by model: J3 = 28 N·m, J4 = 32 N·m, J6 = 38 N·m) using a calibrated torque wrench.
- Start the engine and run it at idle for 30 minutes, then check for abnormal noise, exhaust smoke, or oil consumption.
- Monitor engine parameters (compression pressure, exhaust temperature, fuel consumption) over the first 100 operating hours to ensure they remain within normal ranges.
6. Preventive Maintenance Best Practices
- Use only clean, dry fuel gas—contaminants (e.g., sulfur, moisture, particulates) accelerate valve seat corrosion and wear. Install and maintain gas filtration systems per Jenbacher recommendations.
- Adhere to the scheduled maintenance interval (8,000–12,000 operating hours) for valve seat inspection—do not extend intervals even if the engine appears to be running normally.
- Monitor engine cooling system performance—overheating increases thermal stress on valve seats; maintain coolant temperature at 85–90°C.
- Use genuine Jenbacher OEM valve seats and valves—aftermarket parts may not meet material or dimensional standards, leading to premature failure.
- Train maintenance technicians on Jenbacher-specific procedures—improper installation (e.g., incorrect torque, misalignment) is a leading cause of valve seat failure.
7. Troubleshooting Common Valve Seat Issues
| Symptom | Root Cause | Recommended Action |
|---|---|---|
| Reduced engine power | Valve seat leakage due to wear/pitting | Re-face or replace valve seat; check valve condition |
| Excessive exhaust smoke (black/blue) | Poor seat seal leading to incomplete combustion | Inspect seat contact width; re-cut and perform leak-down test |
| Abnormal ticking noise from engine | Loose valve seat or improper installation | Verify seat press-fit; re-torque or re-install seat |
| Cracked valve seat | Thermal shock or material fatigue | Replace seat; check cooling system and fuel gas temperature |