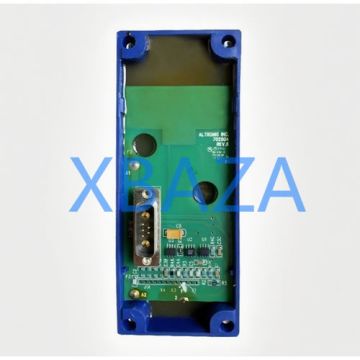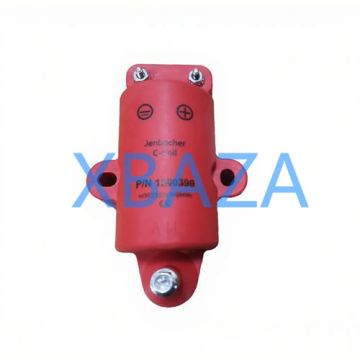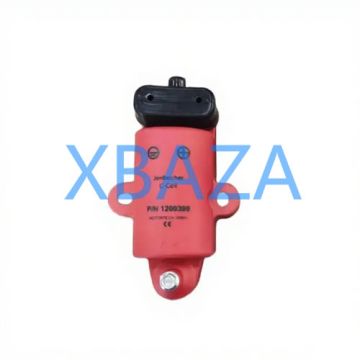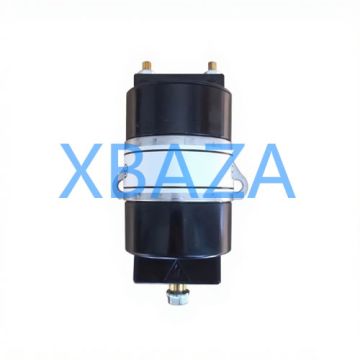
Jenbacher ignition coils are critical components in Jenbacher gas engines, responsible for converting low-voltage electrical energy into the high-voltage spark required to ignite the air-fuel mixture in the combustion chamber. Proper maintenance of these coils is essential to ensure optimal engine performance, reduce downtime, extend component lifespan, and maintain operational safety. This guide outlines the full scope of maintenance practices, inspection protocols, troubleshooting steps, and best practices for Jenbacher ignition coils.
1. Pre-Maintenance Safety Protocols
- Shut down the Jenbacher engine completely and confirm it is in a "zero-energy state" (no fuel supply, no electrical power to the ignition system).
- Isolate the ignition coil’s power source and lockout/tagout (LOTO) the electrical panel to prevent accidental power restoration.
- Wear appropriate personal protective equipment (PPE): insulated gloves, safety glasses, heat-resistant clothing, and anti-static wristbands (to prevent electrostatic discharge damage to coil electronics).
- Ensure the engine compartment is well-ventilated and free of flammable gases or vapors.
- Verify that the engine has cooled to a safe temperature (below 50°C) to avoid burns from hot surfaces.
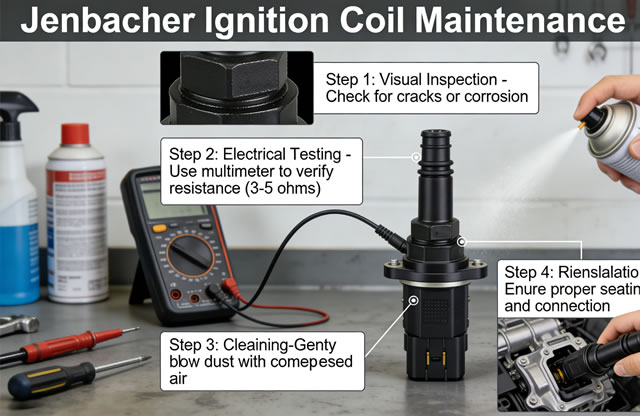
2. Routine Inspection Procedures
Routine inspections should be performed at intervals specified in the Jenbacher engine operation and maintenance manual (typically every 250 operating hours or 3 months, whichever comes first). The goal is to identify early signs of wear, damage, or degradation before they lead to coil failure.
2.1 Visual Inspection
- Check the ignition coil housing for physical damage: cracks, dents, scratches, or signs of impact. Even small cracks can lead to voltage leakage and coil failure.
- Inspect the coil’s electrical connectors (primary and secondary terminals) for corrosion, loose pins, or damaged insulation. Corrosion (white/green/black deposits) can disrupt electrical flow and cause misfires.
- Examine the high-voltage spark plug wire (if applicable) for fraying, brittle insulation, or loose connections to the coil’s secondary terminal.
- Look for signs of overheating: discoloration (yellow/brown spots on the coil housing), melted plastic, or burnt insulation—indicators of internal coil damage or improper voltage supply.
- Check for oil or fuel contamination on the coil surface. Leaks from the engine’s fuel system or oil seals can degrade the coil’s insulation and cause short circuits.
2.2 Electrical Testing
Use calibrated test equipment (multimeter, ignition coil tester, or Jenbacher-specific diagnostic tool) to verify the coil’s electrical performance:
- Primary Resistance Test: Disconnect the coil’s primary wiring harness. Set the multimeter to ohms (Ω) and measure the resistance between the primary terminals. For most Jenbacher ignition coils, the acceptable range is 0.5–2.0 Ω (refer to the engine’s technical datasheet for exact values). Deviations indicate internal winding damage.
- Secondary Resistance Test: Measure the resistance between the primary terminal and the high-voltage secondary terminal. The typical acceptable range is 8,000–15,000 Ω for Jenbacher coils. High resistance (above specs) indicates a broken secondary winding; low resistance (below specs) indicates a short circuit.
- Spark Test: If the coil passes resistance tests but engine misfires persist, perform a spark test. Connect the coil to a test spark plug, power the coil, and check for a strong, consistent blue spark. A weak, yellow spark or no spark confirms coil degradation.
3. Cleaning and Preventive Maintenance
Regular cleaning removes contaminants that can compromise the coil’s performance and insulation. Follow these steps for safe and effective cleaning:
- Use a soft-bristled brush to remove loose dirt, dust, and debris from the coil surface and terminals. Avoid metal brushes (they can scratch the insulation).
- For oily or greasy deposits, use a non-flammable, alcohol-based cleaning solvent (isopropyl alcohol, 90% concentration) or Jenbacher-approved coil cleaner. Apply the solvent to a lint-free cloth and wipe the coil—do not spray solvent directly onto the coil or electrical connectors.
- Clean corrosion from electrical terminals using a terminal cleaner tool or a small wire brush (for heavy corrosion), then apply a thin layer of dielectric grease to prevent future corrosion.
- Ensure the coil is completely dry (allow 15–20 minutes of air drying) before reconnecting electrical components or reinstalling the coil.
- Inspect and replace damaged spark plug wires or boots during cleaning—worn wires can cause excessive strain on the ignition coil.
4. Replacement Procedures
Replace the Jenbacher ignition coil if it fails any inspection/test, shows signs of irreparable damage, or reaches the end of its service life (typically 10,000–15,000 operating hours for Jenbacher coils). Follow these steps for proper replacement:
- Disconnect the primary electrical connector from the coil (press the release tab and pull gently to avoid damaging pins).
- Remove the high-voltage cable (spark plug wire) from the secondary terminal—twist the boot slightly to break the seal before pulling to prevent damage to the wire or terminal.
- Remove the mounting bolts/screws that secure the coil to the engine (use a torque wrench to avoid over-tightening or stripping threads).
- Clean the mounting surface on the engine block to remove dirt, debris, or old gasket material (if applicable).
- Install the new Jenbacher OEM ignition coil (use only genuine Jenbacher parts to ensure compatibility and performance). Align the coil with the mounting holes and hand-tighten the bolts before final torquing (follow Jenbacher specs: typically 8–10 Nm for mounting bolts).
- Reconnect the high-voltage cable to the secondary terminal (ensure it clicks into place to confirm a secure connection).
- Reattach the primary electrical connector (verify it locks into position to prevent loose connections).
- Remove all LOTO devices and perform a functional test: start the engine and check for smooth operation, no misfires, and normal coil temperature (no excessive heating).
5. Troubleshooting Common Ignition Coil Issues
| Symptom | Potential Cause | Resolution |
|---|---|---|
| Engine misfires / rough idle | Low secondary resistance (short circuit), corroded terminals, or damaged spark plug wire | Test coil resistance; clean/replace terminals; replace spark plug wire; replace coil if resistance is out of spec |
| No spark from coil | Broken primary/secondary winding, power supply failure, or faulty ignition module | Test coil resistance; check power to primary terminal; replace coil or ignition module as needed |
| Coil overheating | Excessive voltage supply, poor ventilation, or oil/fuel contamination | Check voltage regulator; clean coil and engine compartment; repair oil/fuel leaks; replace coil if damaged |
| Voltage leakage (arcing) | Cracks in coil housing, worn insulation, or loose high-voltage connection | Inspect coil for cracks; replace coil if damaged; re-secure high-voltage cable with dielectric grease |
6. Long-Term Maintenance Best Practices
- Follow Jenbacher’s recommended maintenance intervals (do not extend intervals beyond OEM specifications).
- Use only genuine Jenbacher ignition coils and replacement parts—aftermarket parts may not meet performance or safety standards.
- Monitor the engine’s electrical system (voltage regulator, battery, alternator) to ensure stable power supply to the ignition coils (fluctuating voltage accelerates coil degradation).
- Keep the engine compartment clean and dry to prevent moisture buildup (moisture causes corrosion and electrical short circuits).
- Document all maintenance activities (inspections, tests, cleanings, replacements) in a logbook—this helps track coil performance and identify recurring issues.
- Train maintenance technicians on Jenbacher-specific ignition system maintenance (OEM training is recommended for complex troubleshooting).
7. Conclusion
Jenbacher ignition coils are vital to the reliable operation of Jenbacher gas engines, and proactive maintenance is the key to avoiding costly failures. By following the safety protocols, routine inspection procedures, cleaning guidelines, and replacement steps outlined in this guide, operators can ensure that ignition coils perform optimally, extend their service life, and maintain the overall efficiency and safety of the engine. Always refer to the Jenbacher engine’s official maintenance manual for model-specific specifications and procedures, as variations may exist between different Jenbacher engine series (e.g., J312, J420, J620).