Technical Guidelines for Optimal Performance and Longevity
Table of Contents
- 1. Overview of CAT Valve Seats
- 2. Pre-Maintenance Inspection Procedures
- 3. Proper Cleaning Techniques
- 4. Repair Procedures for Damaged Valve Seats
- 5. Reinstallation and Torque Specifications
- 6. Post-Maintenance Testing and Validation
- 7. Preventive Maintenance Best Practices
- 8. Safety Protocols and Compliance
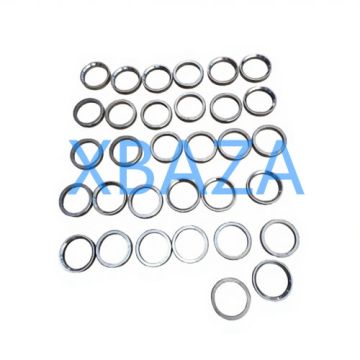
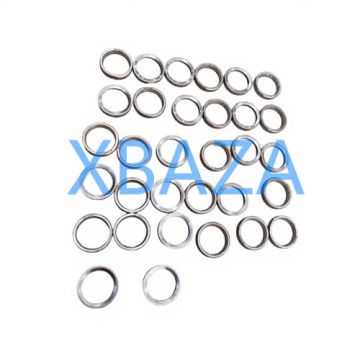
1. Overview of CAT Valve Seats
CAT (Caterpillar) valve seats are critical components in internal combustion engines, hydraulic systems, and industrial machinery, serving as the sealing interface between the valve and the cylinder head or valve body. These precision-engineered components are designed to withstand extreme temperatures (up to 1800°F / 982°C), high pressure, and constant mechanical stress. Proper maintenance of valve seats is essential to prevent leaks, maintain compression ratios, and ensure the overall efficiency and reliability of CAT equipment.
CAT valve seats are typically manufactured from high-alloy cast iron, stellite, or nickel-based alloys to provide superior wear resistance and thermal stability. Over time, however, factors such as fuel contamination, improper lubrication, excessive engine load, and normal wear can lead to degradation, pitting, cracking, or warping of the valve seat surface.
2. Pre-Maintenance Inspection Procedures
Before initiating any maintenance or repair work, a thorough inspection is required to identify the extent of damage and determine the appropriate course of action. Follow these step-by-step inspection guidelines:
- Visual Inspection: Remove the valve assembly and clean the valve seat area with a non-abrasive solvent. Check for visible signs of damage, including pitting, scoring, cracks, corrosion, or uneven wear on the sealing surface. Use a magnifying glass to detect micro-cracks or fine pitting that may not be visible to the naked eye.
- Dimension Verification: Use precision measuring tools (micrometers, feeler gauges, and valve seat gauges) to check the seat diameter, width, and runout. Compare measurements against CAT OEM specifications (refer to the equipment service manual) to identify deviations beyond acceptable tolerances (typically ±0.001 inches / 0.025 mm).
- Seat Contact Pattern Check: Apply a thin layer of prussian blue or valve seat dye to the valve face, then lightly seat the valve and rotate it 1/4 turn. The contact pattern on the valve seat should be a continuous ring (1.5-2.5 mm wide) centered on the seat surface. An off-center or broken pattern indicates misalignment or wear.
- Hardness Testing: For heavy-duty applications, perform a hardness test (Rockwell C scale) to ensure the valve seat material maintains its specified hardness (typically 45-55 HRC). Softening of the material indicates overheating or material fatigue.
3. Proper Cleaning Techniques
Effective cleaning is a prerequisite for successful repair and reinstallation, as contaminants can compromise the seal and accelerate wear. Follow these industry-standard cleaning practices:
- Initial Degreasing: Use a CAT-approved solvent (e.g., Caterpillar Heavy-Duty Degreaser) to remove oil, grease, and carbon deposits from the valve seat and surrounding area. Avoid harsh solvents that may damage alloy surfaces.
- Carbon Deposit Removal: For stubborn carbon buildup, use a non-metallic scraper (nylon or plastic) to avoid scratching the seat surface. Alternatively, use a soft-bristle brush (brass or nylon) with solvent to gently agitate deposits.
- Ultrasonic Cleaning (Recommended): For precision cleaning, immerse the valve seat (or cylinder head assembly) in an ultrasonic cleaner with aqueous cleaning solution (60-80°C) for 10-15 minutes. This removes microscopic contaminants from crevices and ensures a debris-free surface.
- Drying and Inspection: Dry the valve seat with compressed air (filtered to 0.01 micron) to prevent moisture residue. Re-inspect the surface to confirm all contaminants are removed before proceeding to repair.
4. Repair Procedures for Damaged Valve Seats
The repair method depends on the type and severity of damage. Below are the most common repair techniques for CAT valve seats:
4.1 Light Wear or Pitting (Minor Damage)
For surface imperfections (pitting < 0.1 mm deep or light scoring), resurfacing is sufficient:
- Mount the valve seat cutter (CAT OEM tool or equivalent) on a guide pilot that matches the valve stem diameter to ensure concentricity.
- Select the correct cutter angle (typically 45° for intake seats, 30°/45° for exhaust seats) and feed rate (0.002-0.003 inches per pass).
- Make light, gradual cuts to remove the damaged layer, stopping frequently to check the contact pattern and dimensions.
- Finish with a honing stone (fine grit, 400-600) to polish the seat surface and remove any machining marks.
4.2 Severe Damage (Cracks, Deep Pitting, or Warping)
For significant damage, valve seat replacement is necessary:
- Use a CAT-specified puller tool to remove the worn valve seat insert without damaging the cylinder head or valve body bore.
- Clean the seat bore thoroughly and check for damage (e.g., scoring, out-of-roundness) – repair the bore if necessary to meet OEM tolerances.
- Heat the cylinder head/valve body to 200-250°F (93-121°C) (thermal expansion) and press-fit the new CAT OEM valve seat insert using a press tool with controlled force (refer to service manual for specific pressure values).
- After installation, resurface the new seat to achieve the correct contact pattern and dimensions as outlined in Section 4.1.
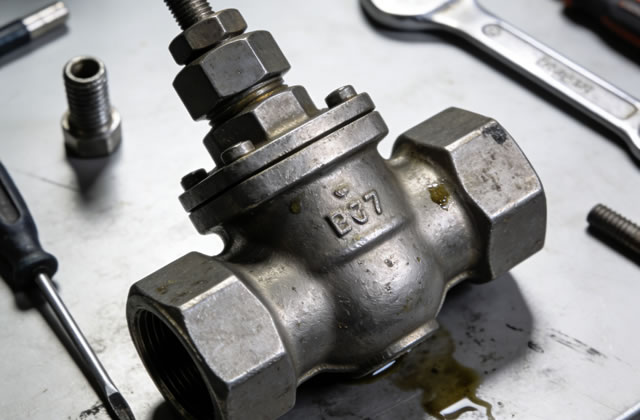
5. Reinstallation and Torque Specifications
Improper installation can negate all repair efforts, so strict adherence to CAT specifications is critical:
- Pre-Installation Preparation: Apply a thin layer of CAT-approved anti-seize compound (e.g., Caterpillar Multi-Purpose Anti-Seize) to the valve seat outer diameter (if applicable) to prevent galling during installation.
- Valve Guide Inspection: Ensure the valve guide is within OEM tolerances (clearance: 0.001-0.003 inches) – worn guides can cause valve misalignment and premature seat wear.
- Torque Application: For bolted valve seat assemblies, use a calibrated torque wrench to apply torque in incremental steps (30%, 60%, 100%) to the CAT-specified value (typically 25-45 ft-lbs for small engines, up to 80 ft-lbs for heavy-duty equipment). Follow the cross-patterning sequence to ensure even clamping force.
- Final Alignment Check: After installation, recheck the valve seat contact pattern and runout to confirm no misalignment occurred during torquing.
6. Post-Maintenance Testing and Validation
Testing is essential to verify the effectiveness of repairs and ensure equipment reliability:
- Leak Down Test: Perform a cylinder leak down test (for engine valve seats) – leak rates should be less than 5% for new/repair seats (reference: CAT OEM standards). High leak rates indicate poor sealing or misalignment.
- Pressure Testing (Hydraulic Valves): For hydraulic valve seats, apply pressure (1.5x the operating pressure) and monitor for leaks over 30 minutes – no visible leakage or pressure drop is acceptable.
- Operational Testing: Run the equipment under light load for 30-60 minutes, then inspect the valve seat area for overheating, noise, or leaks. Check oil consumption and exhaust emissions (for engines) to confirm normal operation.
- Post-Test Inspection: After initial operation, shut down the equipment and recheck torque values and contact patterns – retorque if necessary (typical recheck interval: 25 operating hours).
Key Note
Preventive maintenance reduces valve seat damage by up to 70% – prioritize regular inspections over reactive repairs to minimize downtime and costs.
7. Preventive Maintenance Best Practices
Proactive maintenance extends the service life of CAT valve seats and reduces unplanned downtime. Implement these practices:
- Regular Inspection Schedule:
- Light-duty applications: Inspect every 500 operating hours or 6 months
- Medium-duty applications: Inspect every 250 operating hours or 3 months
- Heavy-duty/high-temperature applications: Inspect every 100 operating hours or 1 month
- Fuel and Oil Quality Control: Use only CAT-approved fuels (low sulfur content) and lubricants to prevent carbon buildup and corrosion of valve seat surfaces.
- Engine Tuning: Maintain proper air-fuel ratio (14.7:1 for gasoline engines, 16:1-18:1 for diesel engines) to avoid lean burning (which causes overheating) or rich burning (which causes carbon deposits).
- Cooling System Maintenance: Ensure the cooling system operates within CAT-specified temperatures (180-200°F / 82-93°C) to prevent valve seat overheating and material softening.
- Storage and Handling: When equipment is stored for extended periods, apply a corrosion inhibitor to valve seats and keep the engine/hydraulic system sealed to prevent moisture ingress.
Safety Warning
Always follow OSHA and CAT safety guidelines when performing valve seat maintenance. Failure to adhere to safety protocols can result in serious injury or equipment damage.
8. Safety Protocols and Compliance
Valve seat maintenance involves working with heavy equipment, high-temperature components, and precision tools – strict safety protocols are mandatory:
- Lockout/Tagout (LOTO): Isolate all energy sources (electrical, hydraulic, pneumatic) and apply LOTO tags before starting work to prevent accidental equipment activation.
- Personal Protective Equipment (PPE): Wear approved safety glasses, heat-resistant gloves, steel-toe boots, and face shields when handling hot components or using cutting tools.
- Ventilation: Ensure adequate ventilation when using solvents or cleaning agents to prevent inhalation of harmful fumes – use a respirator if required by the material safety data sheet (MSDS).
- Tool Safety: Use only calibrated, CAT-approved tools to avoid tool failure or inaccurate measurements. Inspect tools for damage before each use.
- Training Requirements: Only trained and certified technicians should perform CAT valve seat repairs – improper procedures can lead to equipment failure and safety hazards.