Optimizing Performance, Extending Lifespan, and Ensuring Reliability
1. Introduction to Jenbacher Air Filters
Jenbacher gas engines are renowned for their high efficiency and durability in power generation applications, and the air filter is a critical component that protects the engine from harmful contaminants. The primary function of the Jenbacher air filter is to remove dust, dirt, pollen, and other particulate matter from the intake air before it enters the engine's combustion chamber. A well-maintained air filter not only prevents premature wear of engine components (such as pistons, cylinders, and valves) but also ensures optimal air-fuel ratio, maximizing engine efficiency and reducing emissions.
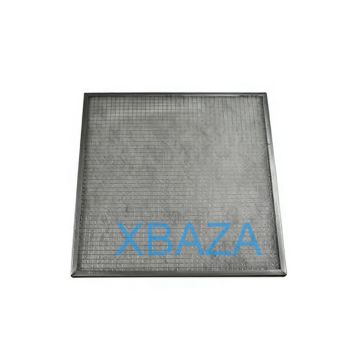
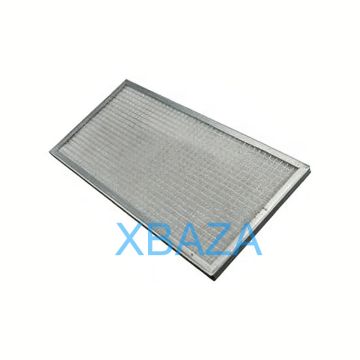
Jenbacher air filters are engineered to meet the specific airflow requirements of Jenbacher gas engines (including J312, J420, J620, and J920 series) and are available in two main types: dry-type air filters (paper/cellulose media) and oil-bath air filters (for high-contamination environments).
2. Key Maintenance Intervals
Regular maintenance is essential to avoid filter clogging, which can lead to reduced engine power, increased fuel consumption, and even engine damage. The following intervals are recommended by Jenbacher, but may need adjustment based on operating conditions (e.g., dusty environments require more frequent checks):
| Operating Environment | Inspection Frequency | Replacement Frequency |
|---|---|---|
| Clean/Indoor (low dust) | Every 500 operating hours | Every 2000 operating hours or 12 months (whichever comes first) |
| Moderate Dust (outdoor/urban) | Every 250 operating hours | Every 1000 operating hours or 6 months (whichever comes first) |
| High Dust (construction/mining) | Every 100 operating hours | Every 500 operating hours or 3 months (whichever comes first) |
3. Step-by-Step Inspection Procedure
Before performing any inspection or maintenance, ensure the engine is shut down, cooled to ambient temperature, and the intake system is depressurized to prevent injury.
- Visual Inspection
- Remove the air filter housing cover (using appropriate tools such as a socket wrench or screwdriver).
- Check the filter element for visible damage (tears, holes, or collapsed media) – damaged filters must be replaced immediately.
- Inspect the filter housing for debris, oil contamination, or moisture buildup (moisture can cause filter degradation and engine corrosion).
- Check the gasket/seal on the housing cover for wear or damage – replace if necessary to prevent unfiltered air from entering the engine.
- Airflow Resistance Test
- Use a differential pressure gauge to measure the pressure drop across the filter (refer to Jenbacher's technical manual for specific threshold values – typically 2-3 kPa for a clean filter).
- If the pressure drop exceeds the manufacturer's limit, the filter is clogged and must be replaced (do not attempt to clean and reuse if the pressure drop is too high).
- Post-Inspection Checks
- Reinstall the filter element correctly (ensure it is seated properly in the housing).
- Secure the housing cover and torque the fasteners to Jenbacher's specified values (over-tightening can damage the cover or gasket).
- Start the engine and check for air leaks (listen for hissing sounds or monitor intake pressure).
4. Cleaning and Replacement Guidelines
4.1 Cleaning Reusable Filters (Oil-Bath or Foam Filters)
Only clean filters that are designated as reusable by Jenbacher – dry paper filters should never be cleaned and reused (cleaning can damage the filter media and reduce filtration efficiency).
- Remove the filter element from the housing and tap it gently to remove loose dust (do not use compressed air at high pressure, as this can damage the media).
- For oil-bath filters: Drain the old oil, clean the housing with a mild detergent and warm water, and rinse thoroughly.
- For foam filters: Wash with a non-flammable cleaning solvent or mild soap and water, then squeeze out excess liquid (do not wring the foam).
- Allow the filter to dry completely (24 hours in a well-ventilated area – do not use heat sources such as heaters or blowers).
- Re-oil foam filters with Jenbacher-approved engine oil (apply a thin, even coat and squeeze out excess oil to avoid oil ingestion into the engine).
- Reinstall the filter and verify proper seating.
4.2 Filter Replacement Procedure
- Ensure you have a genuine Jenbacher replacement filter (using non-genuine filters can void the engine warranty and compromise performance).
- Shut down the engine and follow lockout/tagout (LOTO) procedures to prevent accidental startup.
- Remove the housing cover and extract the old filter element (note the orientation for correct reinstallation).
- Clean the filter housing with a clean, dry cloth to remove any debris (do not use compressed air directly into the housing, as this can push contaminants into the intake manifold).
- Install the new filter element, ensuring it aligns with the housing guides and the gasket/seal is properly seated.
- Reattach the housing cover and tighten fasteners to the manufacturer's recommended torque (refer to Jenbacher service manual).
- Reset the maintenance indicator (if equipped) and update the maintenance log with the replacement date and filter part number.
5. Troubleshooting Common Air Filter Issues
- Excessive Pressure Drop
- Cause: Clogged filter, incorrect filter installation, or restricted intake air path.
- Solution: Replace the filter, check for proper installation, and inspect the intake duct for obstructions.
- Oil Contamination on Filter
- Cause: Crankcase ventilation system malfunction, excessive engine oil consumption, or oil carryover from the intake system.
- Solution: Inspect the crankcase ventilation valve, check engine oil levels, and replace the contaminated filter.
- Filter Element Damage
- Cause: Improper handling during installation, excessive vibration, or foreign object intrusion.
- Solution: Replace the damaged filter, inspect the housing for debris, and ensure proper torque on housing fasteners.
- Reduced Engine Power
- Cause: Clogged air filter restricting airflow, leading to lean fuel mixture or incomplete combustion.
- Solution: Replace the air filter and perform a system check to verify intake airflow.
6. Best Practices for Long-Term Performance
- Always use genuine Jenbacher replacement filters – aftermarket filters may not meet the required filtration efficiency or airflow specifications.
- Store replacement filters in a clean, dry, and sealed environment to prevent contamination before installation.
- Conduct pre-startup checks of the air filter before operating the engine after long periods of inactivity.
- Train maintenance personnel on proper filter handling and installation procedures to avoid human error.
- Monitor filter performance data (pressure drop, replacement frequency) to optimize maintenance schedules for your specific operating conditions.
- Inspect the entire intake system (ducts, hoses, clamps) during filter maintenance to identify potential air leaks or damage.
7. Conclusion
Proper maintenance and repair of Jenbacher air filters are critical to ensuring the long-term reliability, efficiency, and safety of Jenbacher gas engines. By following the recommended inspection intervals, using genuine replacement parts, and adhering to best practices for cleaning and installation, you can minimize engine downtime, reduce repair costs, and extend the overall lifespan of your Jenbacher power generation system. Always refer to the official Jenbacher service manual for model-specific guidelines and consult a certified Jenbacher technician for complex repairs or troubleshooting.