


Jenbacher gas engines are widely recognized for their reliability and efficiency in power generation applications. The brush assembly (carbon brushes) is a critical component of the generator’s electrical system, responsible for transferring current between the stationary and rotating parts of the alternator. Proper maintenance of Jenbacher brushes is essential to prevent unplanned downtime, extend equipment lifespan, and ensure optimal performance. This guide outlines step-by-step procedures for inspection, cleaning, repair, and replacement of Jenbacher brushes, along with best practices for preventive maintenance.
1. Key Functions of Jenbacher Brushes
Before diving into maintenance procedures, it is important to understand the core role of brushes in Jenbacher generators:
- Transmit electrical current from the stationary stator to the rotating rotor (slip rings) of the alternator.
- Maintain consistent contact pressure to ensure uninterrupted current flow.
- Withstand high temperatures and mechanical wear during operation.
- Prevent arcing and electrical damage to slip rings and other components.
2. Pre-Maintenance Safety Precautions
- Shut down the generator completely and disconnect the main power supply (lockout/tagout procedure).
- Allow the engine to cool to ambient temperature to avoid burns.
- Wear appropriate PPE (Personal Protective Equipment): insulated gloves, safety glasses, heat-resistant clothing, and anti-static wristbands (if applicable).
- Verify that the slip ring assembly is free of residual voltage using a multimeter.
- Secure the rotor to prevent accidental rotation during maintenance.
3. Routine Inspection Procedures
Regular inspection is the foundation of effective brush maintenance. Inspect Jenbacher brushes every 250 operating hours or monthly (whichever comes first) for the following indicators:
3.1 Visual Inspection
- Check brush length: Replace brushes if the remaining length is less than 50% of the original size (refer to Jenbacher OEM specifications for exact thresholds).
- Inspect for cracks, chipping, or excessive wear on the brush surface.
- Check for uneven wear patterns (indicates misalignment or improper pressure).
- Examine brush holders for damage, corrosion, or blockages (e.g., carbon dust buildup).
- Verify that brush springs are intact and provide consistent pressure (no deformation or loss of tension).
3.2 Functional Testing
- Measure brush contact pressure using a spring scale (standard pressure: 1.5–2.5 N/cm² for Jenbacher brushes).
- Test electrical continuity between the brush and brush holder using a multimeter (no open circuits allowed).
- Inspect slip rings for surface roughness, grooving, or discoloration (indicates poor brush contact).
4. Cleaning and Minor Repair
Address minor issues promptly to avoid costly repairs or replacements:
- Remove loose carbon dust from brush holders and slip rings using a soft-bristle brush (avoid metal brushes to prevent scratching).
- Clean slip ring surfaces with isopropyl alcohol and a lint-free cloth to remove oil, grease, or carbon deposits.
- Straighten misaligned brush holders (if minor) using non-metallic tools to avoid damaging insulation.
- Replace worn or damaged brush springs (use only Jenbacher OEM replacement parts to ensure compatibility).
- Lubricate brush holder guide rails with a small amount of high-temperature silicone grease (do not over-lubricate).
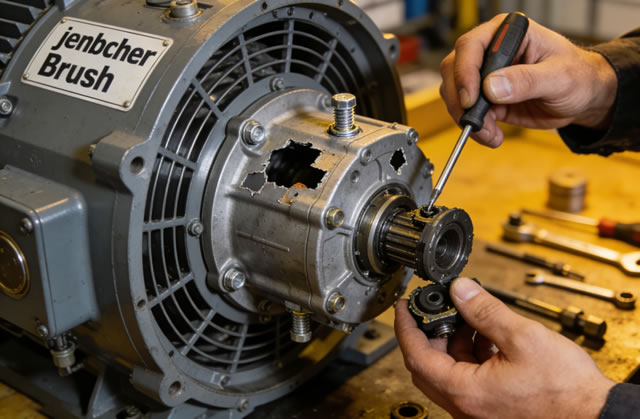
5. Complete Brush Replacement Procedure
Replace Jenbacher brushes if inspection reveals excessive wear, damage, or loss of functionality. Follow these steps:
- Remove the brush cover and disconnect the electrical wiring from the brush assembly (label wires to ensure correct reinstallation).
- Release the brush spring and carefully remove the old brush from the holder.
- Clean the brush holder thoroughly to remove all carbon dust and debris.
- Install the new Jenbacher OEM brush (ensure correct orientation and fitment).
- Reattach the brush spring and verify proper pressure (refer to Section 3.2).
- Reconnect the electrical wiring (match labels to avoid reverse polarity).
- Reinstall the brush cover and torque all fasteners to Jenbacher specified values (typically 8–10 Nm).
- Perform a test run of the generator (no-load) for 15–20 minutes to check for arcing, unusual noise, or vibration.
6. Preventive Maintenance Schedule
| Maintenance Task | Frequency | Key Notes |
|---|---|---|
| Visual inspection of brushes | Every 250 operating hours / Monthly | Check wear, damage, and alignment |
| Cleaning of brush holders/slip rings | Every 500 operating hours / Quarterly | Remove carbon dust and contaminants |
| Brush pressure testing | Every 1,000 operating hours / Semi-annually | Adjust or replace springs if pressure is outside specs |
| Full brush replacement | Every 3,000–5,000 operating hours (or as needed) | Use only Jenbacher OEM parts |
| Slip ring resurfacing | Every 10,000 operating hours / If grooving >0.5mm | Perform by certified Jenbacher technicians |
7. Troubleshooting Common Brush Issues
- Excessive brush wear: Check for misalignment, improper pressure, or contaminated slip rings. Replace brushes and correct root cause.
- Arcing at slip rings: Clean slip rings, verify brush pressure, or replace worn brushes. Inspect for loose wiring or damaged insulation.
- Brush sticking in holder: Clean holder of carbon dust/debris, lubricate guide rails, or replace damaged holders.
- Low output voltage: Check brush continuity, spring pressure, and slip ring condition. Replace faulty components as needed.
8. Conclusion
Proper maintenance of Jenbacher generator brushes is a critical aspect of overall equipment reliability. By following the inspection, cleaning, and replacement procedures outlined in this guide—along with adhering to the preventive maintenance schedule—operators can minimize unplanned downtime, reduce repair costs, and ensure the long-term performance of Jenbacher gas engines. Always use genuine Jenbacher OEM parts for replacements, and consult certified technicians for complex repairs or adjustments beyond routine maintenance.

