Maximize Performance, Extend Lifespan, and Ensure Reliability
1. Introduction to CAT Turbochargers
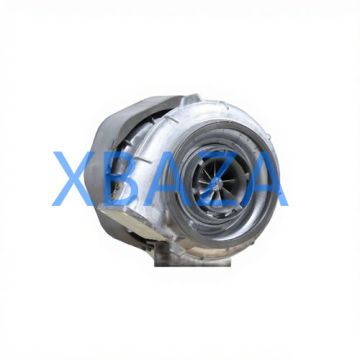
Caterpillar (CAT) turbochargers are critical components in diesel engines, designed to boost engine power and efficiency by compressing intake air. Used across heavy-duty applications including construction, mining, agriculture, and marine operations, CAT turbochargers are engineered for durability—but proper maintenance and timely repair are essential to prevent costly failures and downtime.
A well-maintained CAT turbocharger can operate reliably for thousands of hours, while neglect can lead to issues like oil leaks, compressor wheel damage, bearing wear, or complete turbo failure. This guide outlines best practices for inspection, maintenance, repair, and troubleshooting of CAT turbochargers.
2. Pre-Maintenance Preparation
Before performing any maintenance or repair on a CAT turbocharger, ensure you follow these critical steps to ensure safety and accuracy:
- Safety First: Disconnect the battery, relieve all engine pressure, and allow the turbocharger and engine to cool completely (minimum 30 minutes) to avoid burns or injury.
- Gather Tools & Parts: Prepare CAT OEM (Original Equipment Manufacturer) parts, torque wrenches, socket sets, cleaning solvents, lint-free cloths, compressed air, and a turbocharger rebuild kit (if needed).
- Document the Process: Take photos of the turbocharger assembly before disassembly to ensure correct reassembly (critical for alignment and torque specs).
- Clean the Surroundings: Remove dirt, debris, and oil from the turbocharger and engine bay to prevent contamination during disassembly.
3. Routine Maintenance Procedures
Regular maintenance is the key to preventing turbocharger failure. Follow this schedule based on engine operating hours (per CAT OEM recommendations):
| Maintenance Task | Frequency | Key Steps |
|---|---|---|
| Visual Inspection | Every 250 operating hours | Check for oil leaks, loose bolts, damaged hoses, or signs of corrosion; inspect intake/exhaust connections for cracks. |
| Oil Filter & Oil Change | Every 500 operating hours | Use only CAT-approved engine oil (API CJ-4 or higher); replace oil filter with OEM part to prevent oil contamination. |
| Air Filter Replacement | Every 1,000 operating hours (or sooner if dusty) | Clogged air filters cause compressor surge; replace with CAT OEM air filters to maintain airflow. |
| Turbocharger Oil Line Cleaning | Every 2,000 operating hours | Flush oil supply/drain lines to remove sludge; ensure no restrictions (restricted oil flow causes bearing failure). |
| Full Turbo Inspection | Every 5,000 operating hours | Check shaft play, compressor/turbine wheel condition, and seal integrity; measure clearance per CAT specs. |
3.1 Key Maintenance Checks
- Shaft Play: Use a dial indicator to check radial and axial play. Excessive play (over 0.15mm radial / 0.3mm axial) indicates bearing wear and requires rebuild/replacement.
- Oil Leaks: Inspect the turbocharger seals—oil leaks at the compressor end cause black smoke; leaks at the turbine end cause blue smoke.
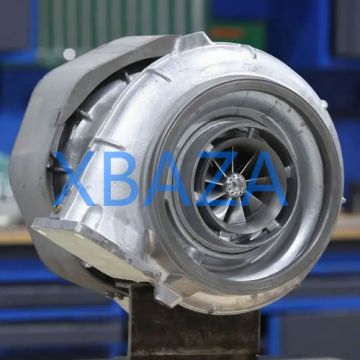
- Wheel Condition: Check compressor/turbine wheels for cracks, dents, or foreign object damage (FOD). Even small dents can cause imbalance and vibration.
- Exhaust Manifold: Ensure manifold bolts are tight and gaskets are intact—exhaust leaks cause turbo overheating and reduced efficiency.
4. Turbocharger Repair Process
If maintenance reveals damage or wear, follow this step-by-step repair process for CAT turbochargers (for minor rebuilds; major failures require professional service):
4.1 Disassembly
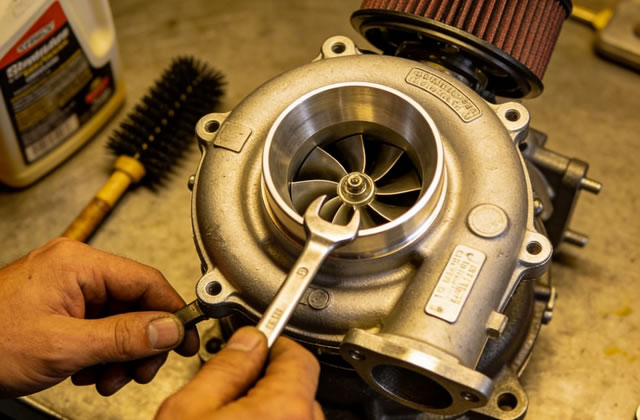
- Remove the turbocharger from the engine: Disconnect intake/exhaust pipes, oil supply/drain lines, and electrical connectors (if equipped with wastegate/sensor).
- Label all hoses/bolts: Use tape or markers to label components for easy reassembly.
- Disassemble the turbocharger: Remove the compressor housing, turbine housing, and center section; take care not to damage delicate components (e.g., thrust bearings).
- Clean all components: Use CAT-approved solvent to remove carbon deposits, oil sludge, and debris—avoid abrasive cleaners that scratch precision surfaces.
4.2 Component Inspection & Replacement
- Replace worn bearings: Thrust and journal bearings are wear items—always replace them during a rebuild, even if they appear intact.
- Check seals: Replace oil seals and O-rings (included in CAT turbo rebuild kits) to prevent leaks.
- Inspect wheels: Replace compressor/turbine wheels if cracked, bent, or damaged by FOD (imbalance will cause vibration and premature failure).
- Verify housing condition: Check for cracks in compressor/turbine housings—replace if cracked (welding is not recommended for CAT turbo housings).
4.3 Reassembly & Installation
- Lubricate components: Apply CAT-approved assembly lube to bearings and shaft to prevent dry start-up.
- Reassemble to specs: Torque all bolts to CAT OEM torque values (typically 20-30 Nm for housing bolts; 15-20 Nm for center section bolts).
- Install the turbocharger: Reconnect oil lines (ensure no kinks), intake/exhaust pipes, and electrical connectors; replace all gaskets with new CAT OEM parts.
- Prime the turbocharger: Before starting the engine, pour a small amount of clean engine oil into the oil supply port to lubricate bearings (prevents dry start damage).
5. Post-Repair Testing & Break-In
After repair/installation, follow these steps to ensure the turbocharger operates correctly:
- Start the engine and let it idle for 5-10 minutes: Check for oil leaks, unusual noises (whistling, grinding), or smoke.
- Perform a low-load test: Run the engine at 50% load for 30 minutes to allow bearings to seat and seals to settle.
- Check boost pressure: Use a pressure gauge to verify boost pressure matches CAT OEM specifications (typically 15-30 psi for heavy-duty CAT engines).
- Monitor temperatures: Ensure turbine outlet temperature (TOT) does not exceed CAT limits (usually < 700°C) during operation.
- Break-in period: Avoid full-load operation for the first 50 operating hours to extend turbocharger life.
6. Troubleshooting Common CAT Turbocharger Issues
Use this guide to diagnose and resolve common turbocharger problems:
- Low Boost Pressure: Causes include clogged air filter, leaking intake hoses, wastegate stuck open, or worn compressor wheel. Fix: Replace air filter, repair hoses, adjust/replace wastegate, or rebuild turbo.
- Excessive Smoke: Blue smoke = oil leak into combustion chamber (seal failure); black smoke = fuel-rich mixture (air restriction). Fix: Replace seals, clean air intake, or adjust fuel injection.
- Turbocharger Noise: Whistling = compressor surge (clogged air filter/leaks); grinding = bearing wear/FOD. Fix: Replace air filter, repair leaks, or rebuild turbo.
- Oil Contamination: Metal particles in oil = bearing failure; sludge = infrequent oil changes. Fix: Replace turbocharger, flush oil system, and perform full oil/filter change.
7. Long-Term Reliability Tips
- Use only high-quality CAT engine oil and filters to prevent sludge buildup.
- Allow the engine to idle for 2-3 minutes before shutdown (cools the turbocharger and prevents oil coking in bearings).
- Install a pre-filter (air intake) in dusty environments to reduce FOD risk.
- Inspect intercoolers (if equipped) for leaks/clogs—intercooler issues reduce turbo efficiency.
- Follow CAT’s recommended service intervals—preventive maintenance is cheaper than replacement.