


Best Practices for Optimal Performance and Longevity
1. Introduction to Jenbacher Fuel Filters
Jenbacher gas engines are widely recognized for their reliability in power generation applications, and the fuel filter is a critical component in ensuring clean fuel delivery to the engine system. The primary function of the Jenbacher fuel filter is to remove contaminants (such as dirt, debris, water, and particulate matter) from the fuel supply, preventing damage to injectors, pumps, and other high-precision engine components. Regular maintenance of the fuel filter is essential to maintain engine efficiency, reduce downtime, and extend the overall service life of the Jenbacher engine.
Jenbacher fuel filters are designed to meet the specific requirements of gas engines operating on natural gas, biogas, landfill gas, or other gaseous fuels. Different Jenbacher engine models (e.g., J312, J416, J620) may use slightly different filter configurations, so always refer to the engine’s service manual for model-specific specifications.
2. Key Maintenance Intervals
| Engine Model | Normal Operating Conditions (Replacement Interval) | Severe Operating Conditions (Replacement Interval) | Filter Inspection Frequency |
|---|---|---|---|
| Jenbacher J300 Series | Every 6,000 operating hours / 12 months | Every 3,000 operating hours / 6 months | Monthly |
| Jenbacher J400 Series | Every 8,000 operating hours / 18 months | Every 4,000 operating hours / 9 months | Monthly |
| Jenbacher J600 Series | Every 10,000 operating hours / 24 months | Every 5,000 operating hours / 12 months | Bi-monthly |
Note: Severe operating conditions include high fuel contamination levels, extreme temperature fluctuations, continuous high-load operation, or fuel with high moisture content. Adjust intervals based on fuel analysis reports and engine performance data.
3. Pre-Maintenance Preparation
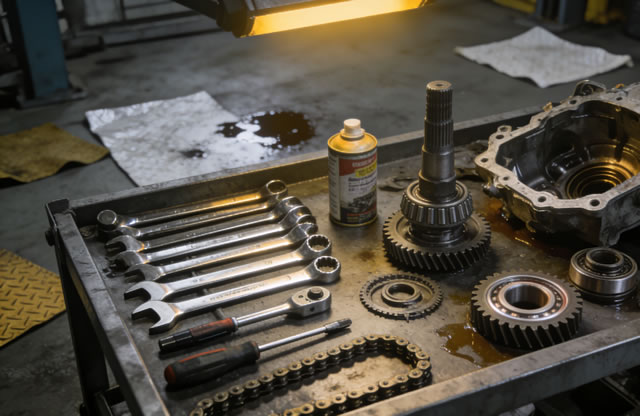
3.1 Required Tools and Materials
- Genuine Jenbacher replacement fuel filter element (matching engine model)
- Filter wrench (size-specific for Jenbacher filters)
- Torque wrench (calibrated, 0-100 Nm)
- Clean rags and lint-free cloths
- Fuel-resistant gloves and safety goggles
- Approved fuel spill containment kit
- Thread sealant (compatible with gaseous fuels, Jenbacher-recommended grade)
- Pressure testing gauge (for post-installation checks)
- Disposal container for used filter elements (compliant with local environmental regulations)
3.2 Safety Precautions
- Work in a well-ventilated area to avoid accumulation of flammable gas vapors.
- Eliminate all ignition sources (e.g., open flames, sparks, static electricity) in the work area.
- Wear appropriate personal protective equipment (PPE) at all times.
- Do not reuse old filter elements or use non-genuine replacement parts—this may void the engine warranty and cause engine damage.
- Document all maintenance activities (date, hours, filter part number) for compliance and traceability.
4. Step-by-Step Filter Replacement Procedure
-
Isolate and Depressurize the Fuel System
Close the main fuel supply valve upstream of the filter housing. Open the bleed valve on the filter housing to release any residual pressure in the system. Collect any spilled fuel in the containment kit and dispose of it properly.
-
Remove the Old Filter Element
Use the filter wrench to loosen the filter housing cap (counterclockwise). Carefully remove the cap and extract the old filter element. Inspect the housing for signs of contamination, corrosion, or damage. Clean the housing interior with a lint-free cloth—do not use solvents that may damage internal seals.
-
Inspect Seals and Gaskets
Check the O-ring/gasket on the filter cap for wear, cracks, or deformation. Replace the seal if it shows any signs of damage (always use Jenbacher OEM seals to ensure a proper fit).
-
Install the New Filter Element
Insert the new genuine Jenbacher filter element into the housing, ensuring it seats correctly in the bottom of the housing (align with the center pin/guide). Apply a thin layer of clean fuel or thread sealant to the new O-ring to aid installation and create a proper seal.
-
Reassemble the Filter Housing
Replace the filter cap and hand-tighten to seat the seal. Use the torque wrench to tighten the cap to the Jenbacher-specified torque (typically 25-35 Nm for most models—verify with the engine service manual). Do not over-tighten, as this may damage the housing or seals.
-
Bleed the Fuel System
Open the bleed valve on the filter housing and slowly reopen the main fuel supply valve to purge air from the system. Close the bleed valve once a steady stream of fuel (free of air bubbles) is observed. Wipe away any spilled fuel with clean rags.
-
Pressure Test and Leak Check
Use the pressure testing gauge to verify the fuel system pressure matches Jenbacher specifications. Inspect all connections (filter cap, fuel lines, bleed valve) for leaks using a gas leak detector or soapy water solution—bubbles indicate a leak that must be addressed before starting the engine.
-
Dispose of Old Filter Element
Place the used filter element in the designated disposal container and dispose of it in accordance with local environmental laws and Jenbacher’s waste management guidelines.
5. Post-Maintenance Checks & Performance Verification
- Remove all LOTO devices and restore the engine to operational status.
- Start the engine and let it run at idle for 5-10 minutes. Monitor the fuel pressure gauge for stable readings (no fluctuations indicate proper filter installation).
- Check for abnormal engine noises, vibrations, or fuel leaks during idle and load testing.
- Record the maintenance activity in the engine’s service log (include filter part number, replacement date, engine operating hours, and technician name).
- Perform a follow-up inspection after the first 24 hours of operation to confirm no leaks or performance issues.
6. Troubleshooting Common Fuel Filter Issues
6.1 Low Fuel Pressure
- Causes: Clogged filter element, incorrect filter installation, restricted fuel line, or damaged filter housing.
- Solutions: Replace the filter element, verify proper torque on the filter cap, inspect fuel lines for kinks/blockages, and check the housing for cracks or damage.
6.2 Fuel Leaks at Filter Housing
- Causes: Damaged O-ring/gasket, loose filter cap, over-tightened threads, or contaminated seal surface.
- Solutions: Replace the seal, retighten to specified torque, inspect threads for damage, and clean the seal surface before reinstallation.
6.3 Frequent Filter Clogging
- Causes: High fuel contamination, incorrect filter grade for fuel type, or upstream fuel system issues (e.g., faulty pre-filter).
- Solutions: Conduct fuel analysis to identify contamination sources, upgrade to a higher-efficiency filter (if recommended by Jenbacher), and inspect pre-filter components.
7. Best Practices for Long-Term Filter Performance
- Always use genuine Jenbacher OEM filter elements—aftermarket filters may not meet quality standards and can cause engine damage.
- Store replacement filters in a clean, dry environment to prevent contamination before installation.
- Regularly test fuel quality (monthly for high-use engines) to proactively address contamination issues.
- Train maintenance technicians on Jenbacher-specific procedures to ensure consistent, correct filter replacement.
- Review maintenance logs quarterly to identify trends (e.g., frequent clogging) and adjust maintenance intervals as needed.

