Comprehensive Guidelines for Optimal Performance and Longevity
1. Introduction to Jenbacher Control Panel
Jenbacher gas engine control panels are the central command center for Jenbacher gas engines, which are widely used in power generation, cogeneration, and industrial applications. These panels monitor, control, and regulate all critical engine functions, including fuel supply, ignition, temperature, pressure, and load management. Proper maintenance and timely repair of the control panel are essential to ensure the safe, efficient, and reliable operation of the entire engine system.
The Jenbacher Control Panel (JCP) is designed to withstand harsh industrial environments, but regular upkeep is necessary to prevent unplanned downtime, reduce repair costs, and extend the service life of the equipment. This manual outlines the standard maintenance procedures, troubleshooting steps, and repair best practices for Jenbacher control panels (including models such as J620, J420, J320, and J220).
2. Pre-Maintenance Safety Procedures
2.1 Mandatory Safety Steps
- Isolate the control panel from the main power supply and lock out/tag out (LOTO) the power source to prevent accidental energization.
- Wear appropriate personal protective equipment (PPE), including insulated gloves, safety glasses, anti-static wristbands, and flame-resistant clothing.
- Ensure the engine is shut down completely and all residual pressure/voltage in the system is discharged.
- Verify that the control panel is at room temperature to avoid thermal shock to electronic components.
- Keep tools and work area clean and free of dust, oil, or flammable materials.
2.2 Prohibited Actions
- Do not attempt repairs without proper training or authorization from Jenbacher service personnel.
- Do not use damaged or uncalibrated test equipment (e.g., multimeters, oscilloscopes).
- Do not modify the control panel's wiring, software, or settings without written approval from Jenbacher technical support.
- Do not expose the control panel to water, moisture, or corrosive chemicals during maintenance.
3. Routine Maintenance Procedures
Routine maintenance should be performed at scheduled intervals (daily, weekly, monthly, quarterly, and annually) based on Jenbacher's recommended maintenance schedule. The following table outlines the key maintenance tasks and their frequency:
| Maintenance Task | Frequency | Details |
|---|---|---|
| Visual Inspection | Daily | Check for physical damage, loose connections, abnormal noises, or error codes on the display. |
| Cleaning | Weekly | Remove dust/debris from the panel using compressed air (low pressure) or lint-free cloths; avoid harsh cleaners. |
| Connection Check | Monthly | Tighten loose terminal screws, inspect wiring for fraying/corrosion, verify ground connections. |
| Calibration | Quarterly | Calibrate sensors (temperature, pressure, flow) and control loops to ensure accurate readings. |
| Software Update | Annually | Update firmware/software to the latest version (approved by Jenbacher) to fix bugs and improve performance. |
| Comprehensive Diagnostics | Annually | Run full system diagnostics using Jenbacher's proprietary software (e.g., JENPAK) to identify potential issues. |
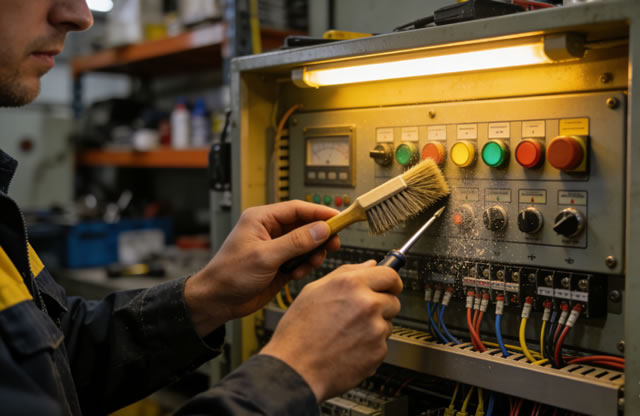
3.1 Detailed Cleaning Instructions
Cleaning is critical to prevent dust buildup, which can cause overheating or short circuits in electronic components:
- Use dry, lint-free microfiber cloths to wipe the exterior and interior surfaces of the control panel.
- For hard-to-reach areas, use compressed air with a pressure of 2-3 bar (29-43.5 psi) to blow out dust from circuit boards and fans.
- Do not use water, alcohol, or solvent-based cleaners on printed circuit boards (PCBs) or display screens.
- Inspect and clean air filters (if equipped) – replace filters that are clogged or damaged.
3.2 Electrical Connection Maintenance
Loose or corroded electrical connections are a common cause of control panel malfunctions:
- Use a torque wrench to tighten terminal screws to the torque specifications provided in the Jenbacher service manual (typically 2-4 Nm for small terminals).
- Treat minor corrosion with anti-corrosion spray (e.g., CRC 5-56) – replace severely corroded terminals or wiring.
- Verify that all ground wires are securely connected and free of rust or damage.
4. Common Malfunctions and Troubleshooting
4.1 Frequently Encountered Issues
| Symptom | Possible Cause | Troubleshooting Steps |
|---|---|---|
| Control panel display is blank | Power supply failure, blown fuse, damaged display module | 1. Check main power input voltage; 2. Inspect and replace blown fuses; 3. Test display module with multimeter; 4. Verify wiring to display unit. |
| Error codes related to sensor readings | Failed sensor, loose wiring, calibration drift | 1. Check sensor wiring for damage/looseness; 2. Calibrate sensor using Jenbacher calibration tools; 3. Replace faulty sensor if necessary. |
| Unresponsive control buttons | Button wear, PCB damage, software freeze | 1. Reboot the control panel; 2. Inspect button contacts for wear; 3. Test button functionality with a multimeter; 4. Replace button assembly if needed. |
| Intermittent communication with engine | Damaged communication cable, faulty PLC module, network issues | 1. Inspect Ethernet/RS485 cables for damage; 2. Test PLC module connectivity; 3. Check network settings (IP address, subnet mask); 4. Reset communication protocols. |
4.2 Advanced Troubleshooting
For complex issues (e.g., software crashes, PLC module failure), follow these steps:
- Retrieve error logs from the control panel using JENPAK software to identify the root cause.
- Perform a factory reset (only if authorized) – ensure all critical settings are backed up first.
- Test individual components (e.g., CPU module, power supply unit, I/O cards) using Jenbacher test equipment.
- Replace faulty modules with genuine Jenbacher spare parts (non-genuine parts may void the warranty).
- After repair, run a full system test to verify all functions are operating correctly.
5. Repair Best Practices
5.1 Component Replacement Guidelines
- Always use genuine Jenbacher spare parts – aftermarket parts may not meet quality standards and can cause further damage.
- Document all repairs (e.g., component serial numbers, repair date, technician name) for future reference.
- After replacing a component (e.g., PCB, display, power supply), perform a functional test to confirm proper operation.
- Follow ESD (Electrostatic Discharge) precautions when handling sensitive electronic components – use anti-static mats and wristbands.
5.2 Post-Repair Verification
After completing any repair work, verify the following:
- All wiring is correctly reconnected and secured.
- Control panel settings are restored to the original configuration (or updated as required).
- Engine starts and runs without error codes.
- All sensors and actuators are communicating correctly with the control panel.
- Emergency stop functions and safety interlocks are fully operational.
6. Long-Term Maintenance Strategies
To maximize the lifespan of the Jenbacher control panel, implement the following long-term strategies:
- Maintain a detailed maintenance log, recording all inspections, cleanings, calibrations, and repairs.
- Train maintenance personnel on Jenbacher control panel operation and maintenance (Jenbacher offers official training courses).
- Store spare parts (e.g., fuses, sensors, display modules) in a clean, dry environment to ensure they are in good condition when needed.
- Conduct annual audits of the control panel's performance to identify potential issues before they cause downtime.
- Schedule preventive maintenance during planned shutdowns to minimize production disruption.