Jenbacher gas engines are widely recognized for their reliability and efficiency in power generation applications. The knock sensor is a critical component of the engine's monitoring system, responsible for detecting abnormal combustion (knocking) that can cause severe engine damage if left unaddressed. This guide provides a comprehensive overview of the maintenance, inspection, and repair procedures for Jenbacher knock sensors to ensure optimal engine performance and longevity.
1. Understanding Jenbacher Knock Sensors
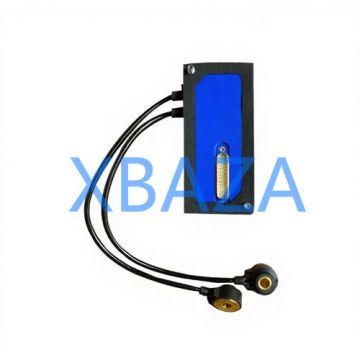
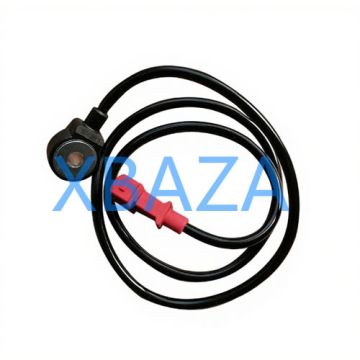
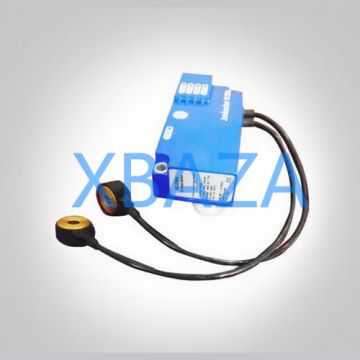
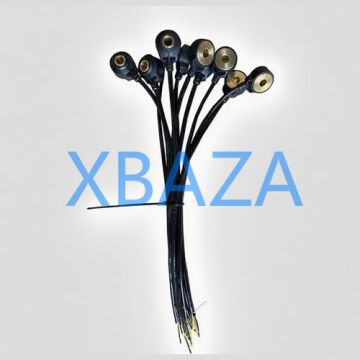
A knock sensor is a piezoelectric device mounted on the engine block of Jenbacher gas engines (e.g., J312, J420, J620 series). It converts mechanical vibrations from engine knocking into electrical signals, which are sent to the engine control unit (ECU). The ECU then adjusts ignition timing to eliminate knocking and protect the engine.
- Primary Function: Detect detonation/knocking in real-time to prevent piston, cylinder head, and valve damage.
- Operating Principle: Piezoelectric crystals generate voltage when exposed to vibration; higher vibration intensity (knocking) produces higher voltage output.
- Key Specifications (Typical):
- Operating temperature: -40°C to +125°C
- Output voltage range: 0.5V to 5V (AC)
- Mounting torque: 25-30 Nm (varies by model)
2. Preventive Maintenance Procedures
Proactive maintenance is critical to avoid unexpected sensor failure and engine downtime. Follow these scheduled maintenance steps:
2.1 Routine Inspection (Every 2,000 Operating Hours)
- Shut down the engine and disconnect the battery to ensure safety.
- Visually inspect the sensor for physical damage (cracks, corrosion, or oil leaks around the mounting area).
- Check the wiring harness for fraying, loose connections, or damage to insulation.
- Verify the sensor’s mounting bolt is tight (per Jenbacher torque specifications) – loose mounting reduces vibration detection accuracy.
- Clean the sensor and surrounding area with a non-corrosive solvent to remove dirt, oil, or carbon buildup.
2.2 Calibration and Testing (Every 6,000 Operating Hours)
Use Jenbacher’s proprietary diagnostic tools (e.g., JenView or Engine Diagnostic Interface) to perform the following tests:
| Test Type | Procedure | Acceptance Criteria |
|---|---|---|
| Voltage Output Test | Start the engine and measure AC voltage output at idle (normal operation) and under load. | 0.5-2V at idle; 2-5V under light load (no knocking); >5V during detected knocking |
| Resistance Test | Disconnect sensor connector and measure resistance between pins (refer to engine manual for pinout). | 800-1200 ohms (varies by sensor model: e.g., 1000 ohms for J420 sensors) |
| ECU Communication Test | Check for fault codes (e.g., P0325 for sensor circuit malfunction) in the ECU. | No active fault codes; sensor data displayed in real-time on diagnostic tool |
3. Troubleshooting Common Knock Sensor Issues
Below are common symptoms of faulty knock sensors and their root causes:
- Symptom 1: ECU logs "knock sensor circuit fault" (Code P0325/P0330)
- Causes: Damaged wiring, loose connector, sensor internal failure, or corrosion on pins.
- Fix: Inspect/replace wiring, clean connectors, or replace the sensor.
- Symptom 2: Engine knocking (detonation) with no ECU alert
- Causes: Sensor mounting loose, carbon buildup on sensor, or sensor calibration drift.
- Fix: Retorque sensor, clean sensor surface, or recalibrate/replace the sensor.
- Symptom 3: False knock detection (ECU retards timing unnecessarily)
- Causes: Sensor contamination, damaged piezoelectric element, or electromagnetic interference (EMI) from nearby wiring.
- Fix: Replace sensor, reroute wiring away from high-voltage components, or shield the sensor harness.
4. Step-by-Step Sensor Replacement Procedure
- Prepare Tools & Parts: Gather a torque wrench (25-30 Nm), socket set, wire brush, non-corrosive solvent, new OEM knock sensor, and thread lock (Loctite 243, as recommended by Jenbacher).
- Disconnect Power: Turn off the main engine switch and disconnect the battery negative terminal to prevent electrical short circuits.
- Access the Sensor: Locate the knock sensor (typically mounted on the cylinder block/head – refer to your Jenbacher engine manual for exact location).
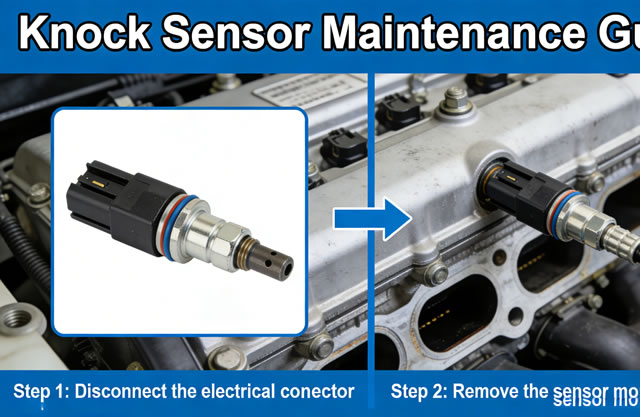
- Disconnect Wiring: Unplug the electrical connector from the sensor (press the release tab to avoid damaging pins).
- Remove the Old Sensor: Use a socket wrench to loosen and remove the sensor mounting bolt. Pull the sensor out of the mounting hole.
- Clean the Mounting Area: Use a wire brush and solvent to remove dirt, carbon, or rust from the mounting hole and mating surface.
- Install New Sensor: Apply a small amount of thread lock to the sensor’s mounting bolt. Insert the new sensor into the hole and hand-tighten the bolt.
- Torque to Specification: Use a torque wrench to tighten the bolt to Jenbacher’s recommended torque (25-30 Nm – confirm with your engine model’s manual).
- Reconnect Wiring: Plug the electrical connector back into the sensor (ensure a secure click to confirm proper connection).
- Reconnect Power: Reattach the battery negative terminal and turn on the main engine switch.
- Test the Sensor: Start the engine and run a diagnostic test (via JenView) to verify no fault codes and normal voltage output.
5. Post-Repair Verification & Documentation
After maintenance or replacement, complete these final steps to ensure compliance and traceability:
- Run the engine under load for 30-60 minutes to confirm no knocking and stable sensor readings.
- Clear any historical fault codes in the ECU and verify no new codes are generated.
- Document the maintenance/replacement in the engine logbook (include date, operating hours, sensor part number, and technician name).
- Schedule the next preventive maintenance check (per Jenbacher’s recommended interval).
6. Best Practices for Long-Term Reliability
- Avoid over-tightening the sensor (excessive torque can damage the piezoelectric element).
- Keep the sensor and wiring harness free from oil/coolant leaks – fluid contamination degrades performance.
- Use only Jenbacher-approved diagnostic tools for testing/calibration to avoid incorrect readings.
- Store replacement sensors in a dry, temperature-controlled environment (avoid extreme heat/cold).
- Train maintenance technicians on proper sensor handling and installation procedures.
In summary, regular maintenance and prompt repair of Jenbacher knock sensors are essential to protect the engine from costly damage and ensure uninterrupted power generation. By following the procedures outlined in this guide, you can maximize the lifespan of the sensor and maintain optimal engine performance.