









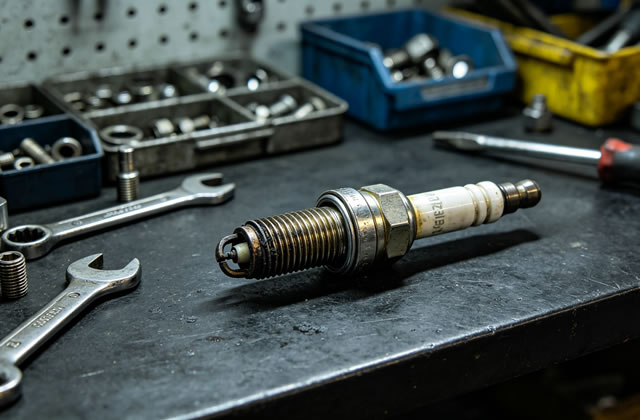
MWM ignition plugs are critical components for gas engines, generator sets, combined heat and power (CHP) units, and industrial power systems. They directly influence engine starting reliability, combustion efficiency, fuel consumption, emissions performance, and overall service life. Regular, professional maintenance is not only essential for stable operation but also reduces downtime, lowers operational costs, and extends the service life of both the ignition plugs and the entire engine system.
This comprehensive guide covers inspection, cleaning, adjustment, replacement, troubleshooting, and long-term care practices for MWM ignition plugs. It is suitable for technicians, maintenance teams, and equipment managers responsible for MWM engine systems.
1. Core Functions & Importance of MWM Ignition Plugs
MWM ignition plugs generate high-energy sparks to ignite the air-fuel mixture inside engine cylinders. Unlike standard automotive spark plugs, MWM ignition plugs are engineered for heavy-duty, continuous operation under high pressure, high temperature, and variable load conditions. Their performance directly determines:
- Consistent and reliable engine startup, even in low-temperature environments
- Complete and stable combustion to maximize fuel efficiency
- Reduced harmful exhaust emissions (CO, HC, NOx)
- Prevention of misfires, rough idling, power loss, and abnormal vibration
- Extended lifespan of engine cylinders, pistons, and turbochargers
- Minimized risk of unplanned downtime and expensive repairs
2. Recommended Maintenance Schedule for MWM Ignition Plugs
Follow MWM’s official service intervals to maintain optimal performance. Adjust frequency based on fuel quality, operating environment, load rate, and engine usage hours.
Basic Maintenance Intervals
- Visual Inspection: Every 250 operating hours or 30 days (whichever comes first)
- Professional Cleaning & Gap Check: Every 500–1000 operating hours
- Performance Testing: Every 1500 operating hours
- Full Replacement: Every 3000–5000 operating hours (depending on model and conditions)
Conditions Requiring Earlier Maintenance
- Poor-quality fuel with high impurities or moisture content
- Continuous high-load operation (>85% load)
- Dusty, humid, or corrosive working environment
- Frequent engine startup/shutdown cycles
- Visible misfires, power reduction, or increased fuel consumption
3. Step-by-Step Inspection Process
Before any service, ensure the engine is completely shut down, cooled down, and isolated from power and fuel sources to avoid safety hazards.
3.1 Visual External Inspection
- Check ignition plug cables, connectors, and insulators for cracks, burns, corrosion, or oil contamination
- Confirm all connections are tight and free of looseness or arcing marks
- Inspect for carbon deposits, oil fouling, fuel stains, or abnormal discoloration
3.2 Internal Electrode Inspection
- Check center electrode and ground electrode for wear, erosion, melting, or deformation
- Assess deposit type: dry carbon, wet oil, ash, or fuel fouling
- Verify insulator nose condition: clean, smooth, and free of cracks or chipping
- Measure electrode gap with a feeler gauge to ensure it matches MWM specifications
4. Professional Cleaning & Restoration
Proper cleaning restores ignition plug performance and extends service life. Avoid aggressive or abrasive methods that damage electrodes and insulators.
4.1 Approved Cleaning Methods
- Ultrasonic cleaning: Ideal for removing carbon and oil deposits without physical damage
- Compressed air drying: Use dry, oil-free compressed air after cleaning
- Specialized non-flammable cleaning solvents designed for ignition components
4.2 Methods to Avoid
- Wire brushes, sandpaper, or metal scrapers (scratch electrodes and insulators)
- High-temperature open-flame burning (causes thermal shock and cracking)
- Harsh chemicals that degrade insulation materials
4.3 Post-Cleaning Inspection
- Confirm all deposits are fully removed
- Recheck electrode gap and adjust if necessary
- Ensure no cracks or damage appear after cleaning
- Test spark intensity before reinstallation
5. Electrode Gap Adjustment Standards
Correct electrode gap is critical for spark energy and combustion stability. MWM ignition plugs have precise factory-set gaps based on engine model and application.
- Standard gap range: 0.40 mm – 0.80 mm (refer to your MWM engine manual)
- Adjust only if gap is out of tolerance; avoid repeated bending of ground electrodes
- Use only proper gap tools; do not tap or strike the ignition plug
- Recheck gap after adjustment to ensure accuracy
6. Correct Installation & Torque Requirements
Improper installation is one of the leading causes of premature ignition plug failure and engine damage.
Installation Steps
- Clean spark plug holes and threads in cylinder heads before installation
- Hand-thread ignition plugs carefully to avoid cross-threading
- Use a calibrated torque wrench to tighten to MWM’s specified torque
- Reconnect ignition cables securely and ensure proper routing
- Verify no cables are touching hot engine components
Typical torque range: 25–35 N·m (varies by plug size and engine model). Over-tightening cracks insulators; under-tightening causes overheating and power loss.
7. When to Replace MWM Ignition Plugs
Replacement is necessary when maintenance can no longer restore safe, reliable performance. Replace all plugs at the same time for balanced engine operation.
Replacement Indicators
- Electrode wear exceeds 0.1 mm or shows severe erosion
- Insulator is cracked, chipped, stained, or carbon-tracked
- Persistent misfires, rough running, or starting failures after service
- Unusual coloration (white blistering, dark melting, or heavy ash deposits)
- End of recommended service life (3000–5000 operating hours)
- Engine fails performance tests or emissions standards
Always use genuine MWM ignition plugs or OEM-approved equivalents to guarantee compatibility and performance.
8. Troubleshooting Common Ignition Plug Problems
8.1 Dry Carbon Deposits
Cause: Rich fuel mixture, idling too long, weak ignition system, low operating temperature.
Solution: Clean plugs, check fuel system, verify ignition coil output, increase engine load.
8.2 Oil Fouling (Wet, Shiny Deposits)
Cause: Worn piston rings, valve seals, or cylinder walls; oil entering combustion chamber.
Solution: Address engine oil leakage issues; replace plugs after repair.
8.3 Overheating (White, Blistered Insulator)
Cause: Incorrect heat range, advanced ignition timing, lean fuel mixture, cooling system failure.
Solution: Install correct heat-range plugs; check timing and cooling system.
8.4 Misfires & Rough Running
Cause: Bad cables, loose connections, worn electrodes, incorrect gap, fuel quality issues.
Solution: Inspect wiring, clean/adjust/replace plugs, test fuel quality.
9. Long-Term Care & Best Practices
To maximize the lifespan and reliability of MWM ignition plugs, implement these long-term strategies:
- Use clean, dry, high-quality fuel that meets MWM standards
- Maintain proper engine temperature and cooling system efficiency
- Keep air filters clean to prevent dust and dirt intake
- Regularly test ignition coils, cables, and control modules
- Record operating hours, maintenance dates, and performance trends
- Train maintenance staff on correct MWM service procedures
- Store spare plugs in clean, dry, shock-proof packaging
- Perform seasonal checks before extended operation or downtime
10. Conclusion
MWM ignition plugs are small components but play a vital role in the performance, efficiency, and durability of industrial gas engines. A proactive, systematic maintenance program reduces unexpected failures, lowers fuel and repair costs, and ensures continuous, stable operation of your power system.
By following the inspection, cleaning, adjustment, and replacement guidelines in this manual, you can maximize the service life of MWM ignition plugs and maintain peak engine performance throughout the equipment’s lifecycle.
Always refer to your official MWM engine service manual for model-specific specifications and requirements.

