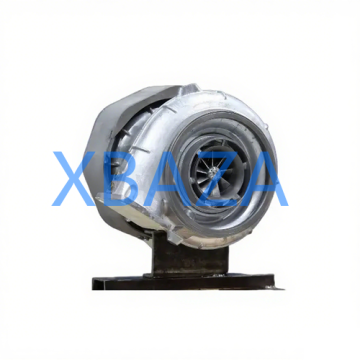
MWM turbochargers are high-performance components designed for heavy-duty industrial engines, generator sets, marine powertrains, and commercial vehicles. They deliver exceptional power density and durability—but only when maintained properly. This comprehensive guide covers daily inspections, routine service, troubleshooting, full repair procedures, and best practices to extend turbo lifespan and avoid costly failures.
1. Core Importance of MWM Turbocharger Maintenance
Turbochargers operate under extreme conditions: up to 150,000 RPM, exhaust temperatures exceeding 600°C, and continuous mechanical stress. Without regular maintenance, MWM turbos face accelerated wear, oil contamination, bearing failure, seal leaks, and total breakdown. Proper maintenance delivers these critical benefits:
- Preserve engine power, torque, and fuel efficiency
- Prevent catastrophic turbo failure and engine damage
- Reduce downtime and expensive replacement costs
- Extend turbocharger service life by 30–50%
- Maintain OEM performance specifications
- Ensure compliance with industrial and marine operational standards
2. Pre-Maintenance Safety Protocols
Critical Safety Warnings
- Allow engine and turbocharger to cool completely (minimum 60 minutes) to avoid burns
- Disconnect battery power before any disassembly to prevent accidental engine startup
- Relieve all pressure in intake and exhaust systems before disassembly
- Wear heat-resistant gloves, safety goggles, and protective clothing
- Use only approved lifting tools for heavy turbo assemblies
- Work in well-ventilated areas to avoid exhaust fume inhalation
3. Daily & Pre-Operation Inspection Checklist
Perform these quick checks before every engine startup to catch issues early:
- Visual inspection for oil leaks at turbocharger oil inlet, outlet, and seal housing
- Check intake piping for cracks, loose clamps, or boost leaks
- Inspect exhaust piping for damage, soot buildup, or loose connections
- Verify clean, unobstructed air filter (no dirt or debris)
- Check engine oil level and quality (no discoloration or contamination)
- Listen for unusual noises (whining, grinding, rattling) during startup
- Monitor boost pressure gauge for abnormal readings
4. Scheduled Maintenance Intervals (MWM OEM Standards)
Short Intervals (Every 250 Operating Hours)
- Replace engine air filter (critical for turbo protection)
- Inspect and tighten all intake/exhaust fasteners
- Check oil feed line for cracks or blockages
- Clean compressor wheel inlet for dust/dirt buildup
Medium Intervals (Every 1000 Operating Hours)
- Full oil and oil filter replacement (use MWM-approved synthetic oil)
- Inspect turbo mounting bolts and gaskets
- Check wastegate actuator function and adjustment
- Pressure-test intake system for leaks
- Inspect turbine housing for carbon deposits
Long Intervals (Every 3000–5000 Operating Hours)
- Full turbocharger visual and performance inspection
- Professional bearing end-play measurement
- Cleaning of entire exhaust and intake systems
- Seal condition assessment and replacement if needed
- Calibration of electronic actuators (if equipped)
5. Step-by-Step MWM Turbocharger Repair Process
Step 1: Turbo Removal
- Disconnect intake ducting, exhaust piping, and oil lines
- Remove mounting bolts from exhaust manifold and engine bracket
- Carefully lift turbocharger from engine (avoid dropping or impact)
- Cap all oil and air ports to prevent contamination
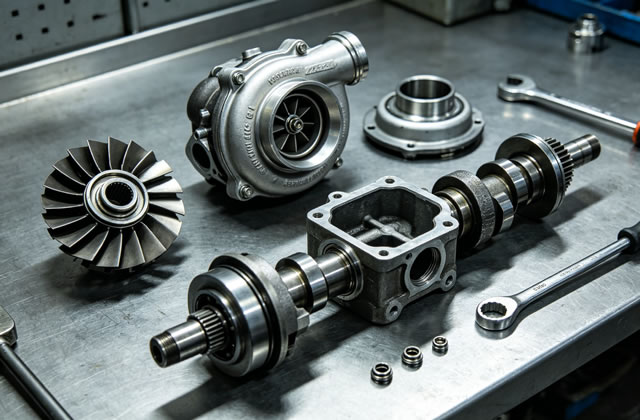
Step 2: Complete Disassembly & Cleaning
- Disassemble compressor housing, turbine housing, center bearing housing
- Remove carbon deposits from turbine wheel and housing (non-abrasive tools only)
- Clean compressor wheel with low-pressure compressed air
- Flush oil passages with approved turbo cleaner solvent
- Inspect all components for cracks, wear, or deformation
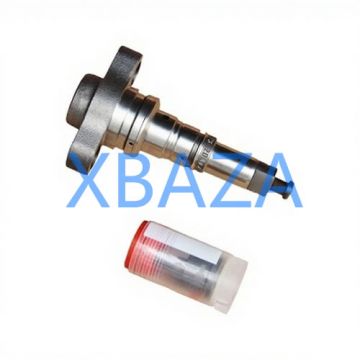
Step 3: Critical Component Replacement
Replace these components during every professional rebuild:
- Full bearing set (floating/ball bearings)
- Oil seals and gaskets (compressor and turbine sides)
- Thermal washers and thrust components
- Worn shafts, wheels, or damaged housings
- Actuator bushings and linkages (if worn)
Step 4: Precision Reassembly
- Lubricate bearings and seals with clean turbo oil before assembly
- Set correct shaft end-play (follow MWM OEM tolerances)
- Torque all fasteners to factory specifications
- Ensure free shaft movement (no binding or friction)
Step 5: Reinstallation & Startup
- Mount turbocharger and torque mounting bolts evenly
- Reconnect oil feed/drain lines and intake/exhaust piping
- Prime turbo with clean oil before engine startup
- Start engine and idle for 3–5 minutes (no revving)
- Check for leaks, abnormal noise, and proper boost pressure
6. Common MWM Turbo Failures & Troubleshooting
Oil Leakage (Compressor or Turbine Side)
Causes: Worn seals, clogged oil drain line, over-pressurized crankcase, damaged bearings
Fix: Replace seals, clean drain line, inspect crankcase ventilation, replace bearings
Lack of Boost / Low Power
Causes: Stuck wastegate, clogged air filter, intake leaks, damaged turbine wheel
Fix: Adjust actuator, replace air filter, repair leaks, replace wheel assembly
Unusual Noise (Whining, Grinding, Rattling)
Causes: Bearing failure, shaft imbalance, foreign object damage
Fix: Full turbo rebuild or replacement, remove foreign debris
Excessive Smoke (White/Black/Blue)
Causes: Oil burning, seal failure, fuel overload, carbon buildup
Fix: Repair turbo seals, clean exhaust system, adjust fuel delivery
Overheating Turbocharger
Causes: Insufficient oil supply, restricted exhaust, high engine load
Fix: Check oil pump/pressure, repair exhaust restrictions, reduce load
7. Best Practices for Long Turbo Life
Pro Tips for Maximum Reliability
- Always use MWM-approved synthetic engine oil (never conventional oil)
- Idle engine 3–5 minutes before shutdown to cool turbo
- Avoid sudden high RPM immediately after startup
- Never run engine without a properly functioning air filter
- Use only genuine MWM turbo replacement parts
- Store turbo in clean, dry environment if removed long-term
- Train operators on proper turbo-friendly driving/operation habits
8. When to Replace vs. Repair Your MWM Turbo
REPAIR if:
- Minor seal leaks
- Small carbon buildup
- Standard bearing wear
- Actuator adjustment needed
REPLACE if:
- Cracked turbine/compressor housing
- Bent or broken shaft
- Severe bearing failure
- Foreign object damage (FOD)
- Excessive shaft play beyond OEM limits
Conclusion
MWM turbochargers are built for extreme durability, but their performance and lifespan depend entirely on consistent, professional maintenance. By following daily inspections, strict service intervals, proper repair procedures, and operational best practices, you can ensure your MWM turbo operates at peak efficiency for years. Always use genuine parts, approved lubricants, and follow OEM guidelines to avoid preventable failures.
For industrial, marine, or high-load applications, proactive maintenance is not optional—it is essential for operational reliability and cost efficiency.