Preface
MWM valves are critical components in industrial systems, serving vital functions in flow control, pressure regulation, and operational safety across oil and gas, power generation, manufacturing, and process industries. As precision-engineered parts, regular maintenance and professional overhaul are indispensable to prevent valve failure, reduce downtime, optimize system efficiency, and extend the service life of MWM valves. This detailed guide covers all aspects of MWM valve maintenance, inspection, troubleshooting, repair, and preventive care, serving as a practical reference for maintenance technicians, engineers, and facility managers.
1. Importance of Regular MWM Valve Maintenance
Valve malfunctions are among the leading causes of industrial system disruptions. Unplanned downtime due to faulty MWM valves results in production losses, increased energy consumption, safety hazards, and costly emergency repairs. Routine maintenance delivers the following core benefits:
- Ensures consistent and accurate flow/pressure control
- Prevents leaks, corrosion, and premature wear of internal components
- Reduces energy waste caused by stuck or inefficient valves
- Extends the overall lifespan of MWM valves and associated equipment
- Complies with industrial safety standards and regulatory requirements
- Minimizes emergency maintenance and operational disruptions
2. Pre-Maintenance Preparation
Before initiating any maintenance or repair work on MWM valves, strict preparation protocols must be followed to guarantee safety and work efficiency:
2.1 Safety Protocols
- Isolate the valve from the operating system: Close upstream and downstream isolation valves, and release residual pressure completely
- Drain fluid, gas, or media from the valve chamber to avoid spills or exposure
- Follow lockout-tagout (LOTO) procedures to prevent accidental system startup
- Wear appropriate PPE: Safety goggles, heat-resistant gloves, protective clothing, and respiratory protection if handling hazardous media
- Verify system shutdown with pressure gauges and visual inspections
2.2 Tool and Material Preparation
Prepare standard and specialized tools for MWM valve servicing:
- Wrenches (adjustable, socket, and torque wrenches)
- Screwdrivers, pliers, and bearing pullers
- Valve reseating tools and lapping compounds
- Cleaning solvents, rags, and wire brushes
- Replacement parts: Seals, gaskets, O-rings, springs, discs, and stems (genuine MWM spare parts recommended)
- Lubricants and anti-seize compounds compatible with MWM valve specifications
- Inspection tools: Calipers, feeler gauges, and leak detectors
3. Step-by-Step MWM Valve Inspection Procedure
Comprehensive inspection is the foundation of effective maintenance. Conduct both external and internal inspections at scheduled intervals.
3.1 External Visual Inspection
- Check for external leaks at the body, bonnet, stem, and connections
- Inspect for corrosion, rust, cracks, or physical damage to the valve body
- Verify proper operation of actuators, handles, levers, or gears
- Check for loose fasteners and damaged mounting brackets
- Confirm alignment with pipeline connections to avoid stress on the valve body
3.2 Internal Inspection (Disassembly Required)
- Document the valve model, serial number, and operating conditions before disassembly
- Disassemble the valve in a clean, organized workspace to avoid component loss
- Inspect the valve seat and disc for wear, scoring, pitting, or debris buildup
- Check the valve stem for bending, corrosion, thread damage, or wear
- Examine seals, gaskets, and O-rings for hardening, cracking, or deformation
- Inspect internal springs for fatigue, breakage, or loss of tension
- Clean all internal parts thoroughly to remove scale, sediment, and contaminants
- Measure critical dimensions to ensure compliance with MWM factory specifications
3.3 Functional Testing
- Test valve operation: Smooth opening/closing without sticking or grinding
- Check for proper shutoff and zero leakage in closed position
- Verify responsiveness of automated or actuated MWM valves
- Perform pressure testing to validate sealing performance
4. Common MWM Valve Issues and Troubleshooting
Identify and resolve frequent problems with targeted troubleshooting:
4.1 Valve Leakage
Causes: Worn seals, damaged seat/disc, debris entrapment, loose bonnet bolts
Solutions: Replace gaskets/O-rings, lap or replace seat/disc, clean internal components, torque bolts to MWM specifications
4.2 Sticking or Difficult Operation
Causes: Lack of lubrication, corrosion, stem damage, misalignment, debris buildup
Solutions: Clean and lubricate stem, remove corrosion, replace damaged stem, realign valve, flush internal passages
4.3 Incomplete Opening/Closing
Causes: Broken spring, actuator malfunction, stem bending, limit switch issues
Solutions: Replace faulty springs, repair actuators, straighten or replace stem, calibrate limit switches
4.4 Corrosion and Erosion
Causes: Harsh media, high velocity, chemical exposure, moisture
Solutions: Clean corroded parts, apply protective coatings, replace damaged components, use corrosion-resistant spare parts
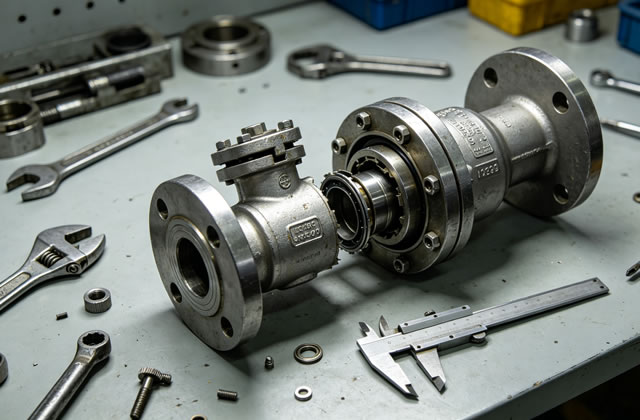
5. Detailed MWM Valve Repair and Overhaul Process
Professional overhaul restores MWM valves to factory performance standards. Follow this structured process:
5.1 Complete Disassembly
- Remove the valve from the pipeline (if necessary) and place on a workbench
- Loosen and remove bonnet fasteners in a crisscross pattern to avoid warping
- Separate the bonnet from the valve body carefully
- Extract the stem, disc, spring, and internal trim components
- Label all parts to ensure correct reassembly
5.2 Component Cleaning
- Use approved solvents to remove carbon deposits, scale, and contaminants
- Use soft brushes to clean delicate internal parts; avoid abrasive tools on sealing surfaces
- Dry all components completely with clean, lint-free cloths
- Inspect cleaned parts for hidden damage
5.3 Component Repair or Replacement
- Seating Surfaces: Lap minor wear; replace severely damaged seats and discs
- Stems: Polish light scratches; replace bent, corroded, or heavily worn stems
- Seals/Gaskets: Replace all soft goods during overhaul—do not reuse worn seals
- Springs/Fasteners: Replace fatigued springs and damaged bolts/nuts
- Body: Repair minor surface corrosion; replace valve body if cracked or structurally compromised
5.4 Reassembly
- Apply MWM-recommended lubrication to stems, threads, and moving parts
- Reinstall internal components in the correct order
- Install new gaskets and seals; ensure proper alignment
- Tighten bonnet bolts gradually in a crisscross torque pattern to MWM specifications
- Verify smooth manual operation before reinstallation
5.5 Post-Repair Testing
- Perform leak testing: Check for external and internal leakage
- Conduct pressure testing per industry standards and MWM guidelines
- Test full stroke operation (open/close) repeatedly
- Calibrate actuators, positioners, and controls as needed
- Document all repairs, parts replaced, and test results
6. Preventive Maintenance Schedule for MWM Valves
Establish a scheduled maintenance program based on operating conditions:
6.1 Routine Monthly Inspection
- Visual leak check
- Operational functionality test
- External cleaning and corrosion check
- Lubrication of moving parts
6.2 Quarterly Maintenance
- Detailed external inspection
- Fastener torque verification
- Actuator and control system check
- Minor cleaning and adjustment
6.3 Annual Comprehensive Overhaul
- Full disassembly and internal inspection
- Complete component replacement (seals, gaskets, etc.)
- Pressure and performance testing
- Detailed maintenance record update
6.4 Heavy-Duty Service Adjustment
For valves in harsh environments (high pressure, corrosive media, continuous operation):
- Reduce inspection intervals by 50%
- Perform quarterly overhauls instead of annual
- Use enhanced corrosion-resistant lubricants and parts
7. Best Practices for Long-Term MWM Valve Care
- Train maintenance staff on MWM valve specific design and service requirements
- Maintain an inventory of genuine MWM spare parts to reduce downtime
- Store valves in clean, dry environments to prevent pre-installation damage
- Avoid over-tightening fasteners—follow MWM torque specifications
- Use only compatible lubricants and cleaning agents
- Document all maintenance activities for traceability and performance tracking
- Consult MWM technical support for complex repairs or unique applications
- Monitor valve performance continuously with sensors and automation systems
8. Conclusion
MWM valve maintenance is not just a reactive repair task—it is a proactive investment in operational reliability, safety, and cost efficiency. By adhering to strict inspection protocols, performing timely overhauls, using genuine parts, and following a structured preventive maintenance schedule, you can maximize the performance and service life of MWM valves. Consistent care eliminates unexpected failures, reduces operational costs, and ensures your industrial systems run smoothly, safely, and efficiently for years to come. Prioritize MWM valve maintenance to secure uninterrupted operations and protect your critical infrastructure.